Встановлення віджета онлайн-запису DIKIDI на Tilda
Last modified:
У цій статті розглянемо, як інтегрувати віджет онлайн-запису DIKIDI з сайтом на Tilda. Дотримуйтесь покрокової інструкції – процес займе всього кілька хвилин!
1️⃣ Додаємо HTML-блок у Tilda
- Зайдіть в адміністративну частину свого сайту на Tilda;
- Додайте новий блок: Усі блоки → Інше → HTML (T123).
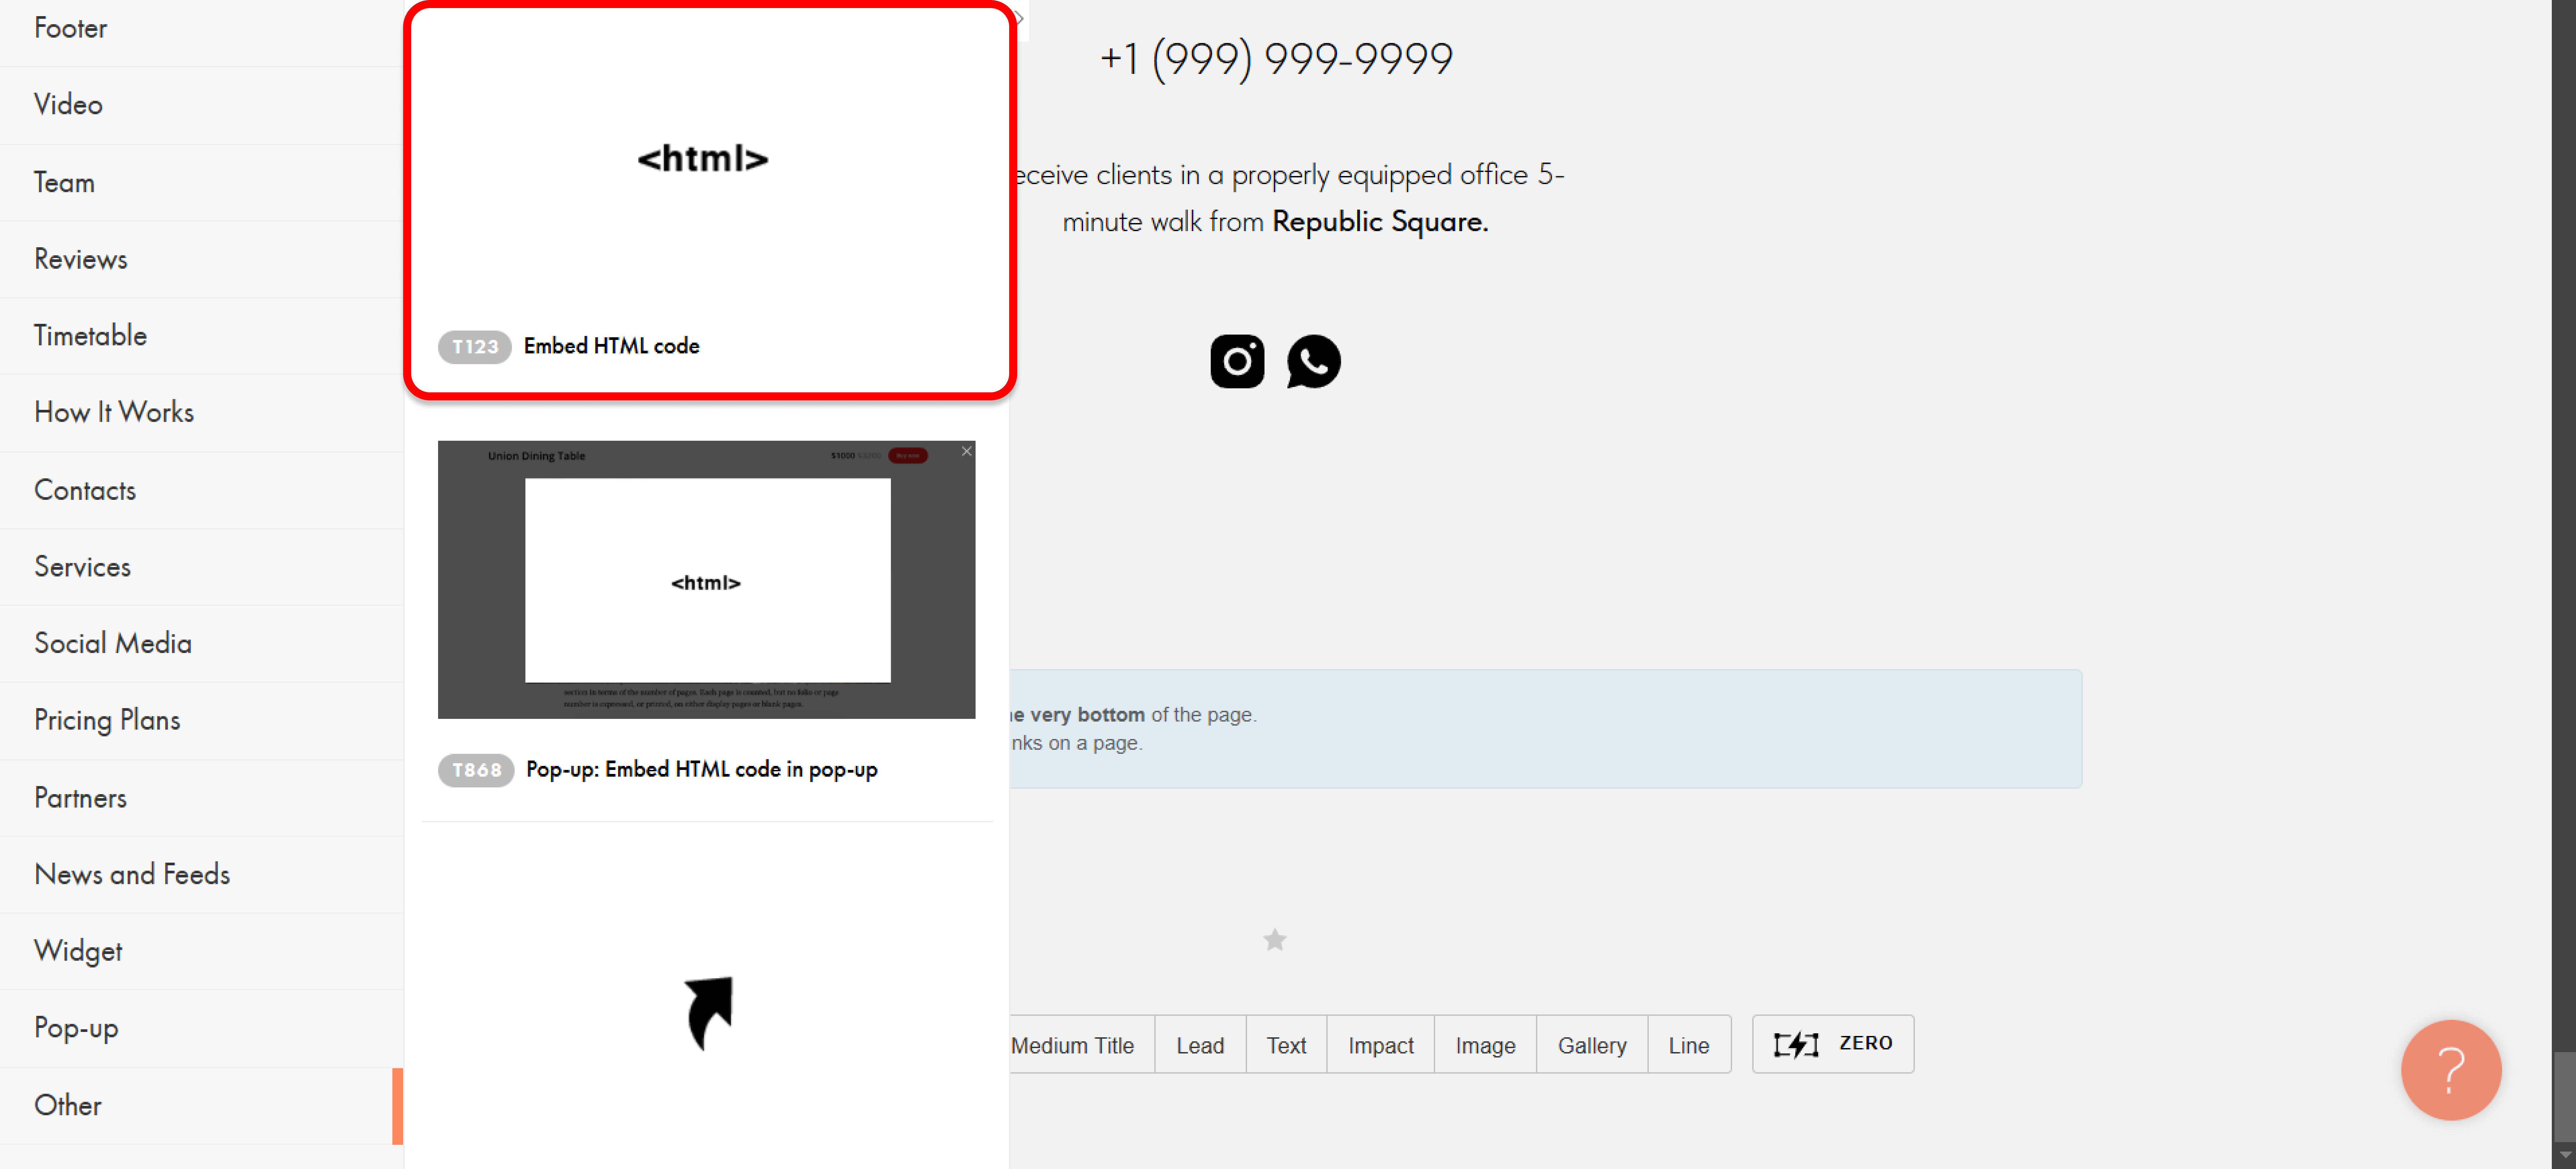
2️⃣ Відкриваємо налаштування блоку
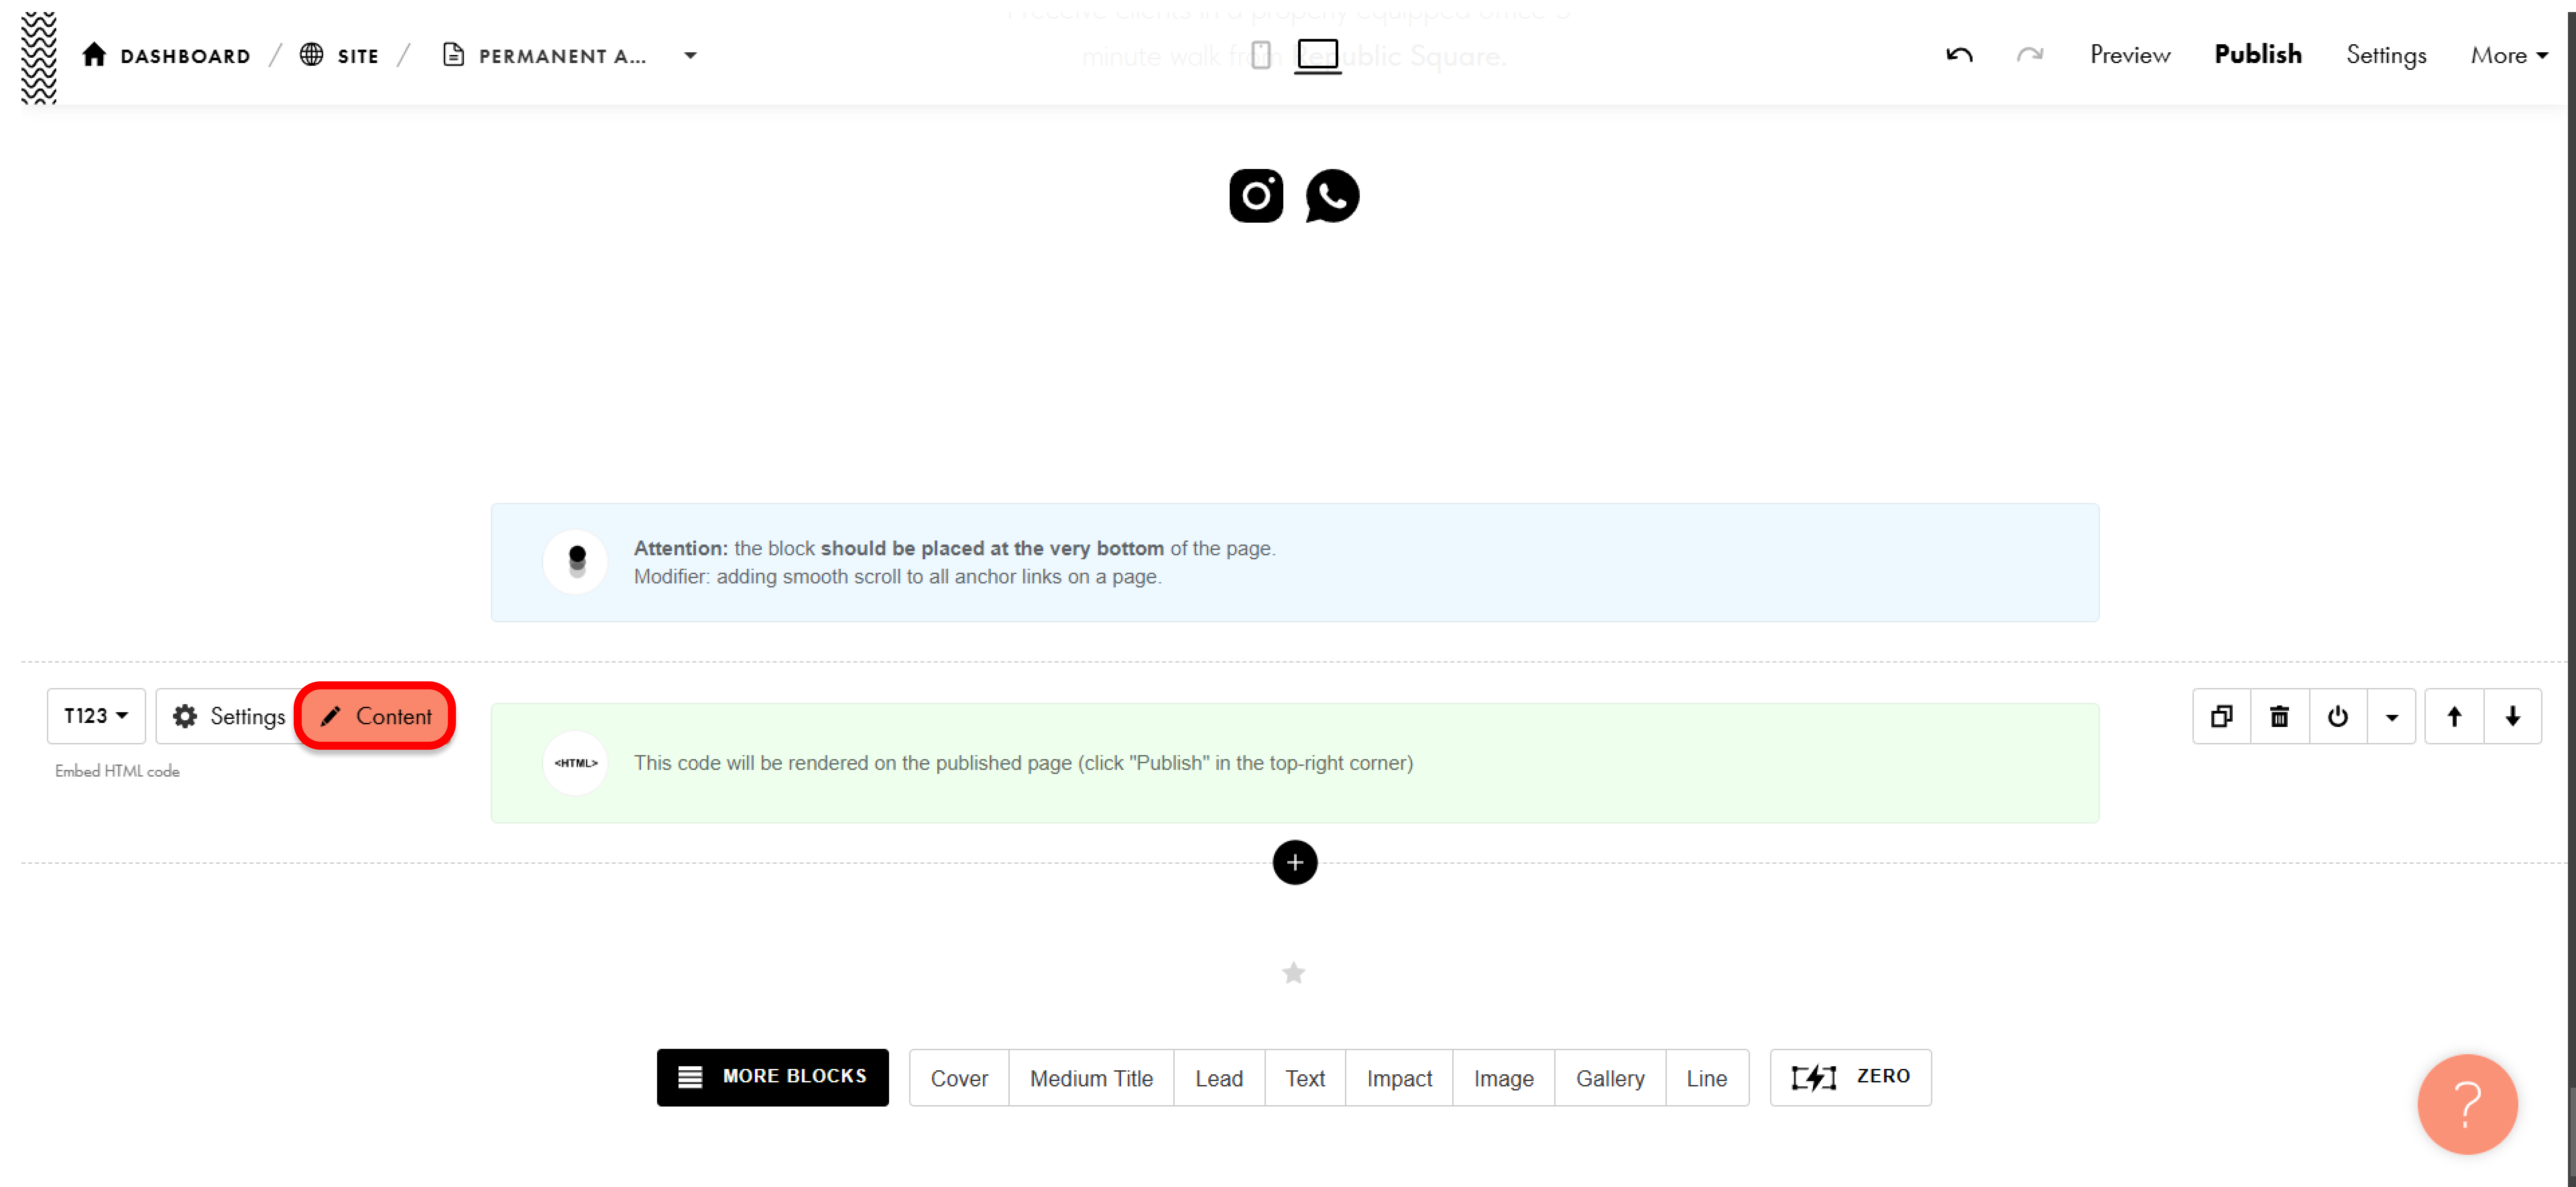
- Наведіть курсор на блок і натисніть на червону кнопку "Контент";
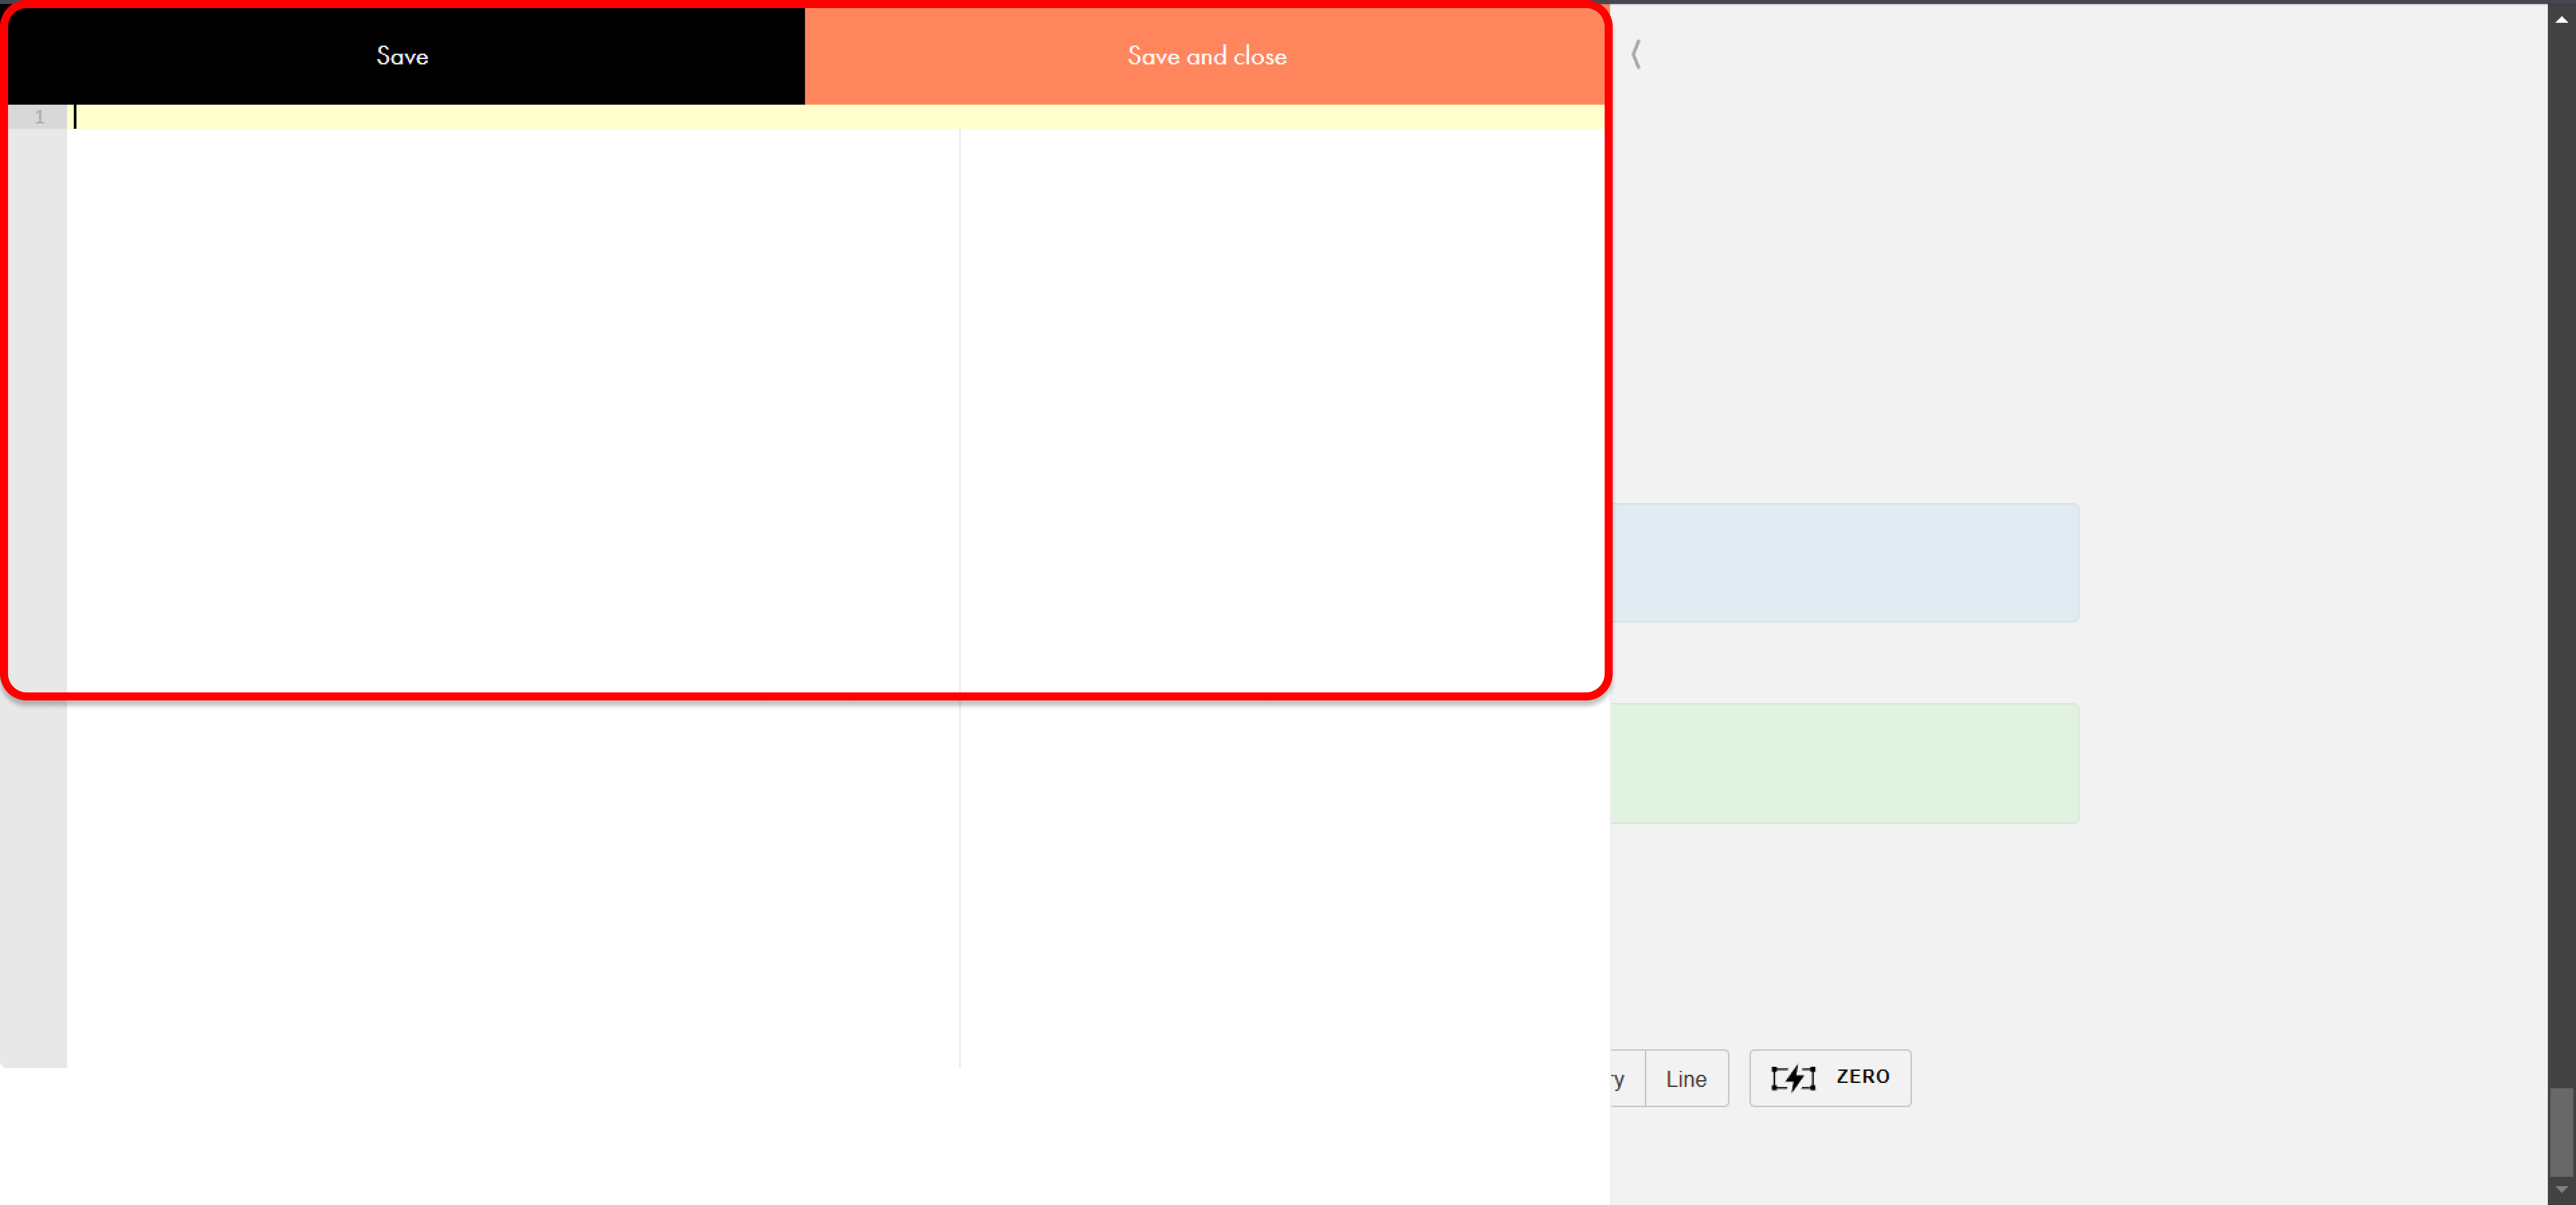
- Відкриється вікно для введення коду – поки залишаємо його порожнім
3️⃣ Отримуємо код віджета в DIKIDI
- Увійдіть у DIKIDI Business за посиланням;
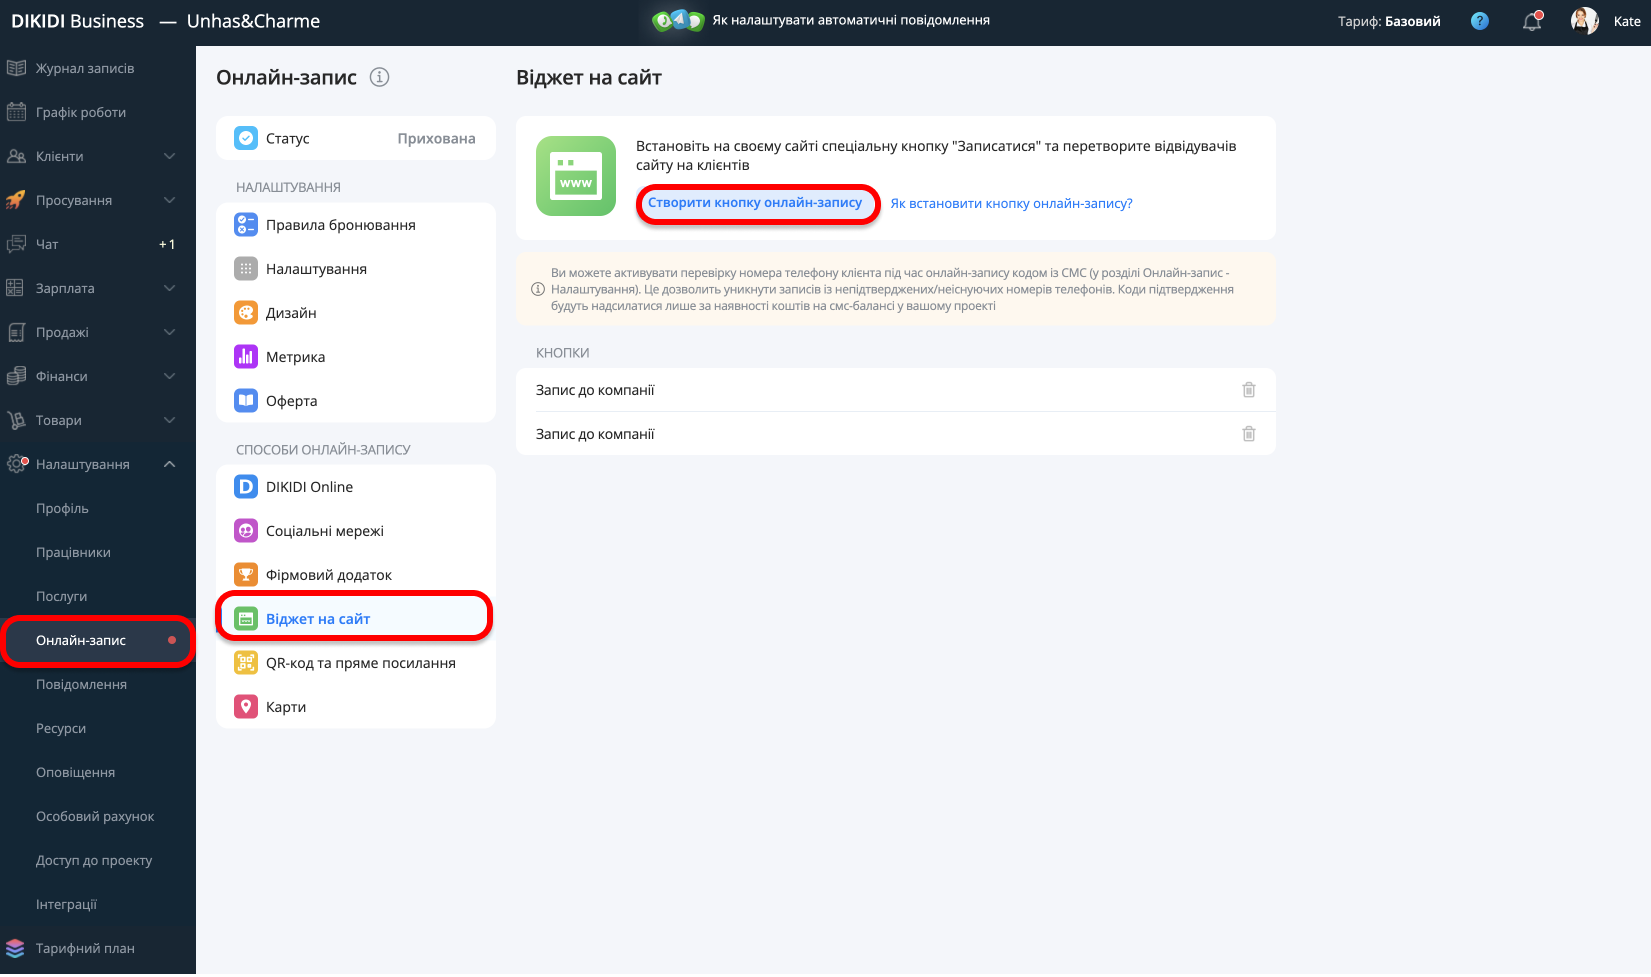
- Відкрийте розділ "Налаштування" → "Онлайн-запис" → "Віджет на сайт";
- Натисніть "Створити кнопку онлайн-запису".
4️⃣ Вибираємо тип кнопки та копіюємо код
- Налаштуйте кнопку за потрібним форматом роботи;
- Скопіюйте код з 1 кроку в DIKIDI Business та вставте його в HTML-блок на Tilda;
- Натисніть "Зберегти та закрити".
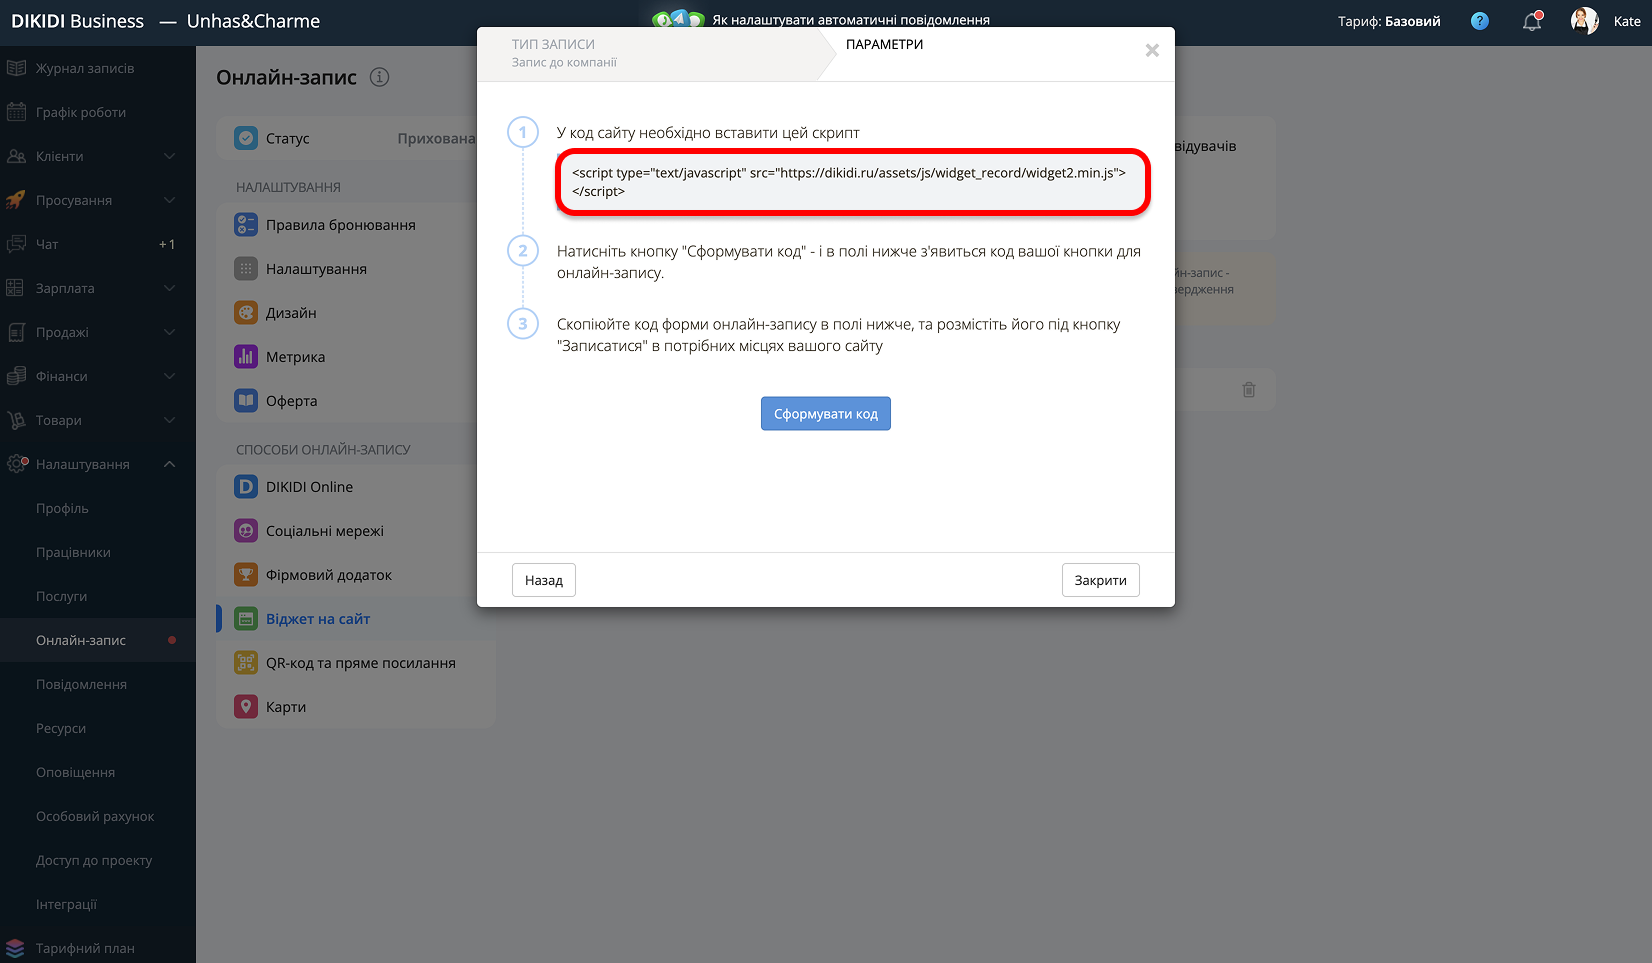
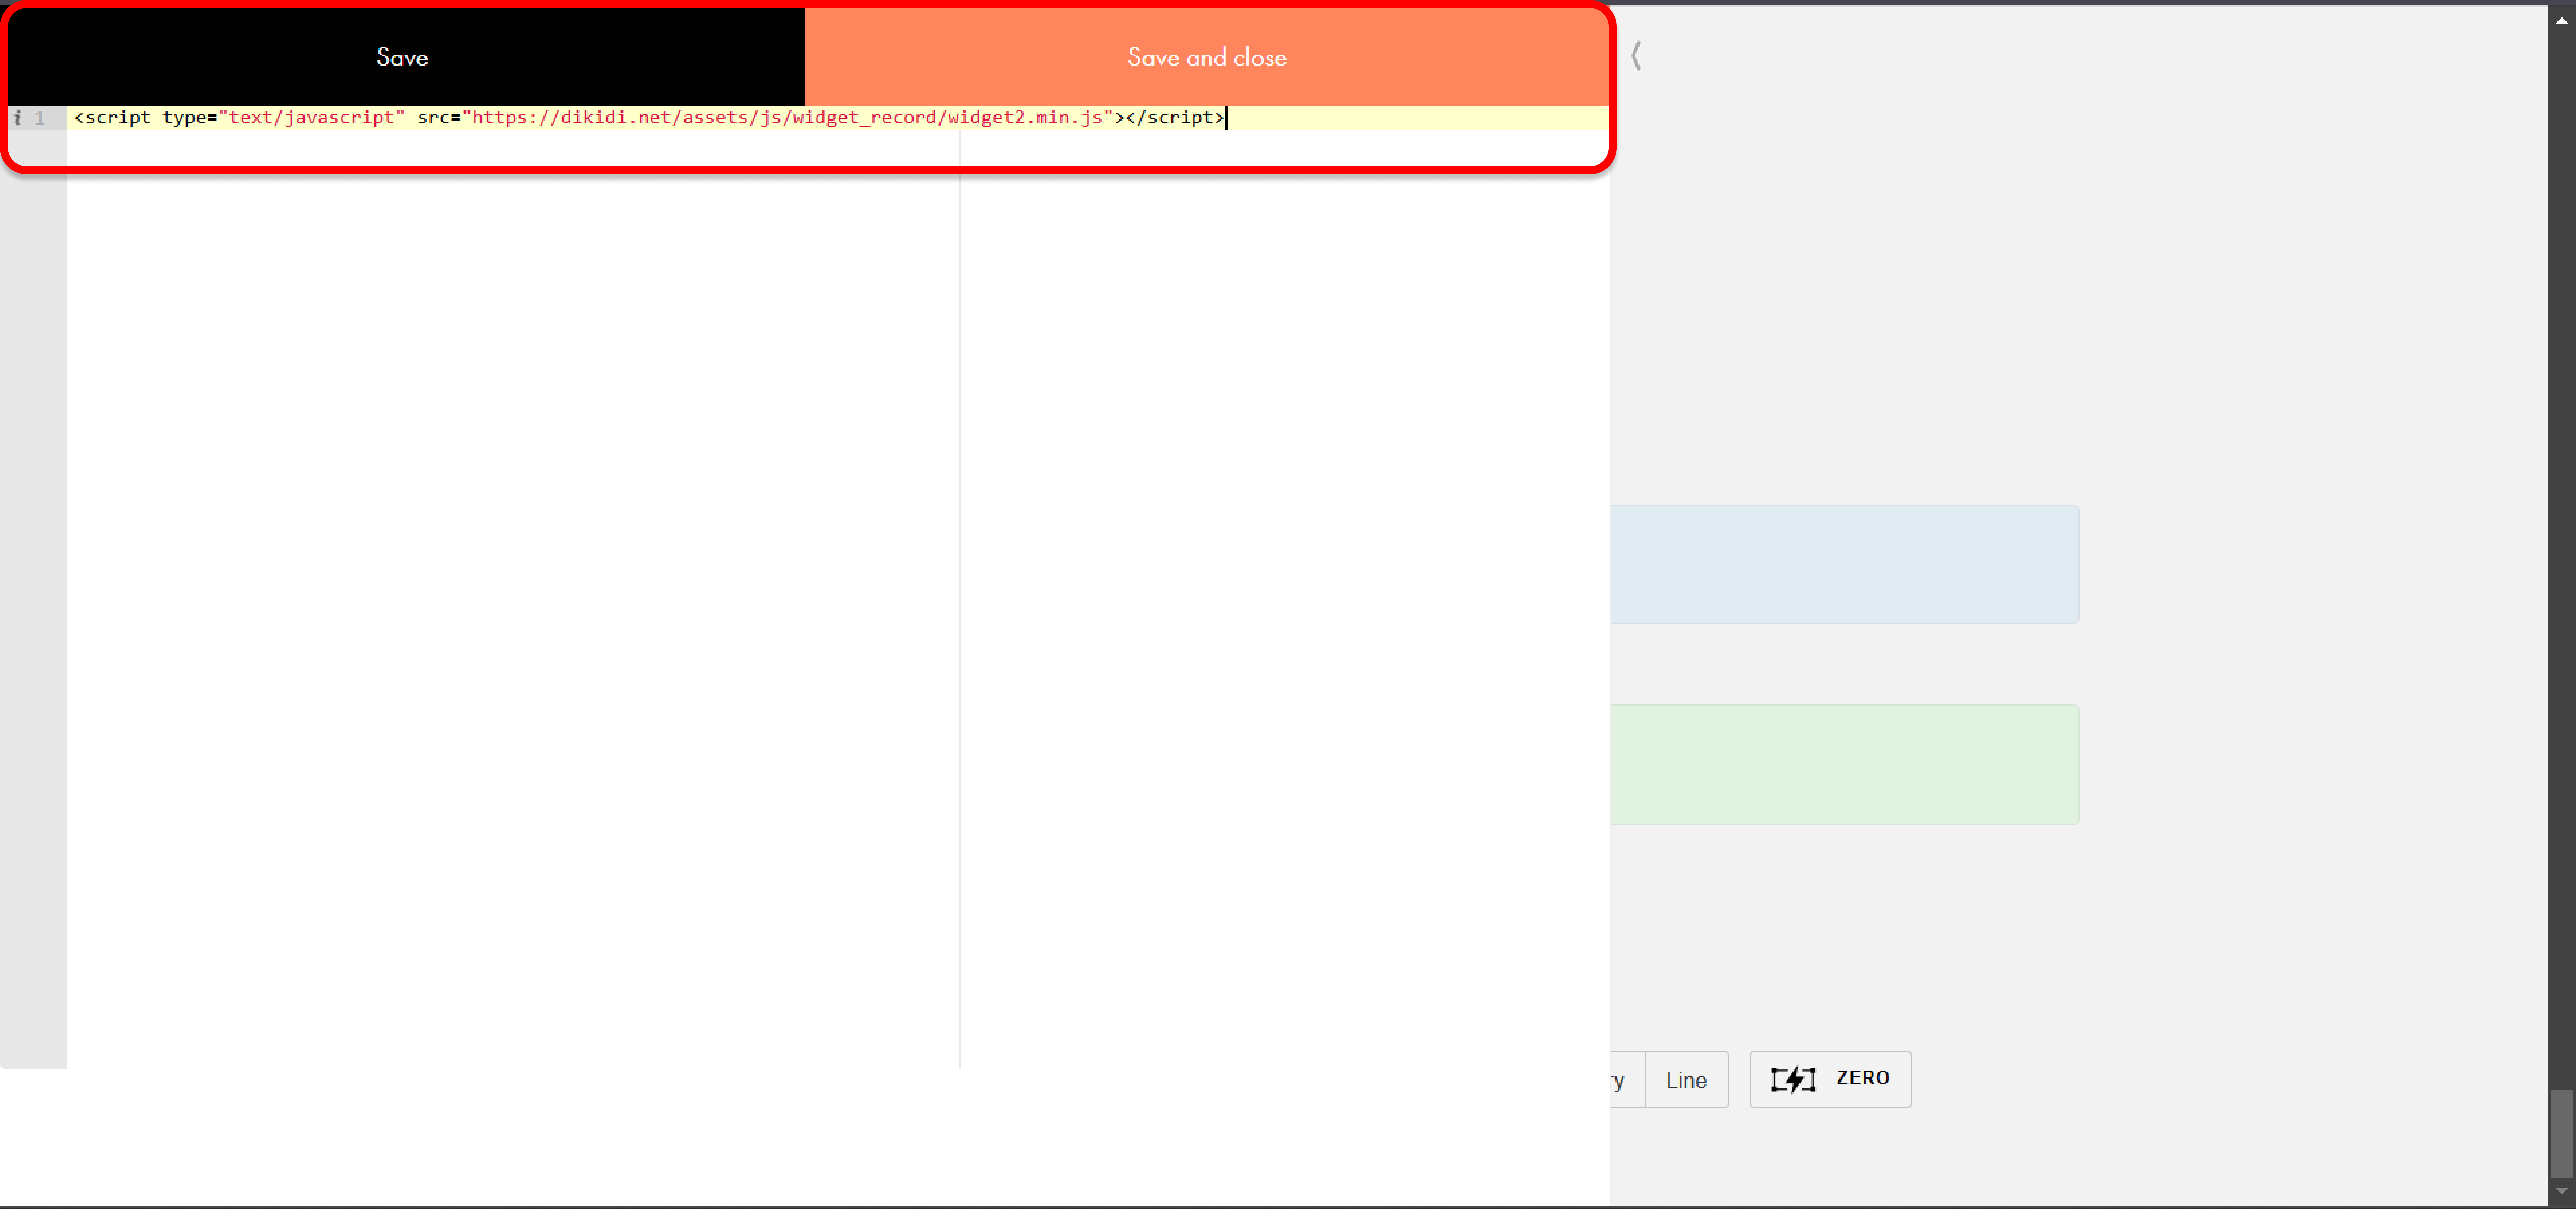
5️⃣ Додаємо кнопку на сайт
У Tilda додаємо кнопку для Онлайн-запису. Наприклад, з текстом «Записатися онлайн».
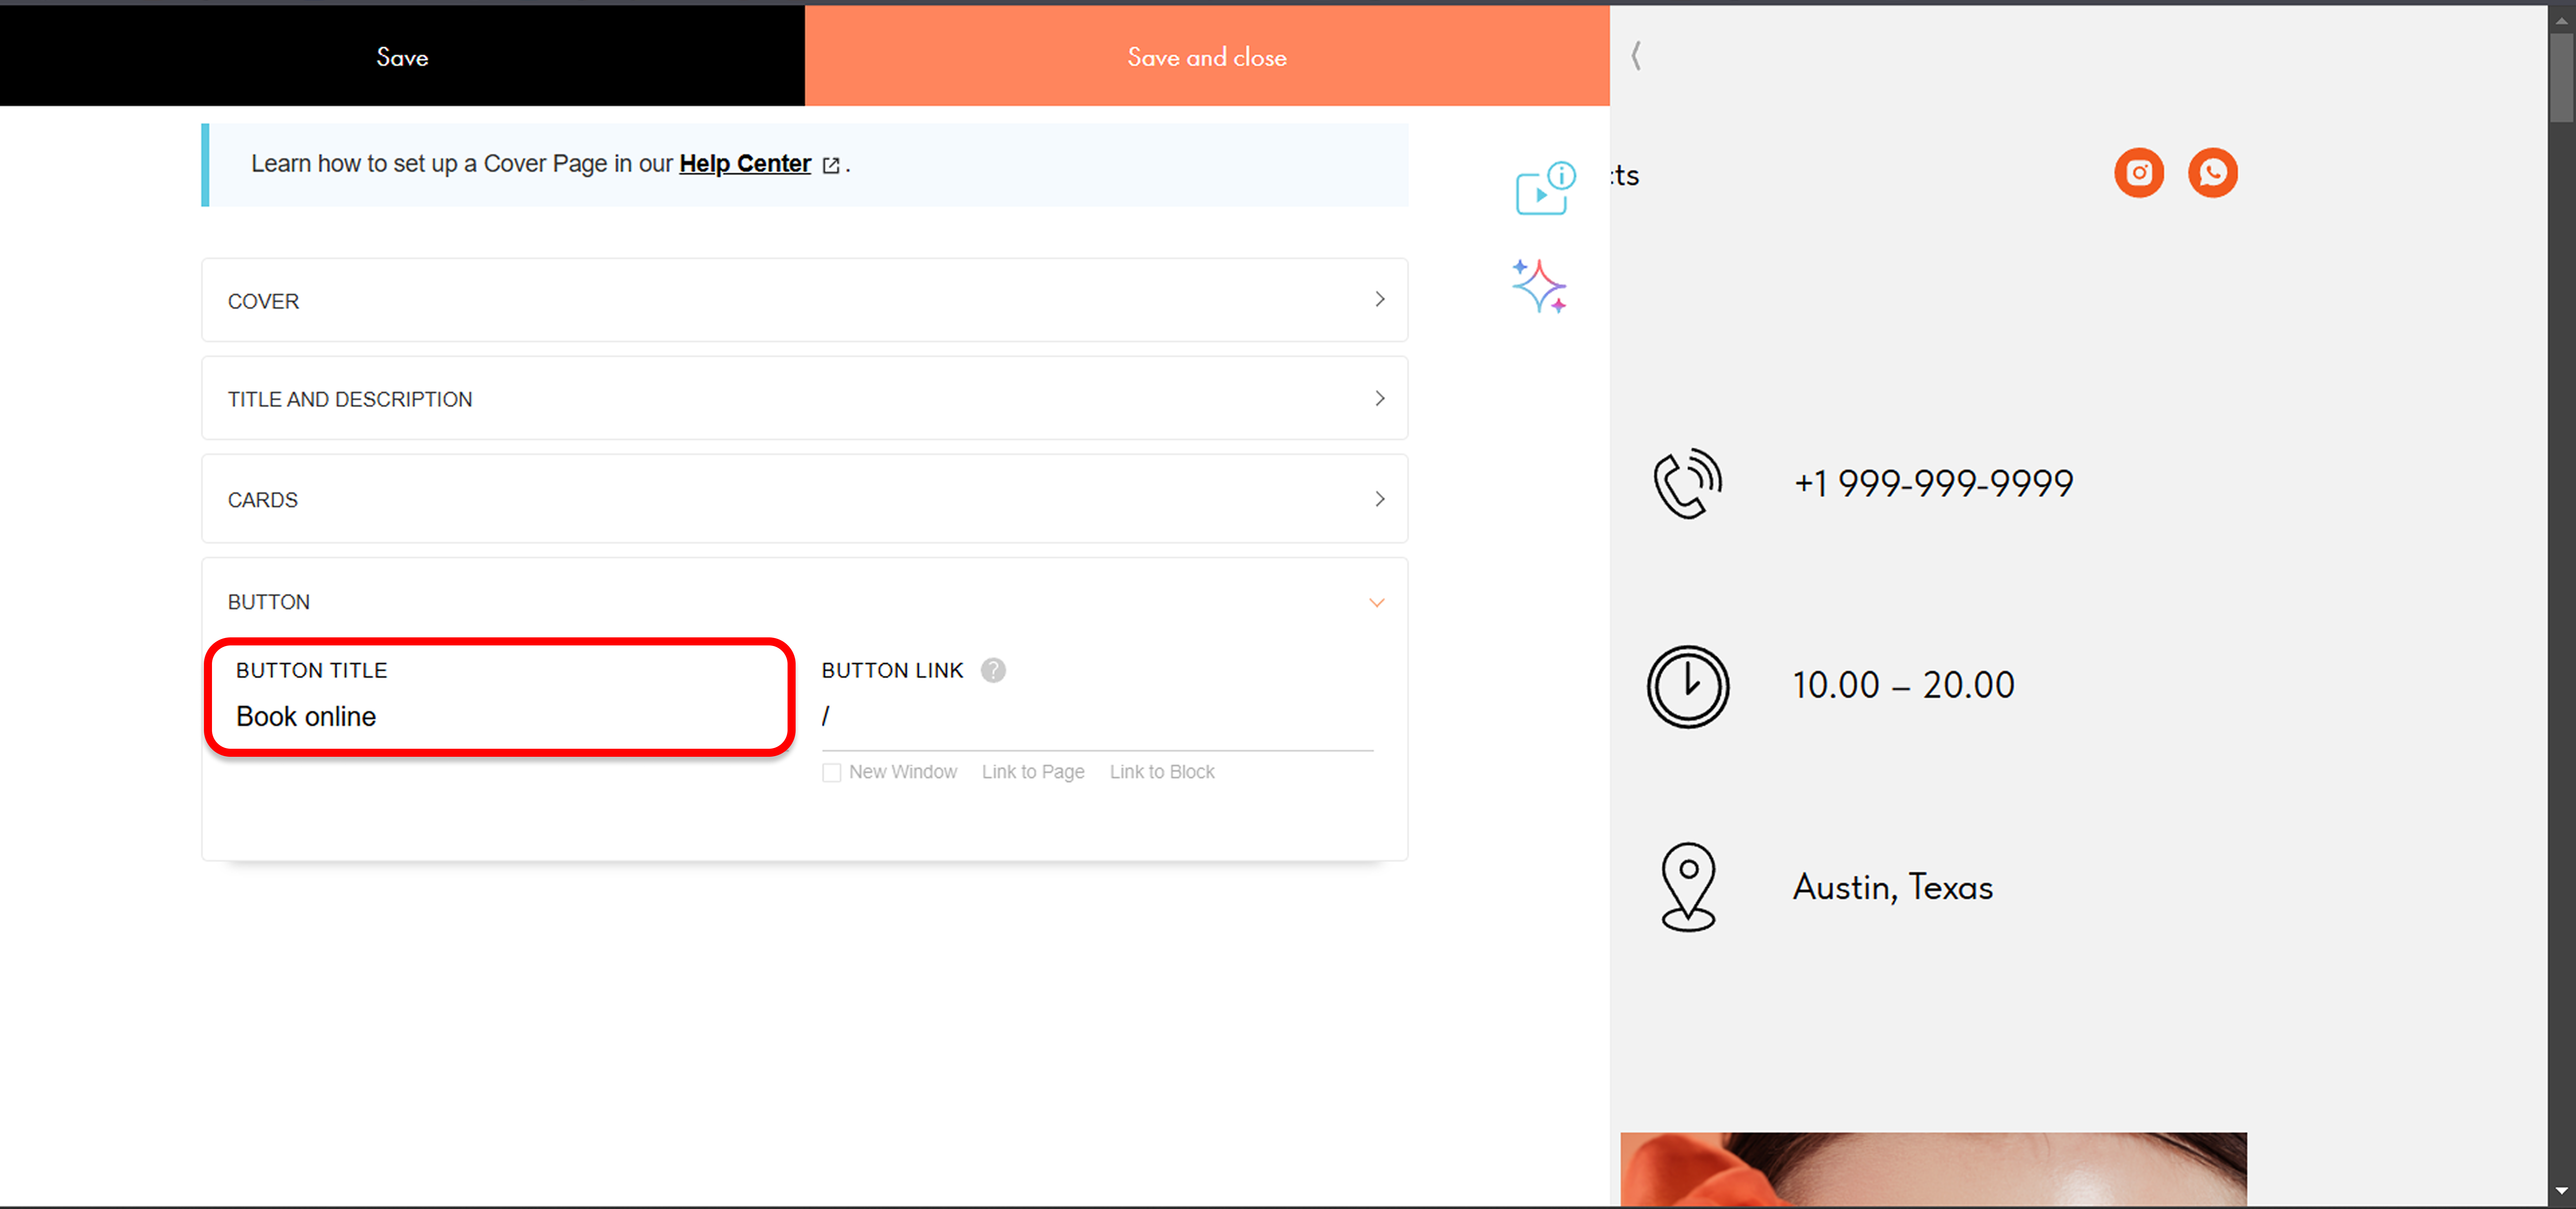
6️⃣ Отримуємо посилання для кнопки
- У DIKIDI натисніть "Сформувати код";
- Із сформованого коду скопіюйте посилання, а не весь код. Приклад ви можете побачити на скріншоті.
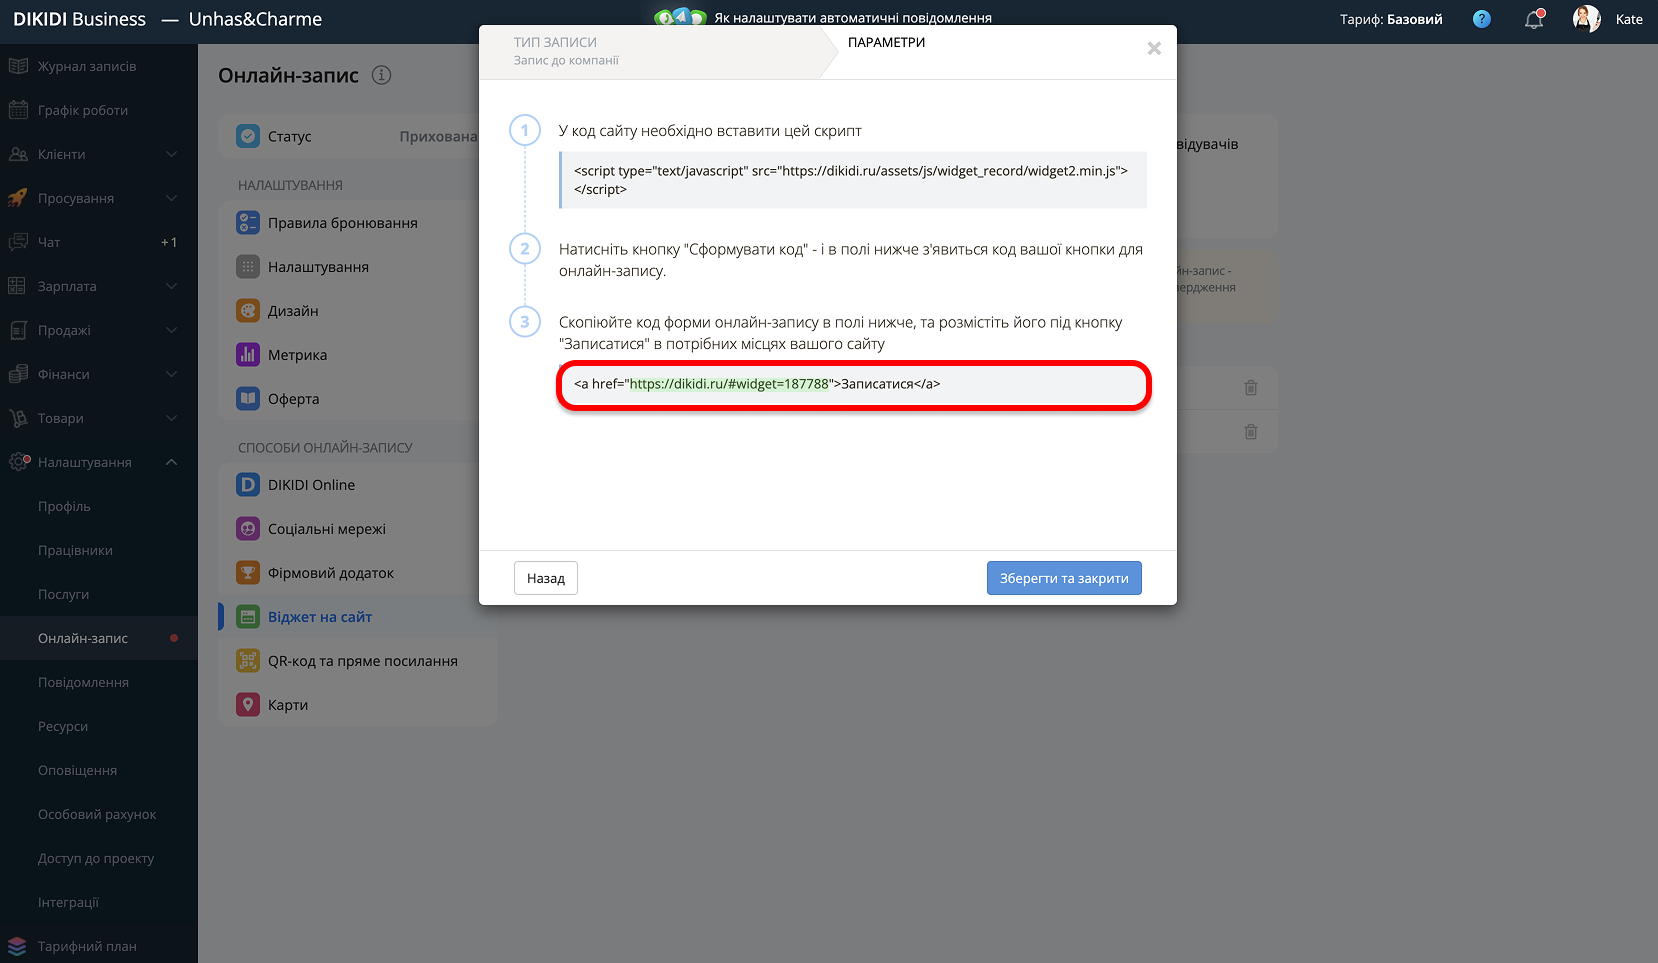
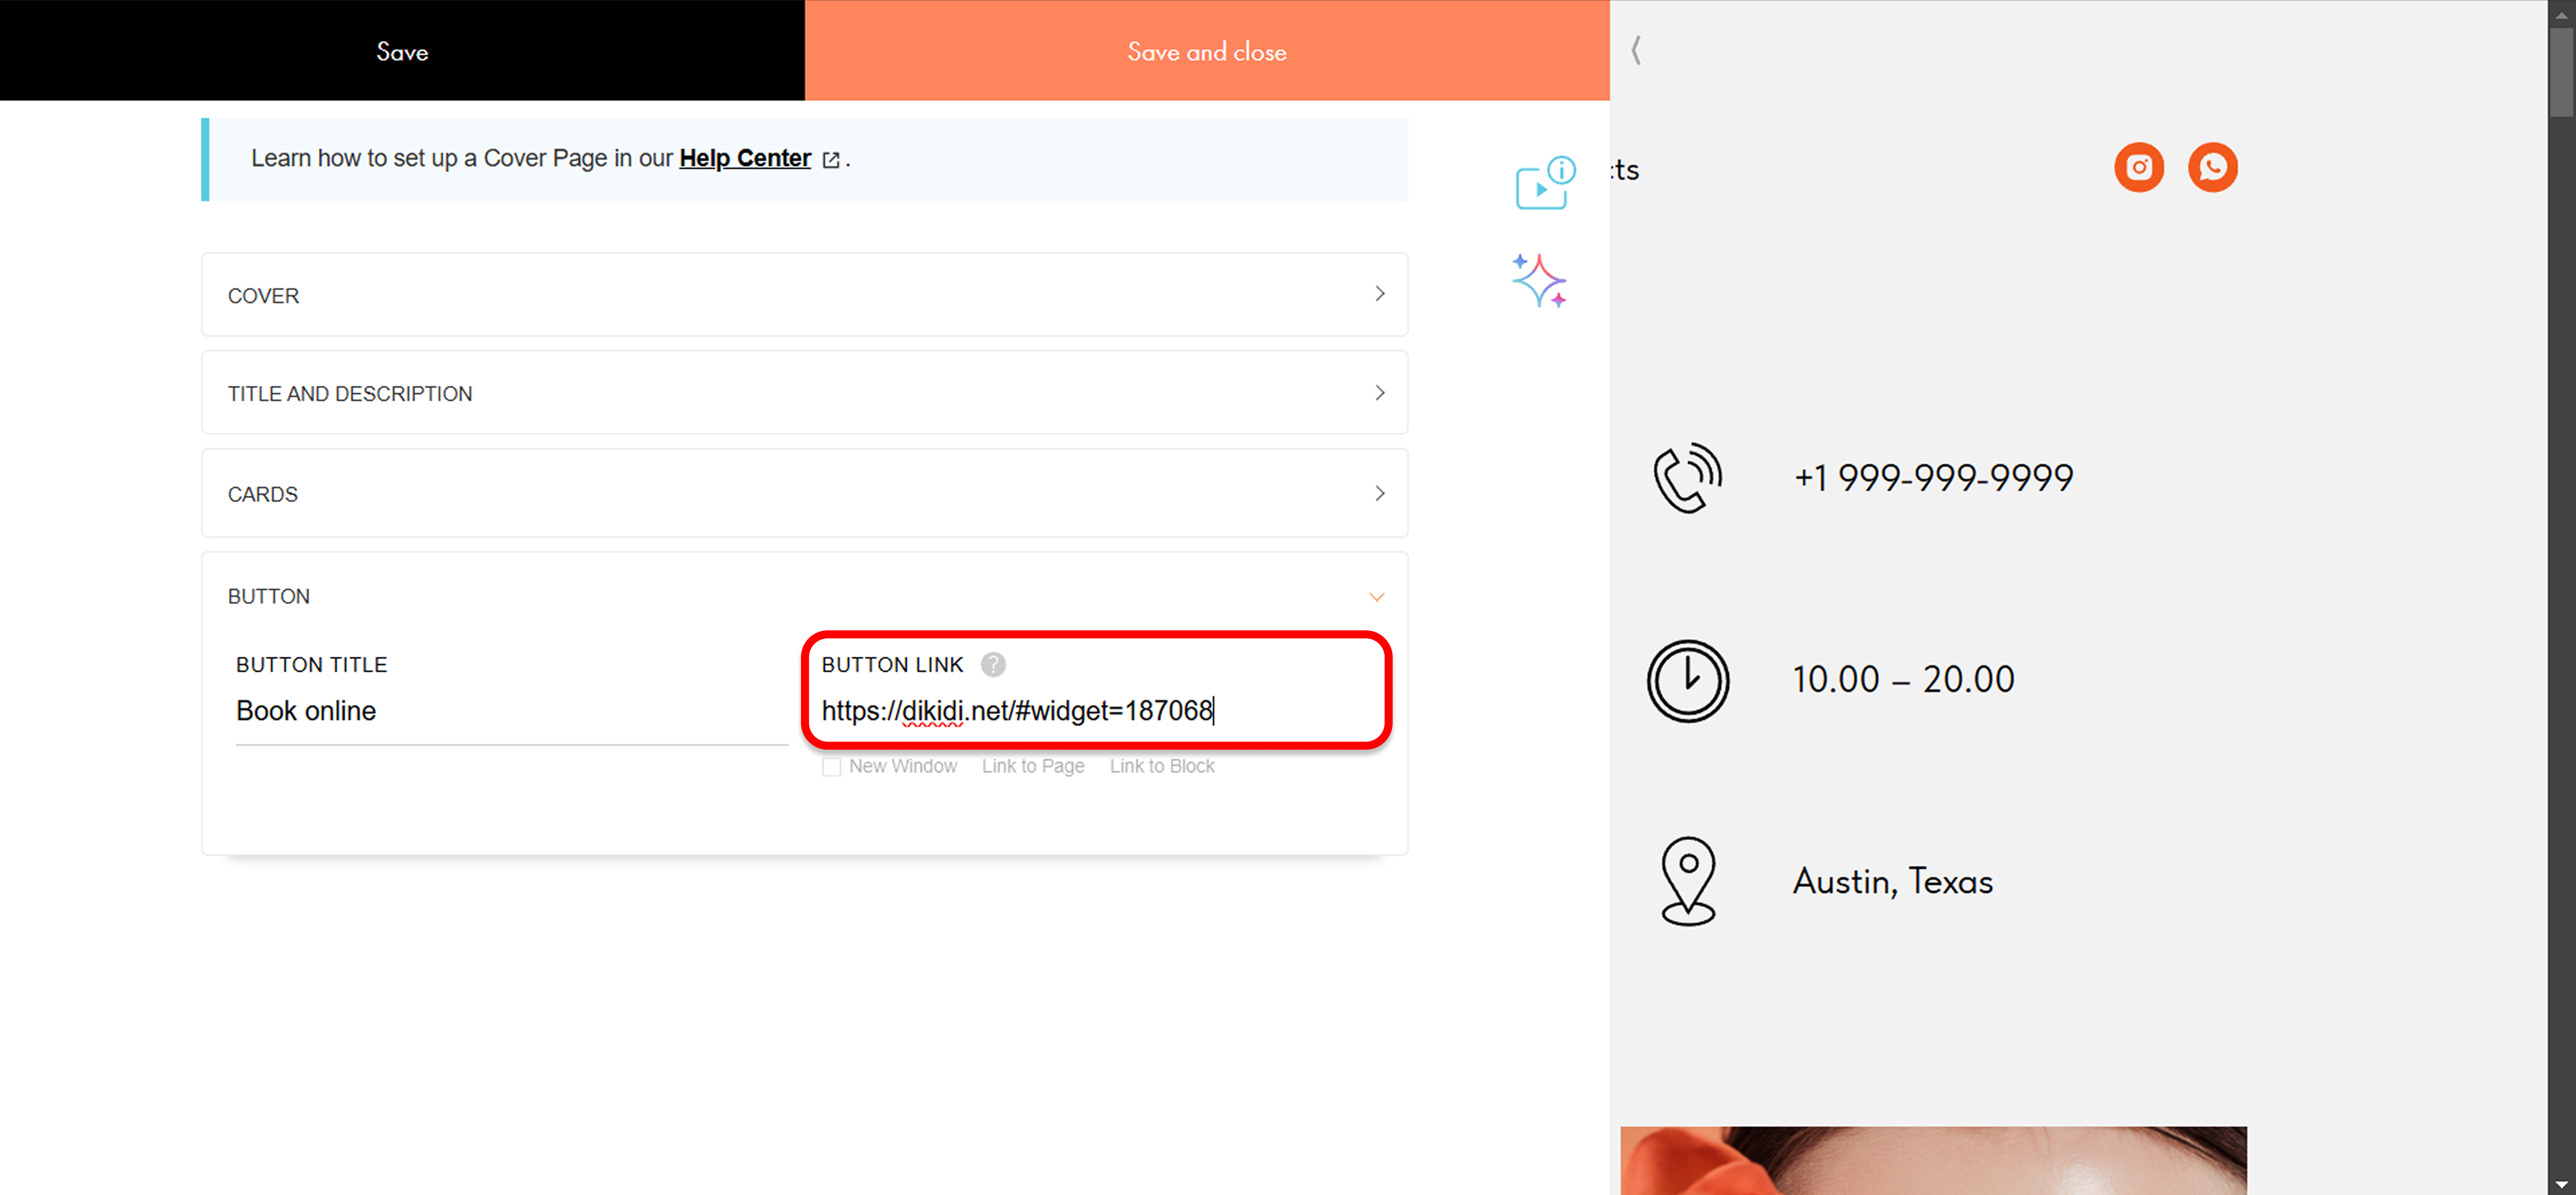
7️⃣ Прив'язуємо посилання до кнопки
Вставте скопійоване посилання в поле "Посилання для кнопки" в Tilda.
8️⃣ Завершуємо налаштування
- Натисніть "Зберегти та закрити";
- Опублікуйте сайт і перевірте роботу віджета. Після натискання на кнопку повинен відкритися віджет онлайн-запису, а на задньому фоні залишиться ваш сайт.
Готово! Тепер на вашому сайті можна записатися через DIKIDI ✅