Flexible Ways to Create an Appointment in DIKIDI
Last modified:
It’s not always convenient to start an appointment the same way. Sometimes the customer's name comes to mind, sometimes just the service or the staff member.
DIKIDI makes it easy — the "+" button in the "Appointments" section lets you choose how to start. You decide what works best for you.
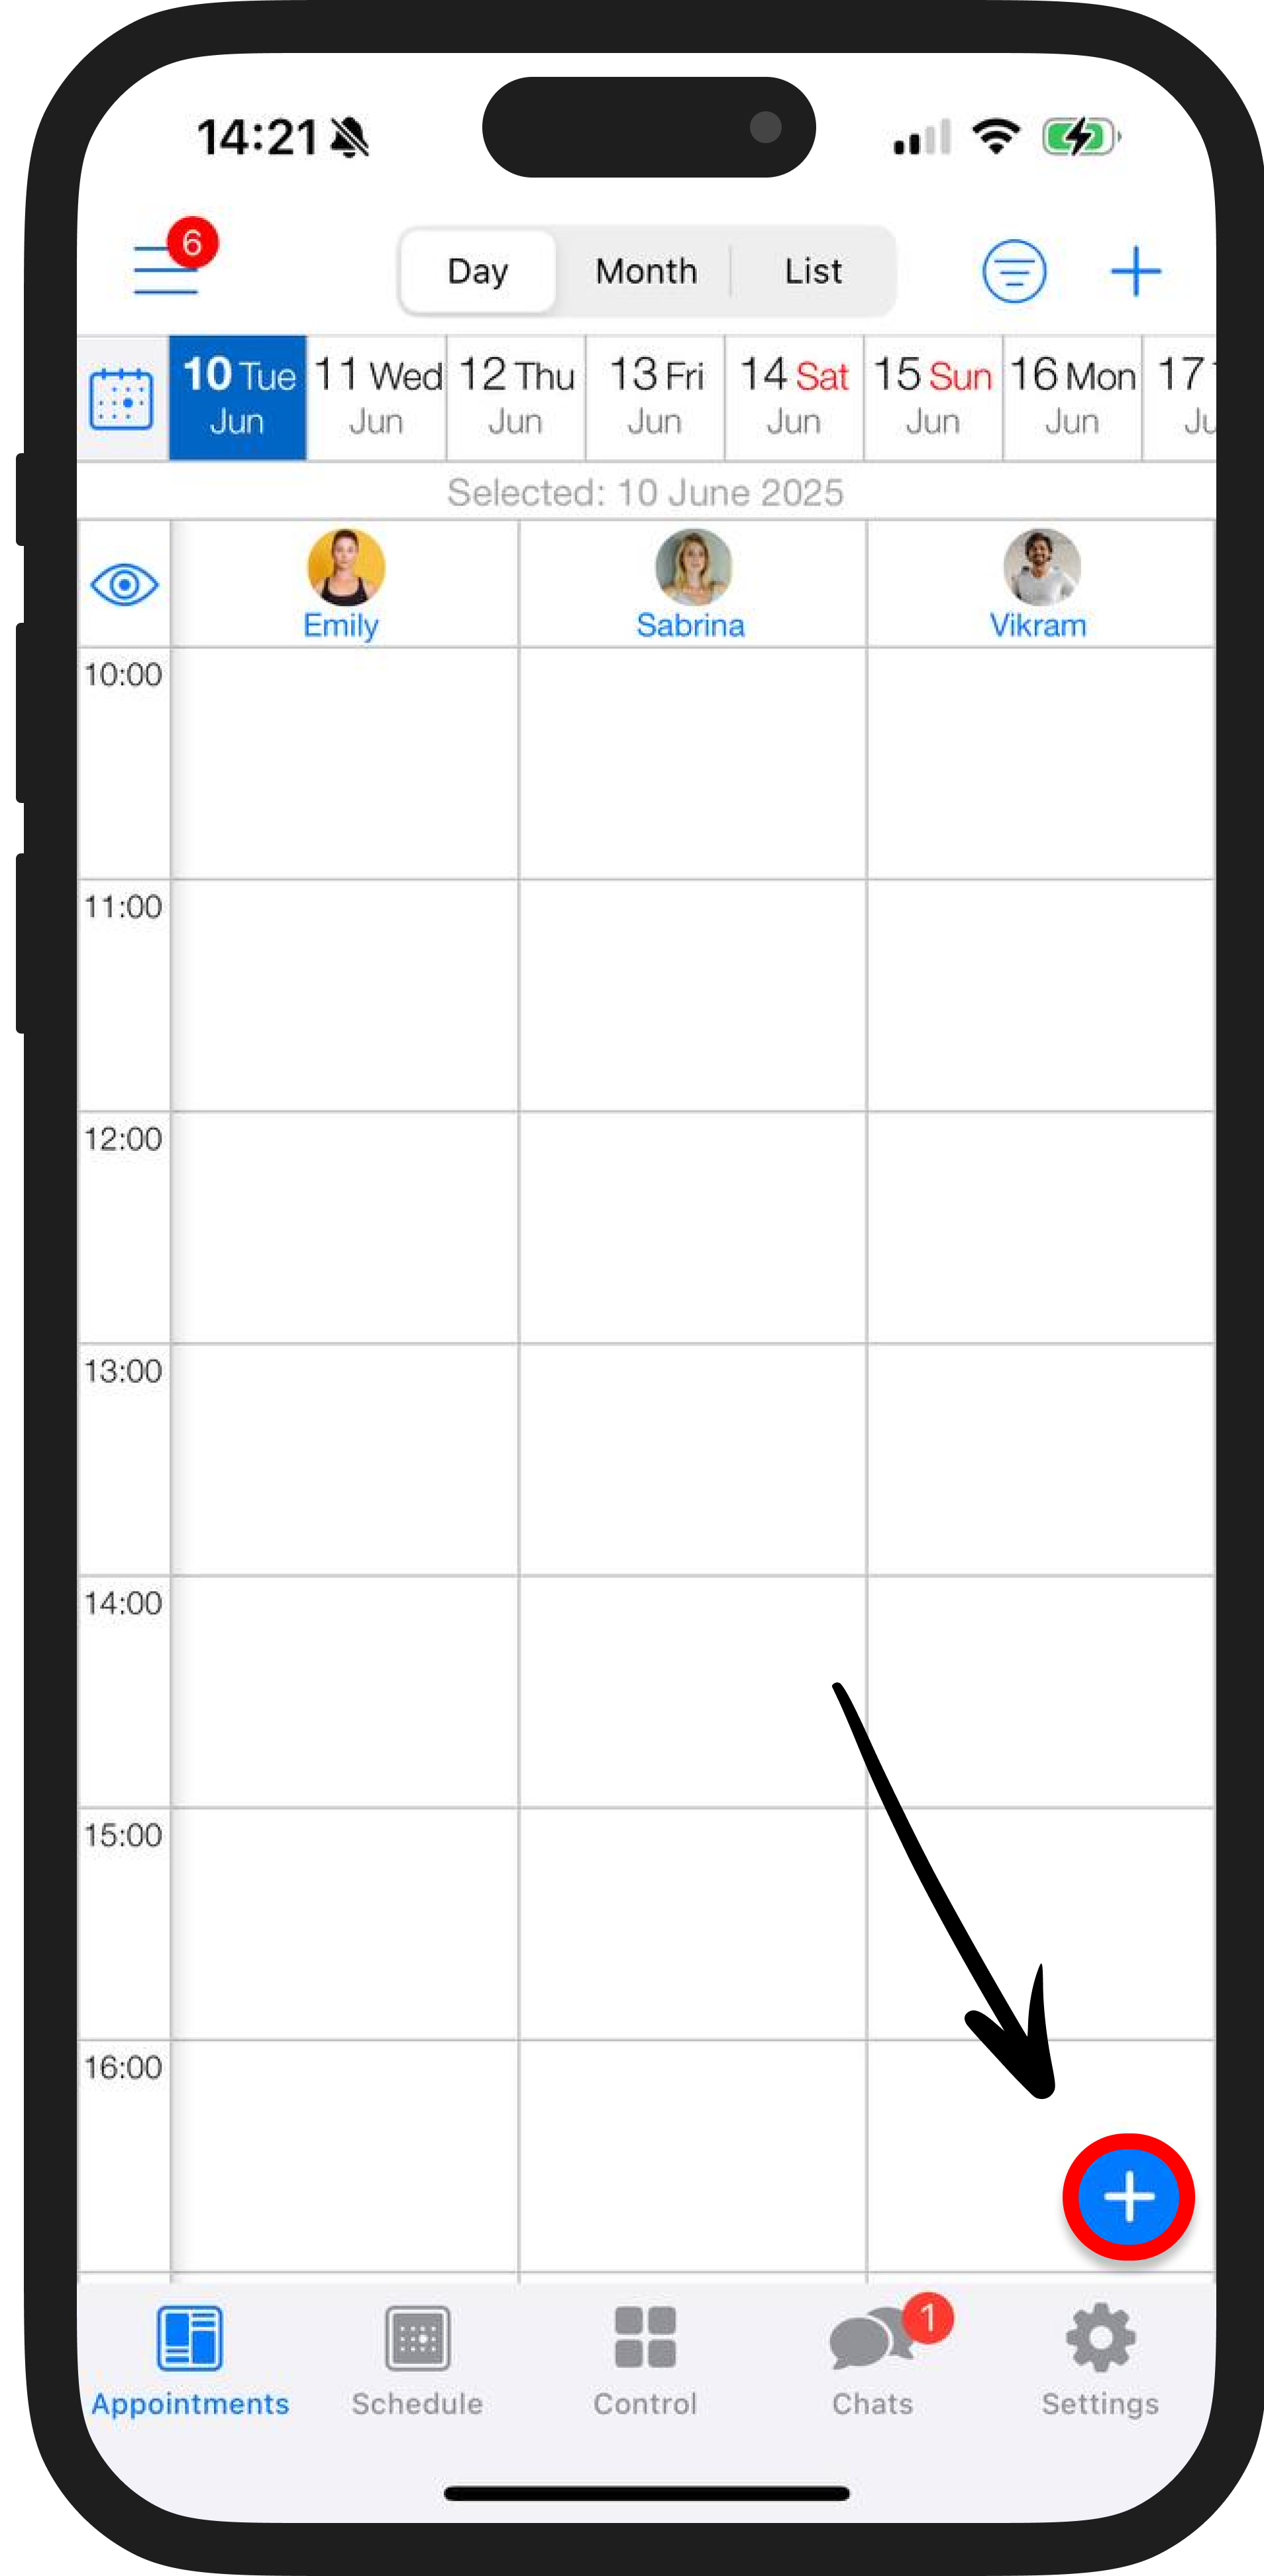
📍 Where is the button?
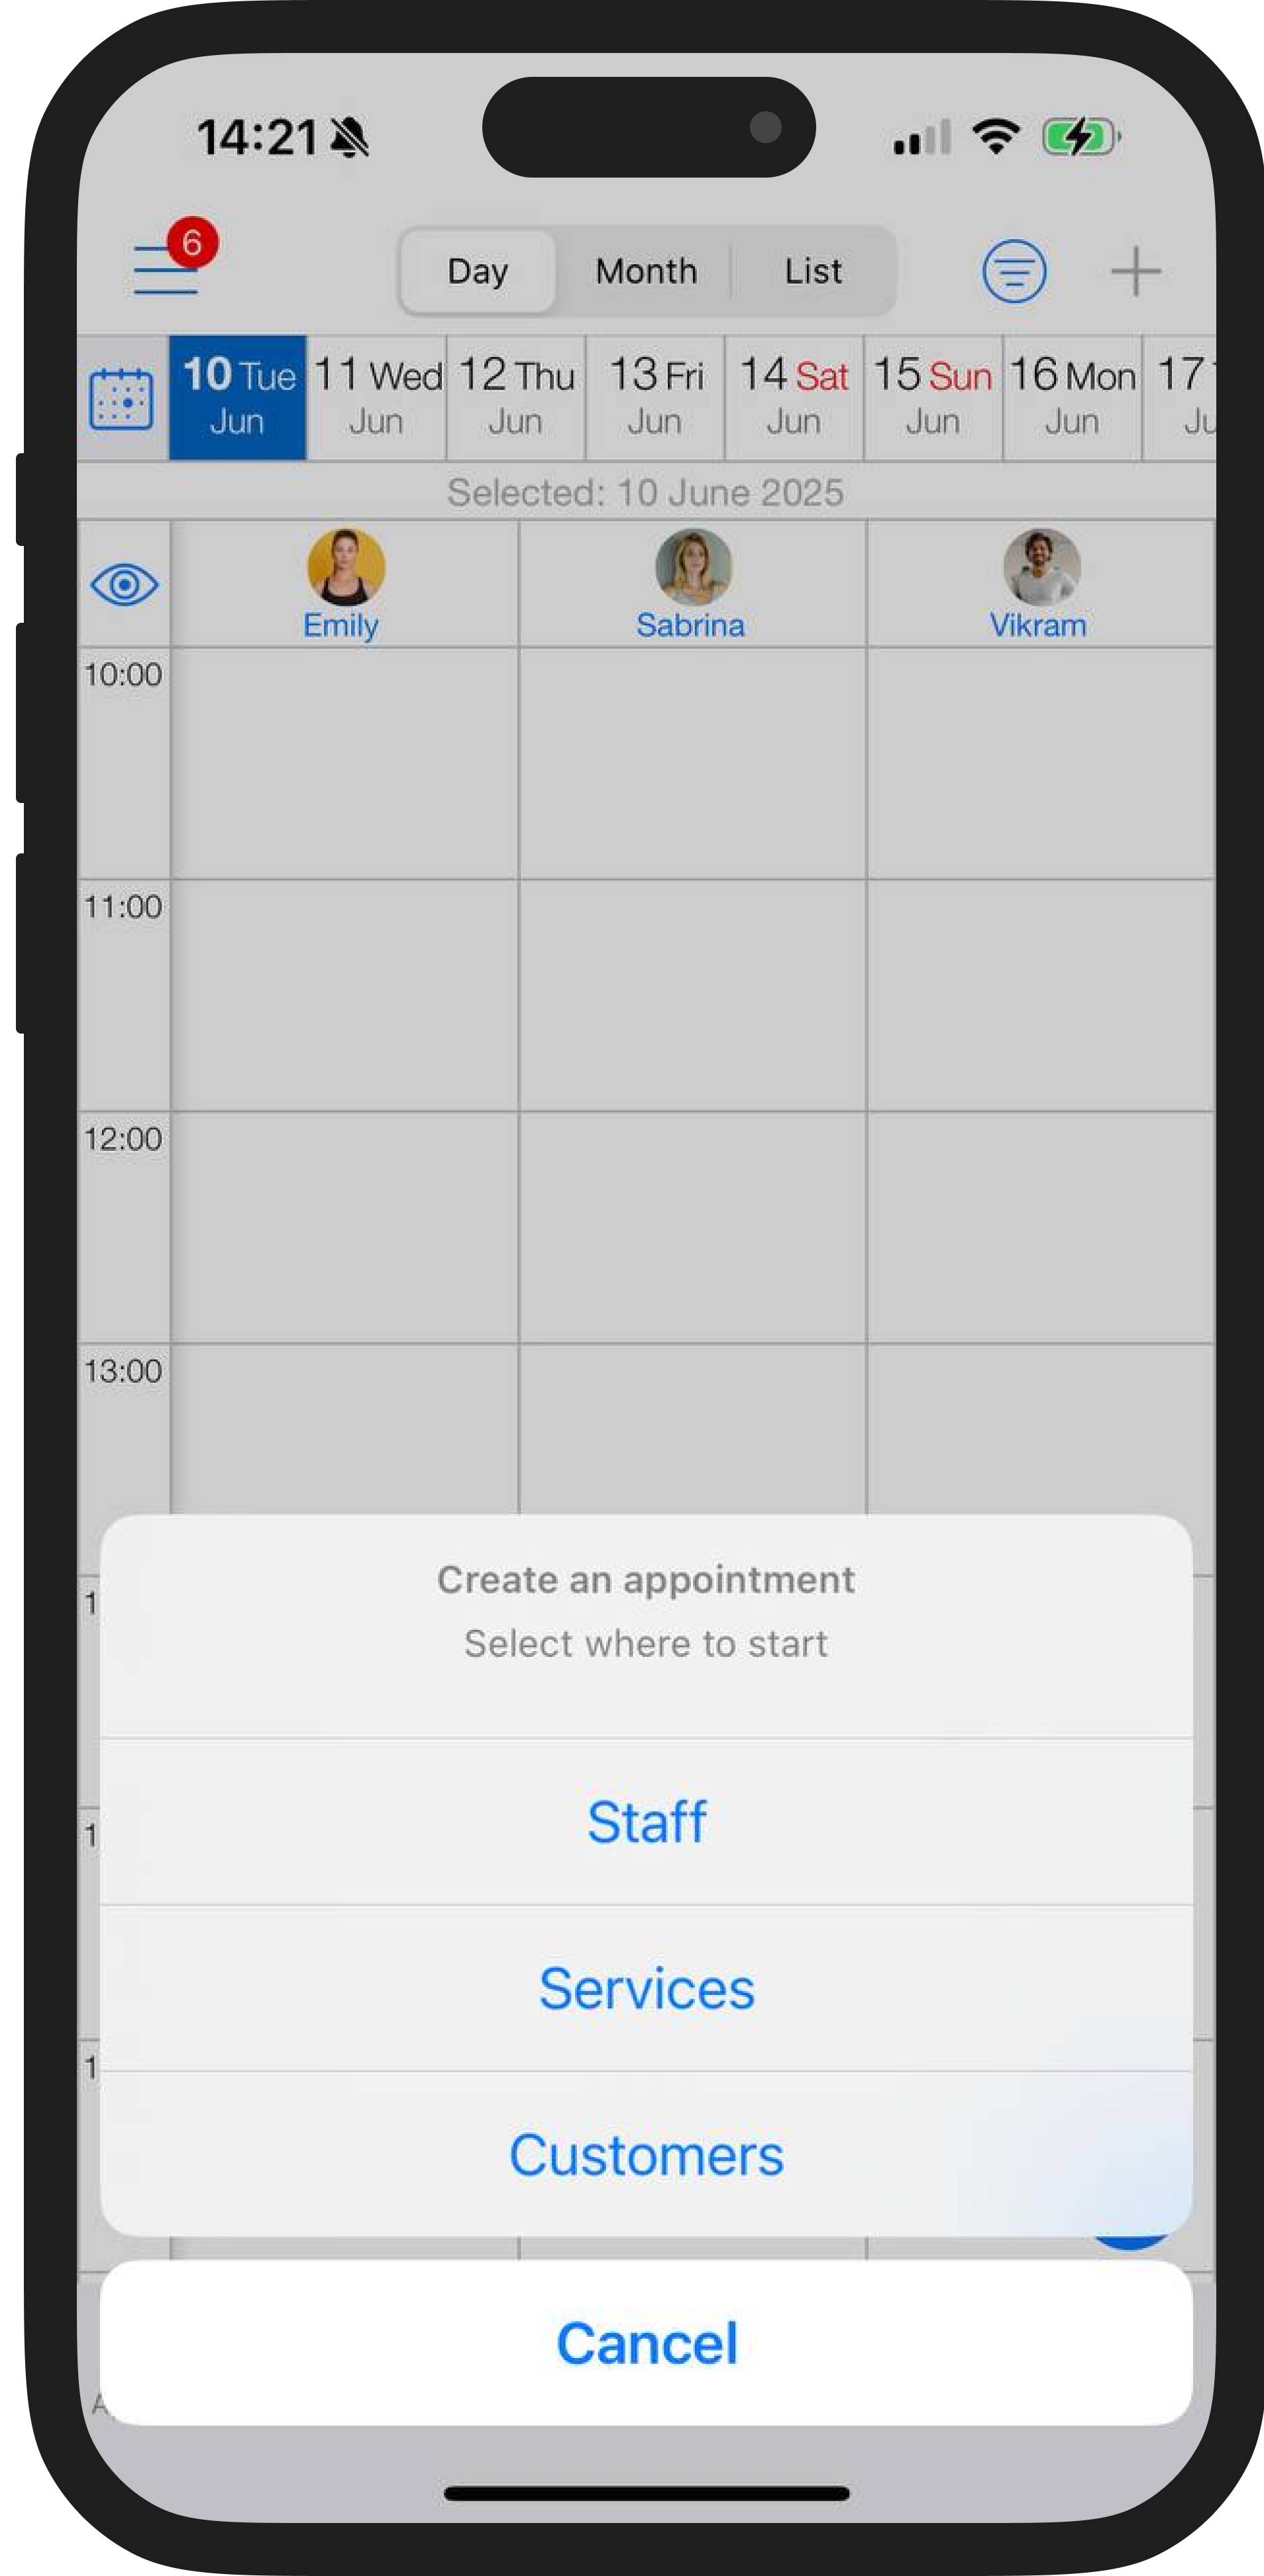
Open the "Appointments" section and tap the "+" button at the bottom right corner. A menu will pop up, letting you start your appointment by selecting:
- Staff member
- Services
- Customers
Let's take a closer look at each scenario 🔎
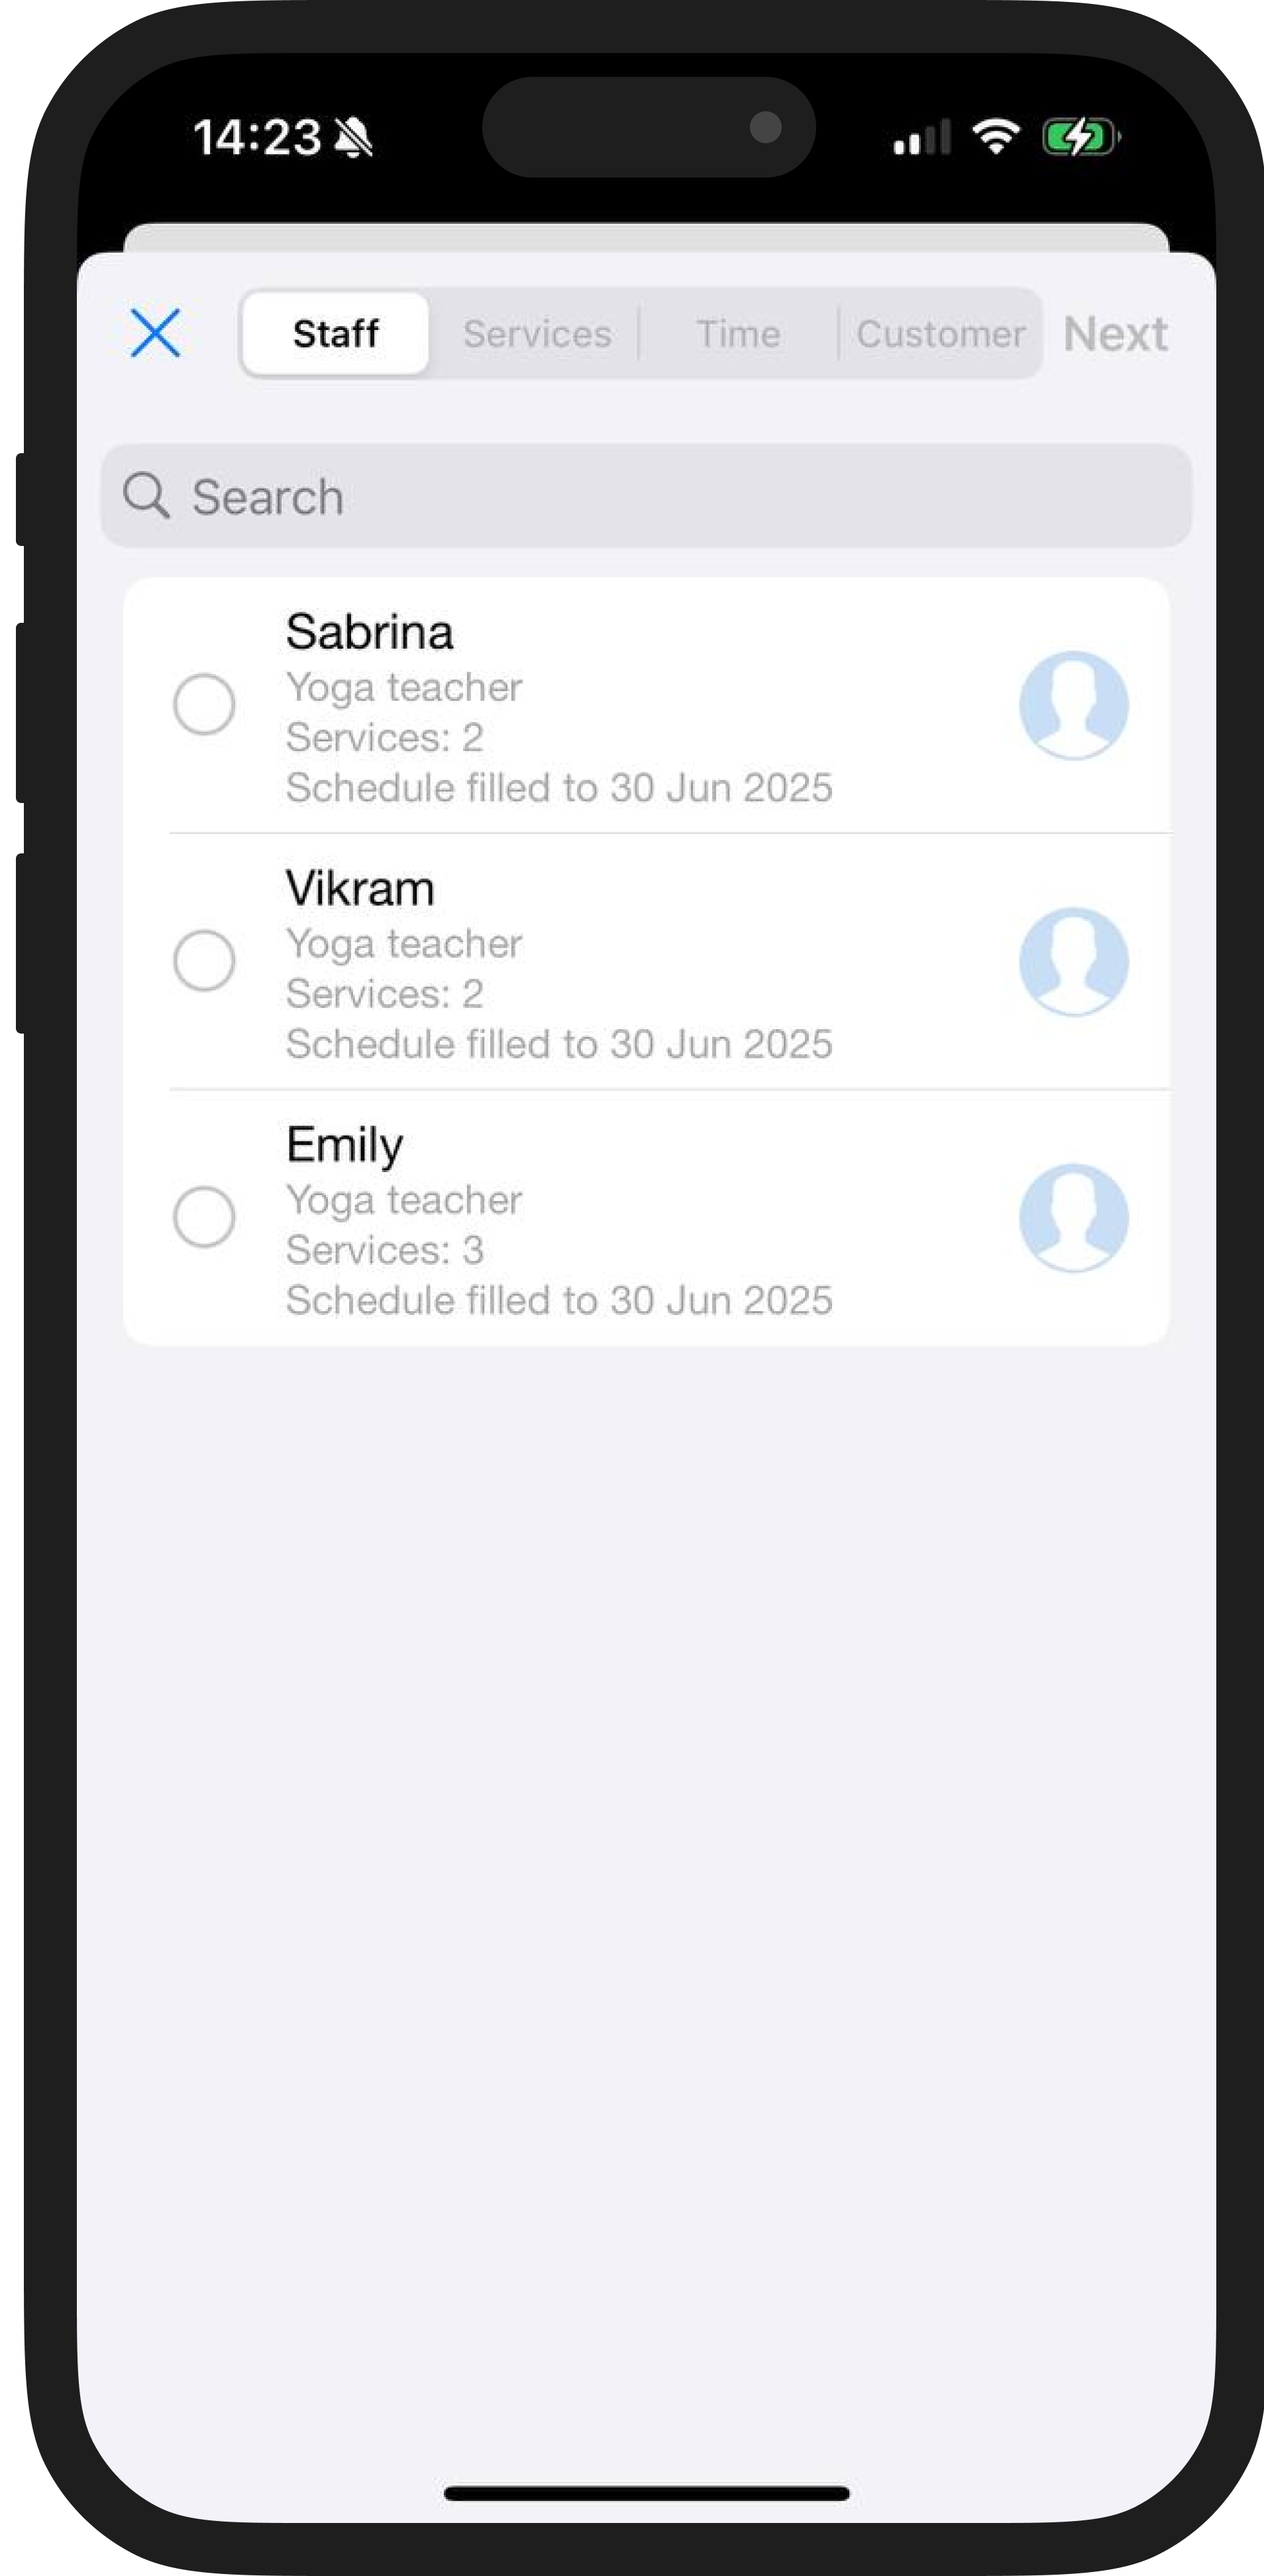
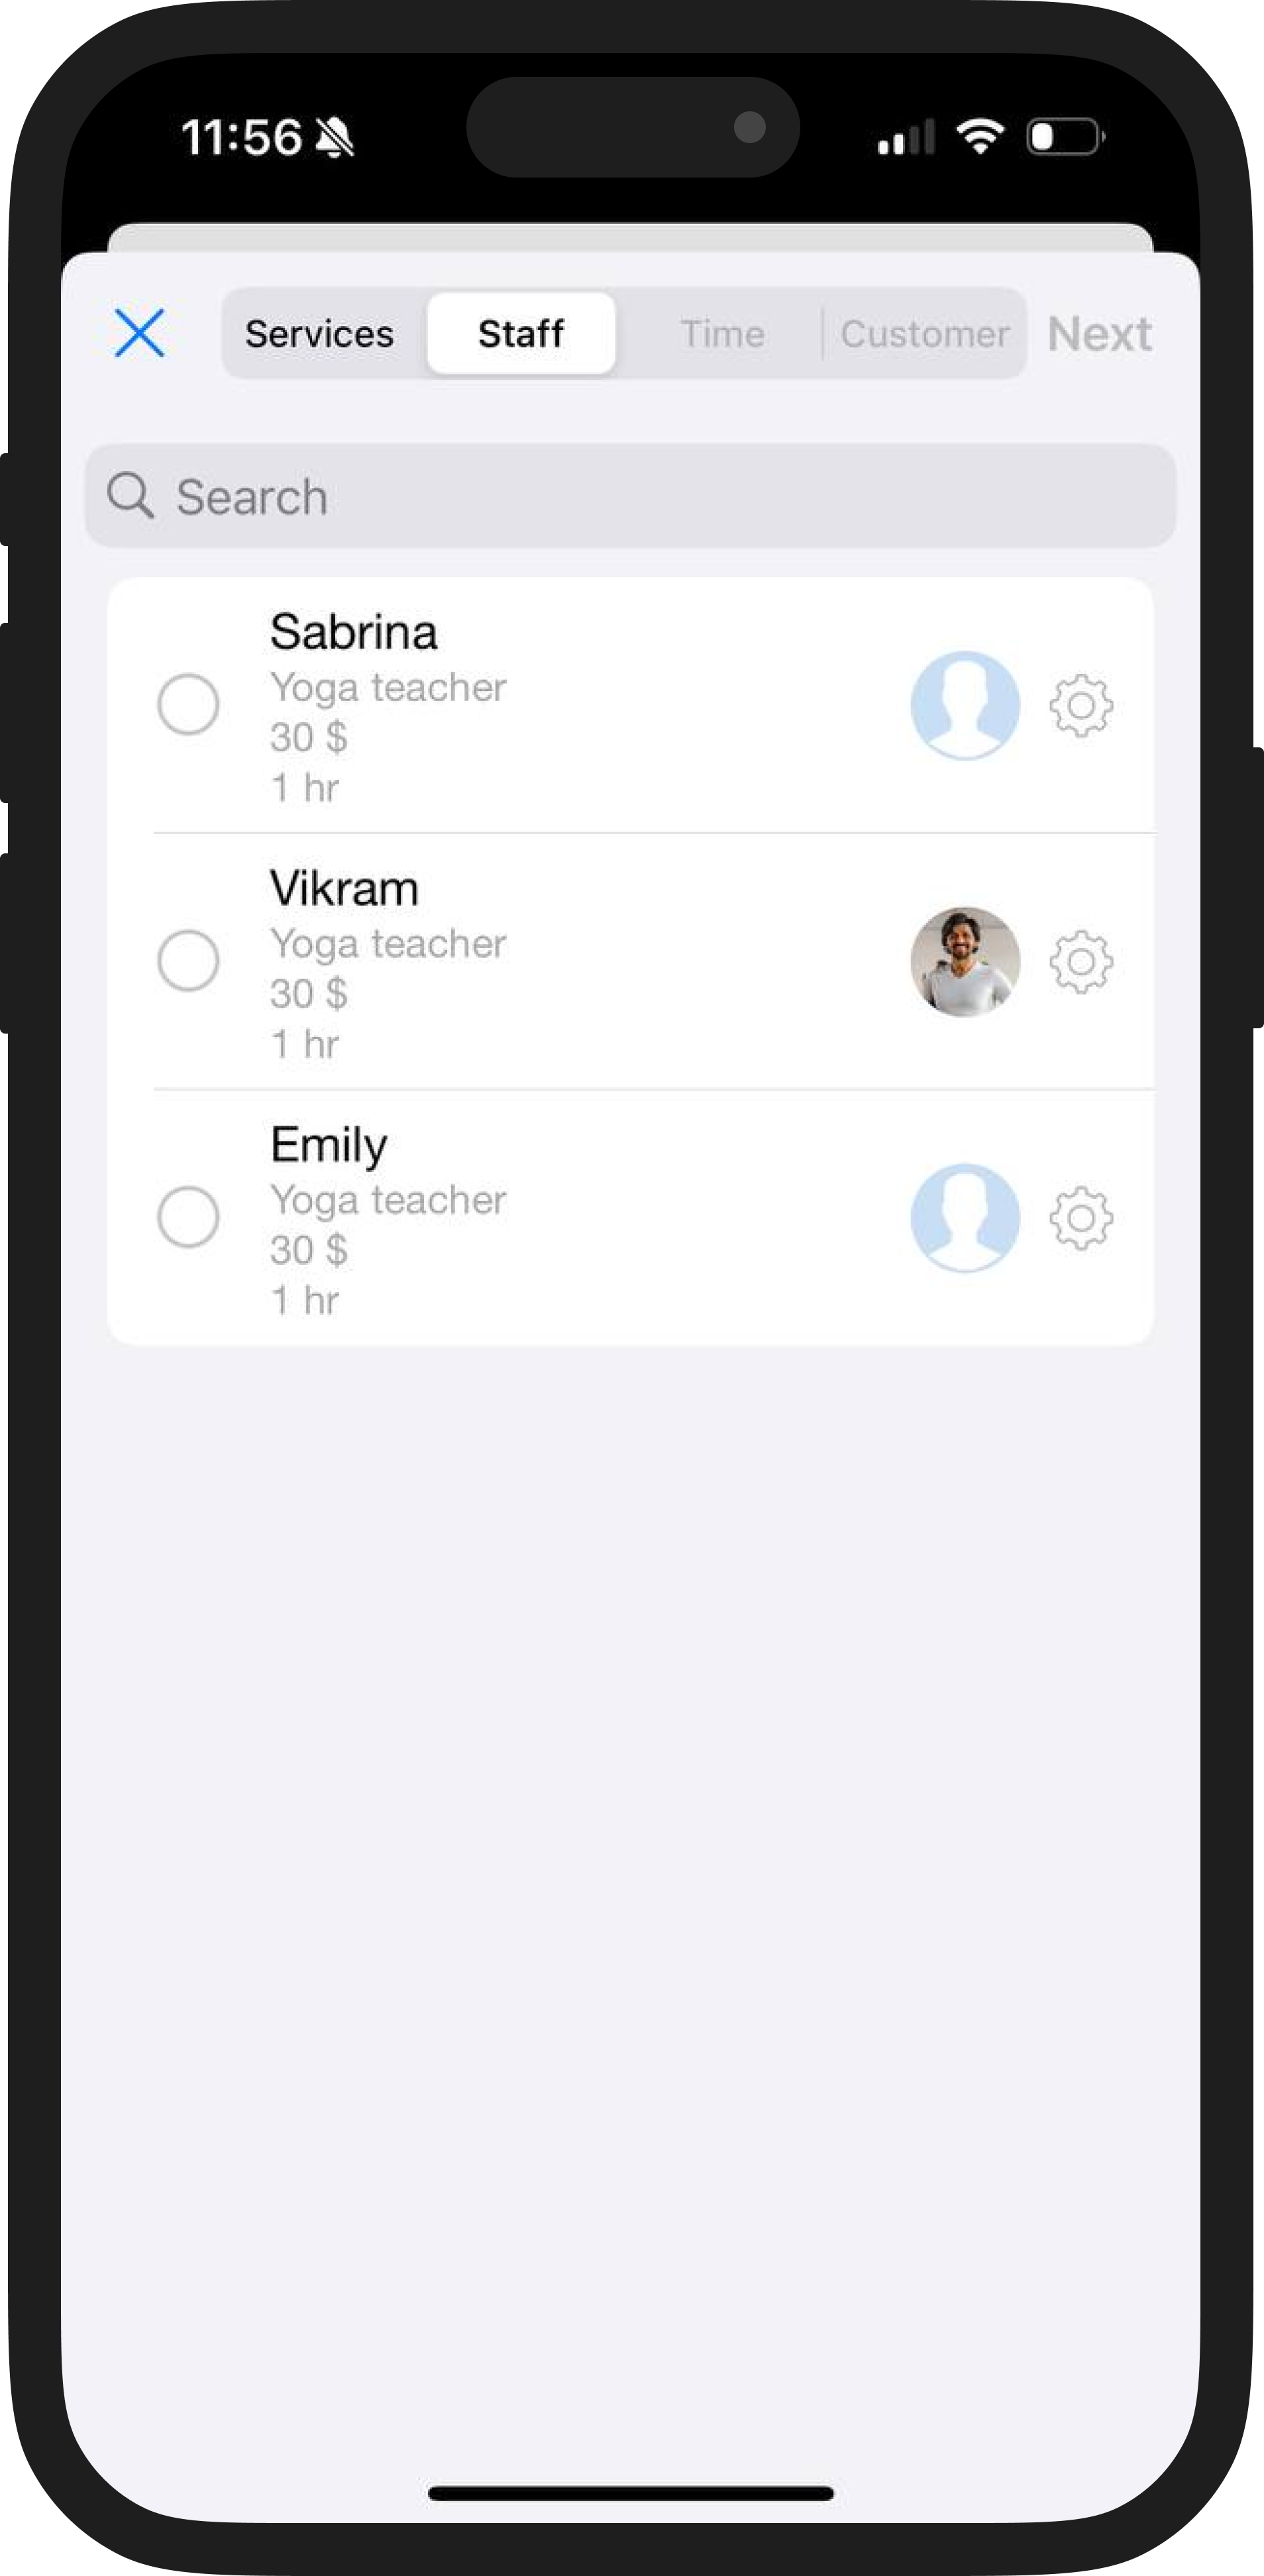
👩🔧 Scenario 1. Start by choosing a staff member
1. Choose a staff member.
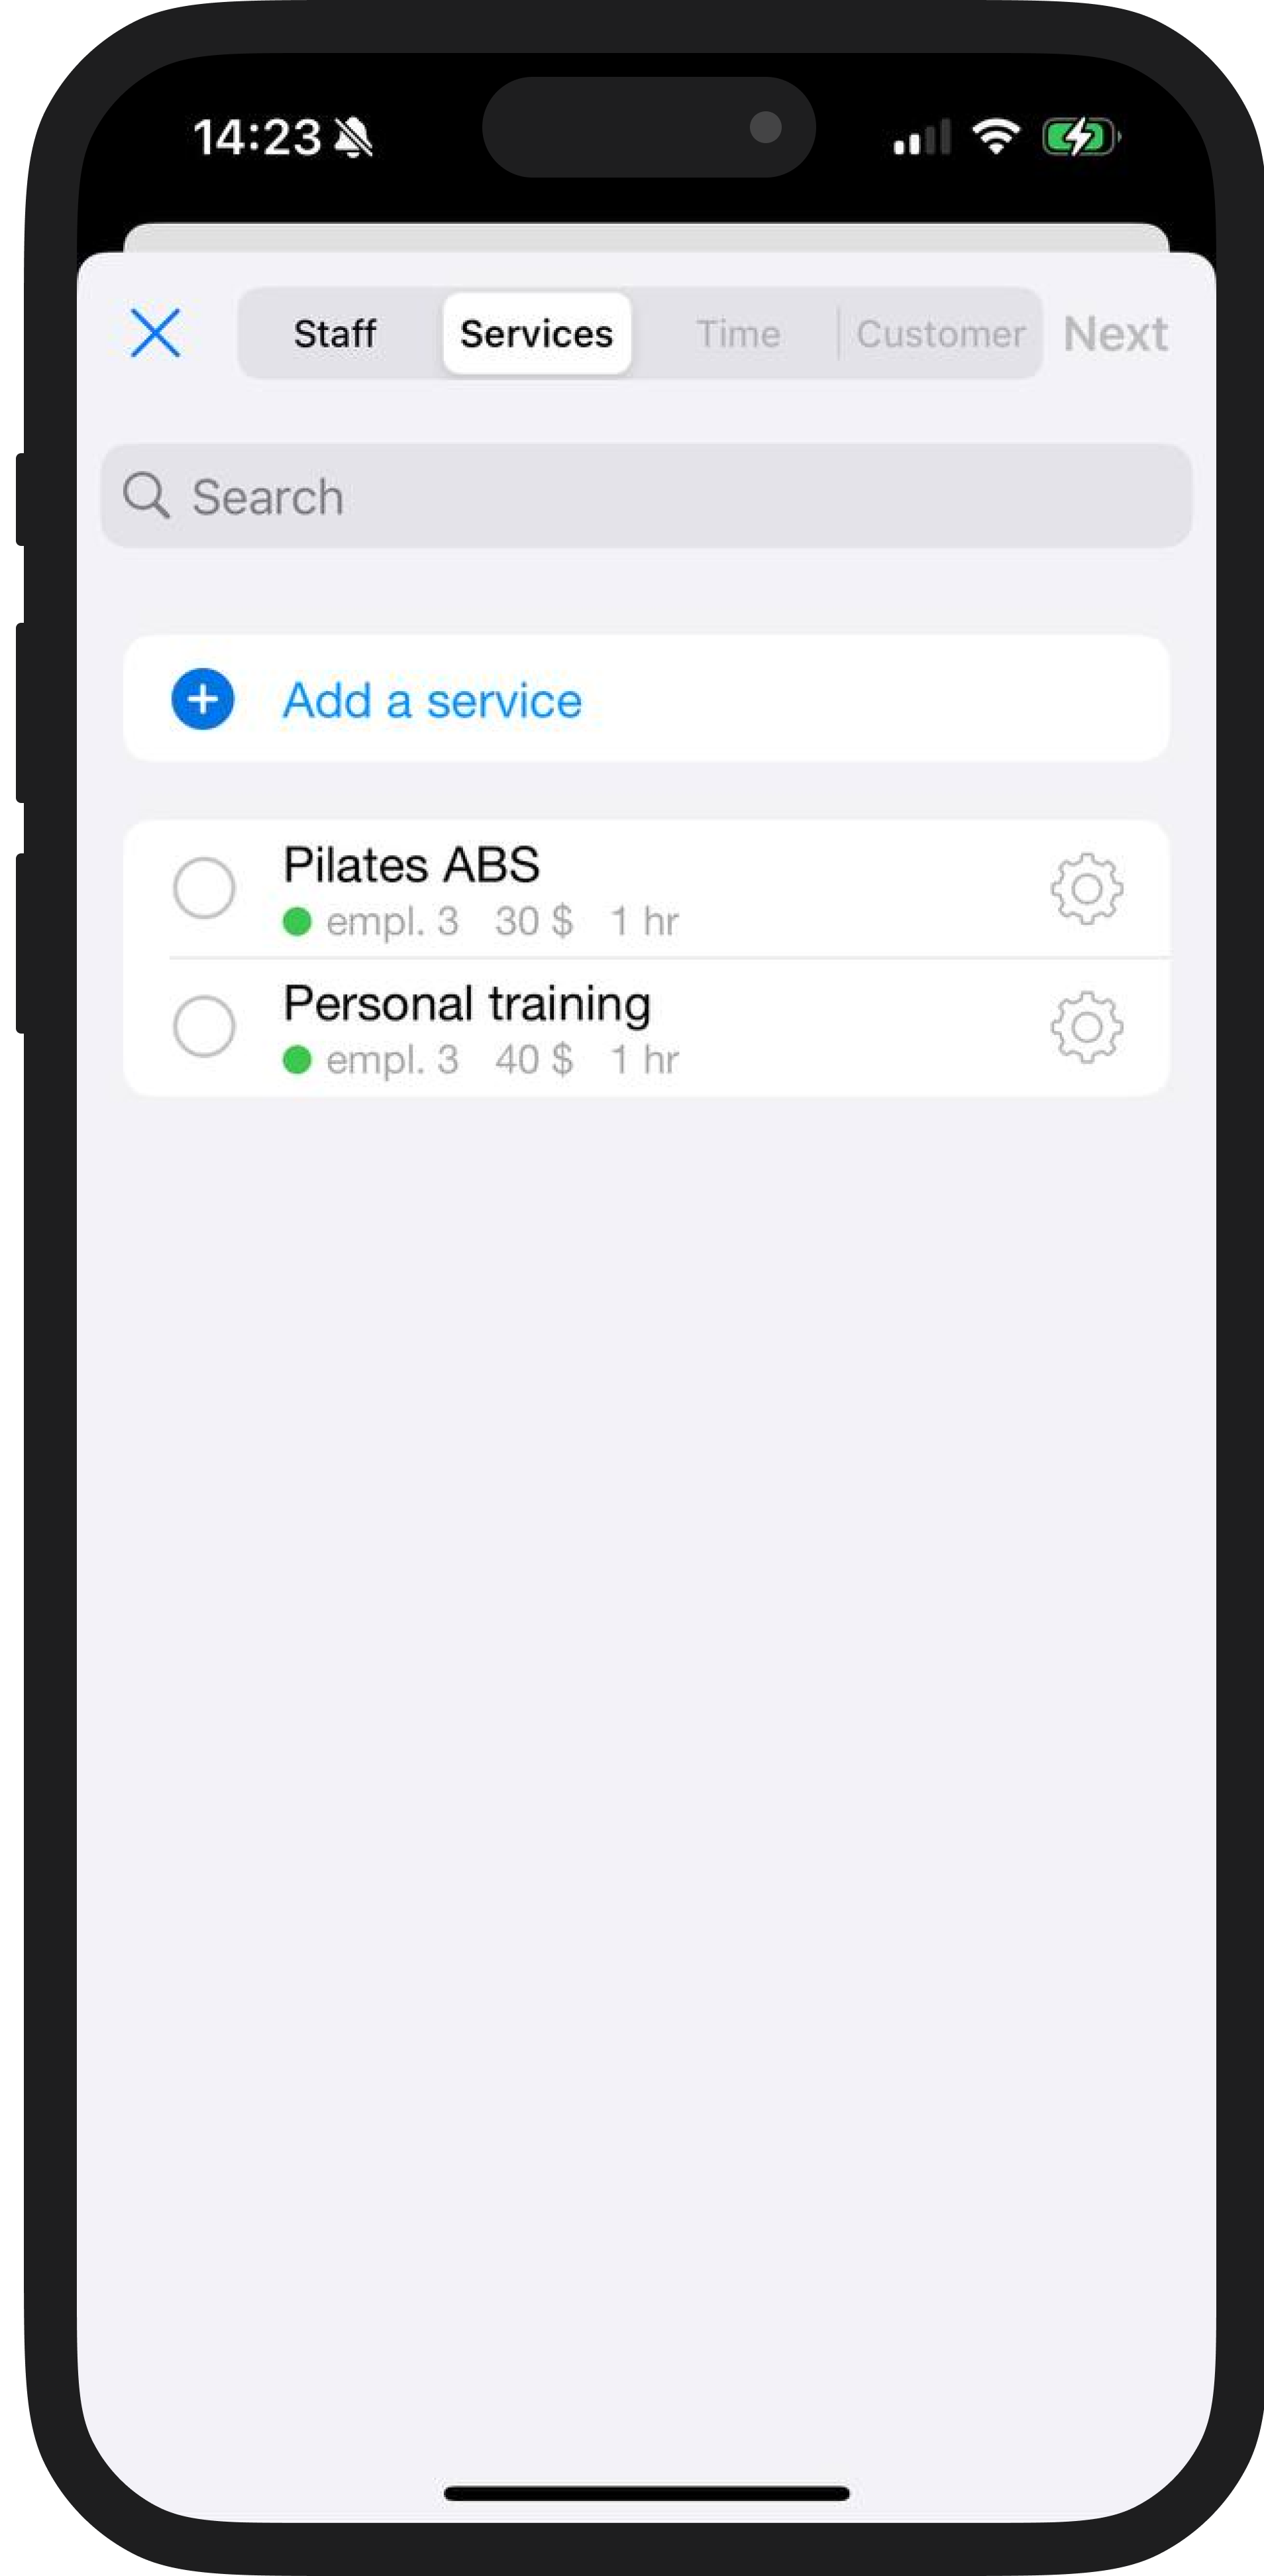
2. Choose one or more services they provide, or create a new one.
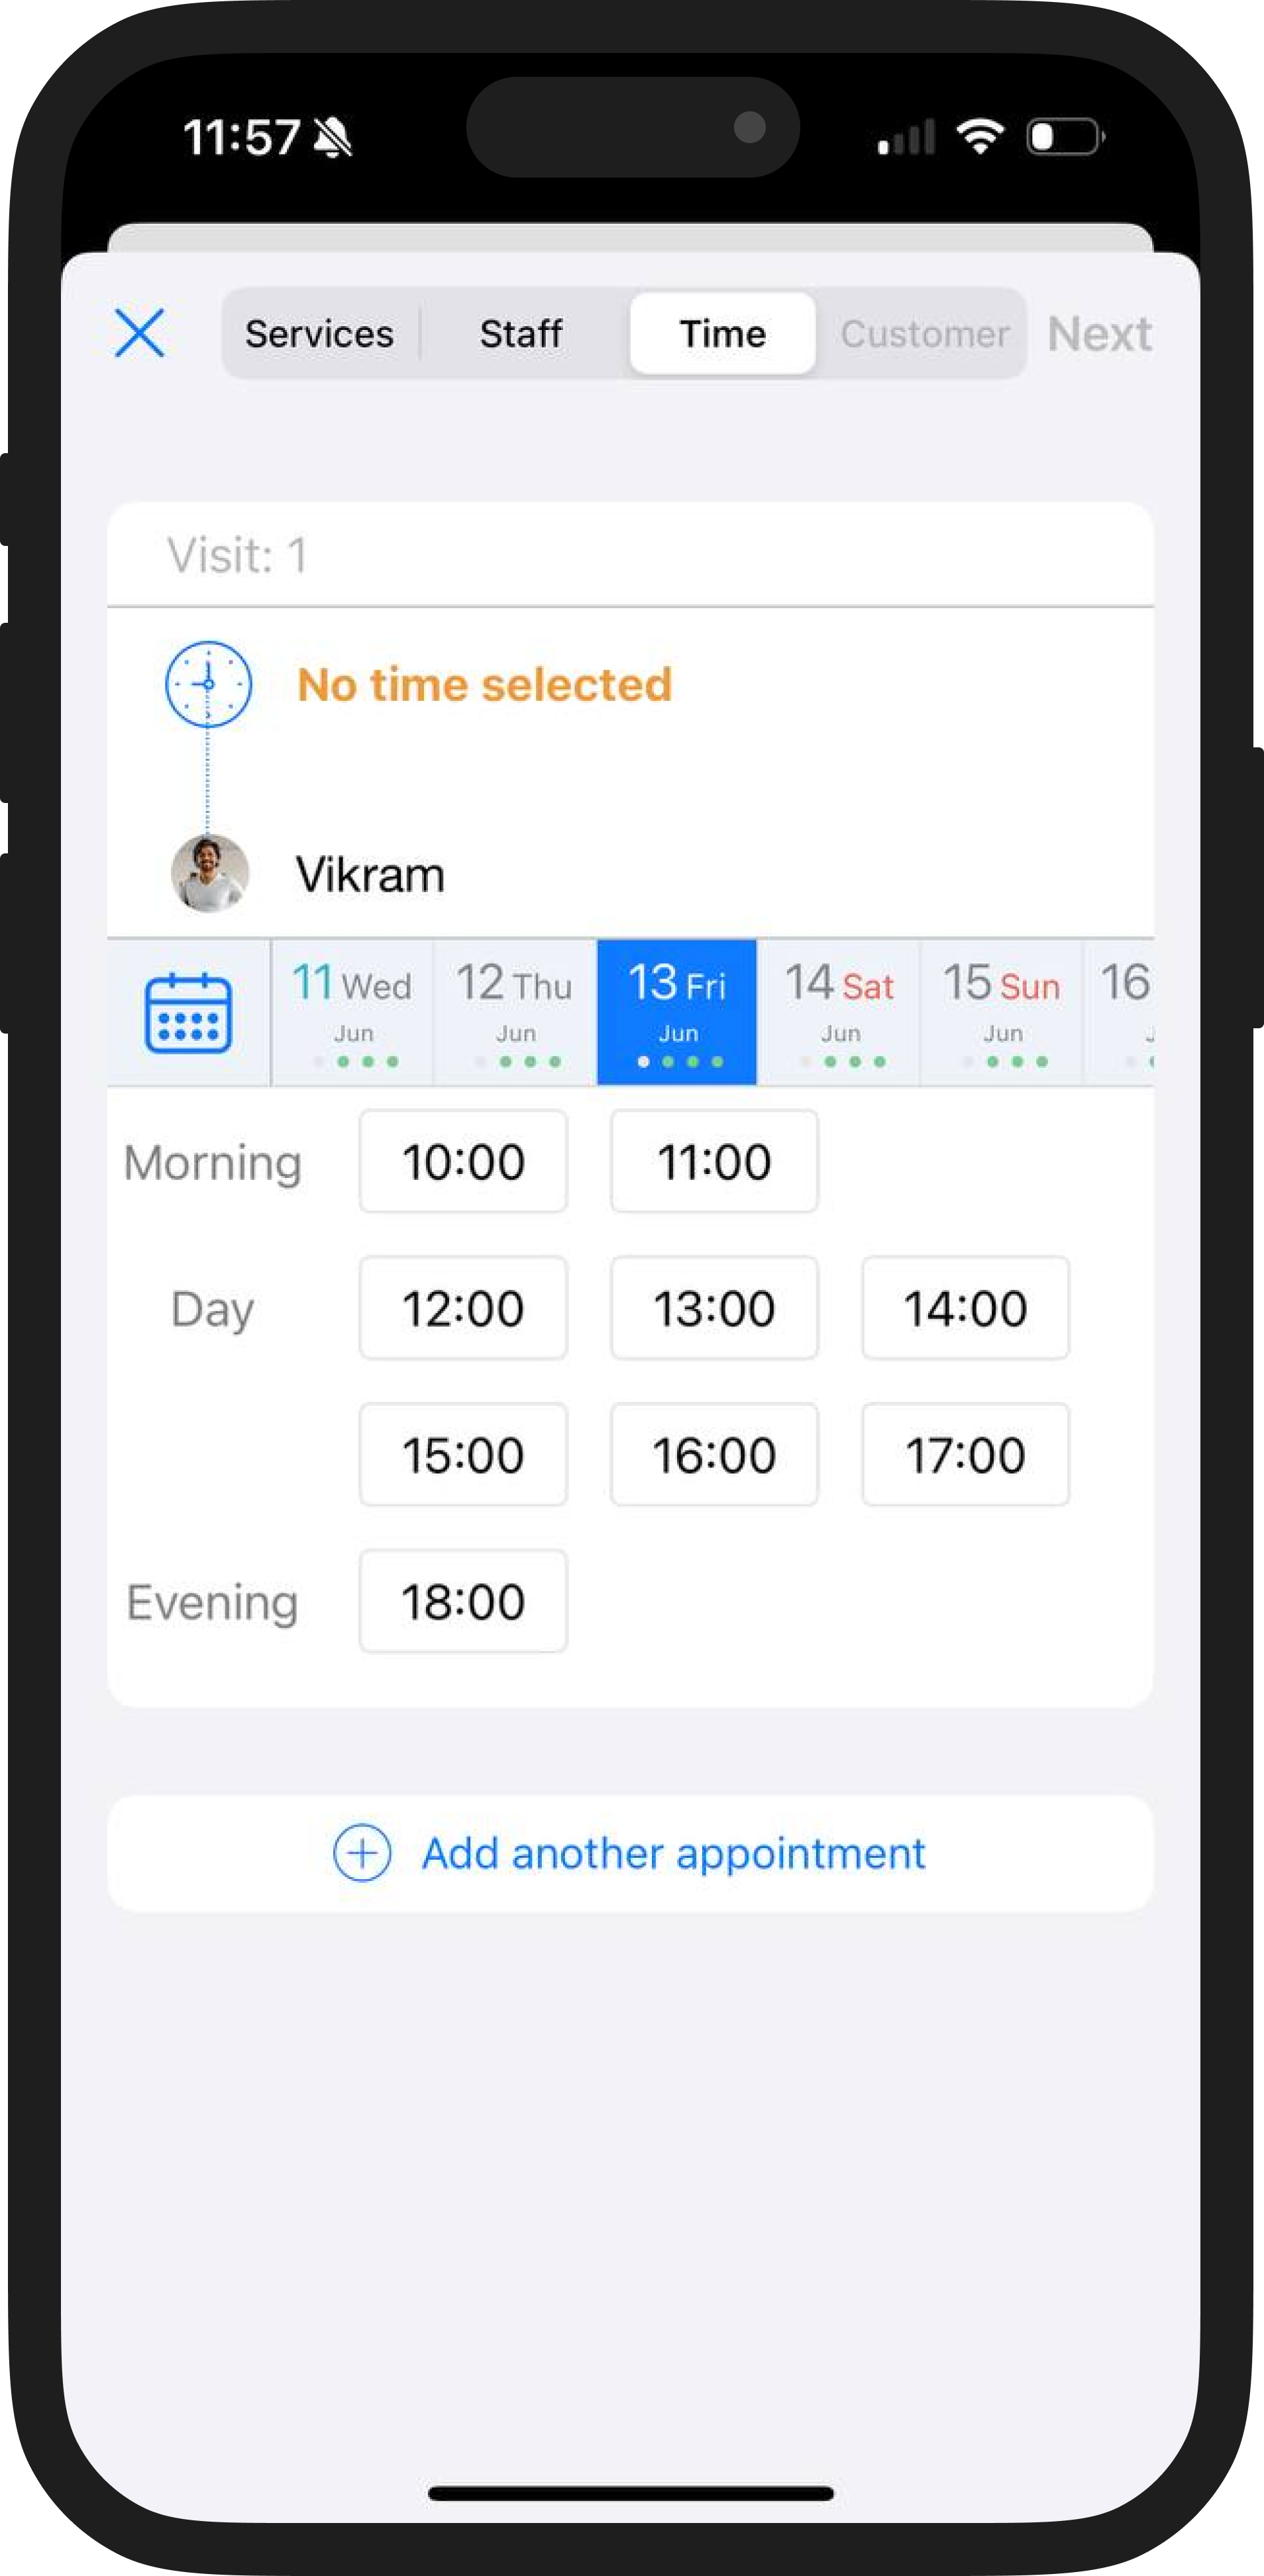
3. Choose the date and time for the appointment:
- For upcoming dates – simply select from the list;
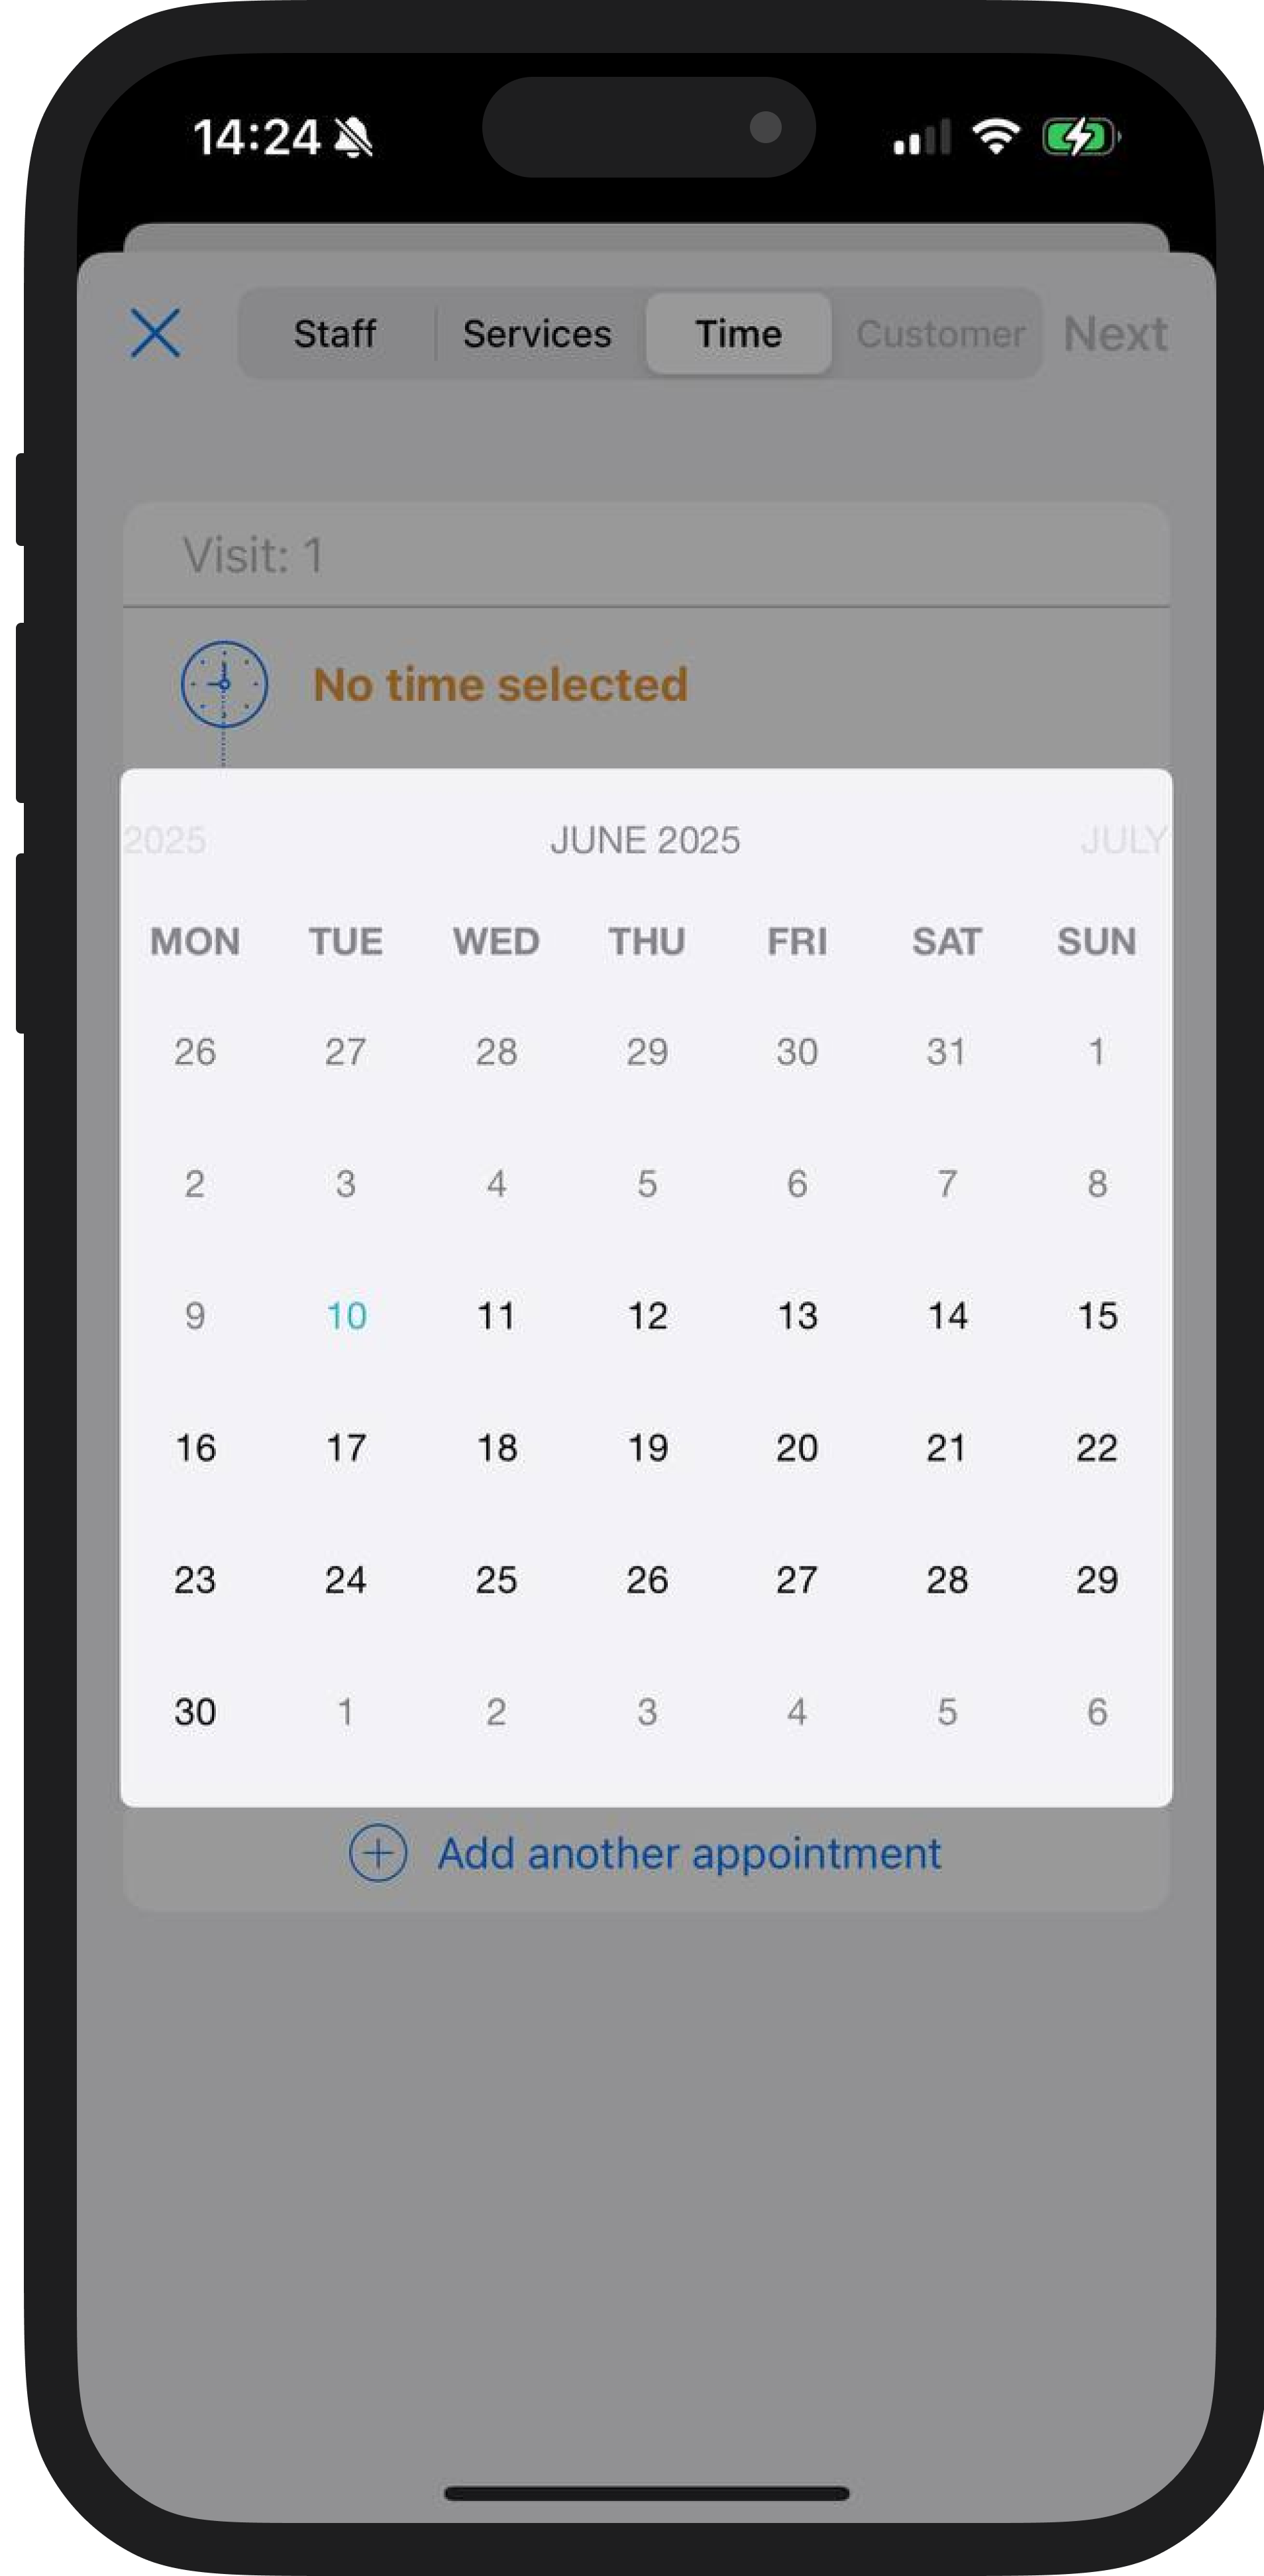
- For later dates – click the calendar icon and choose the date.
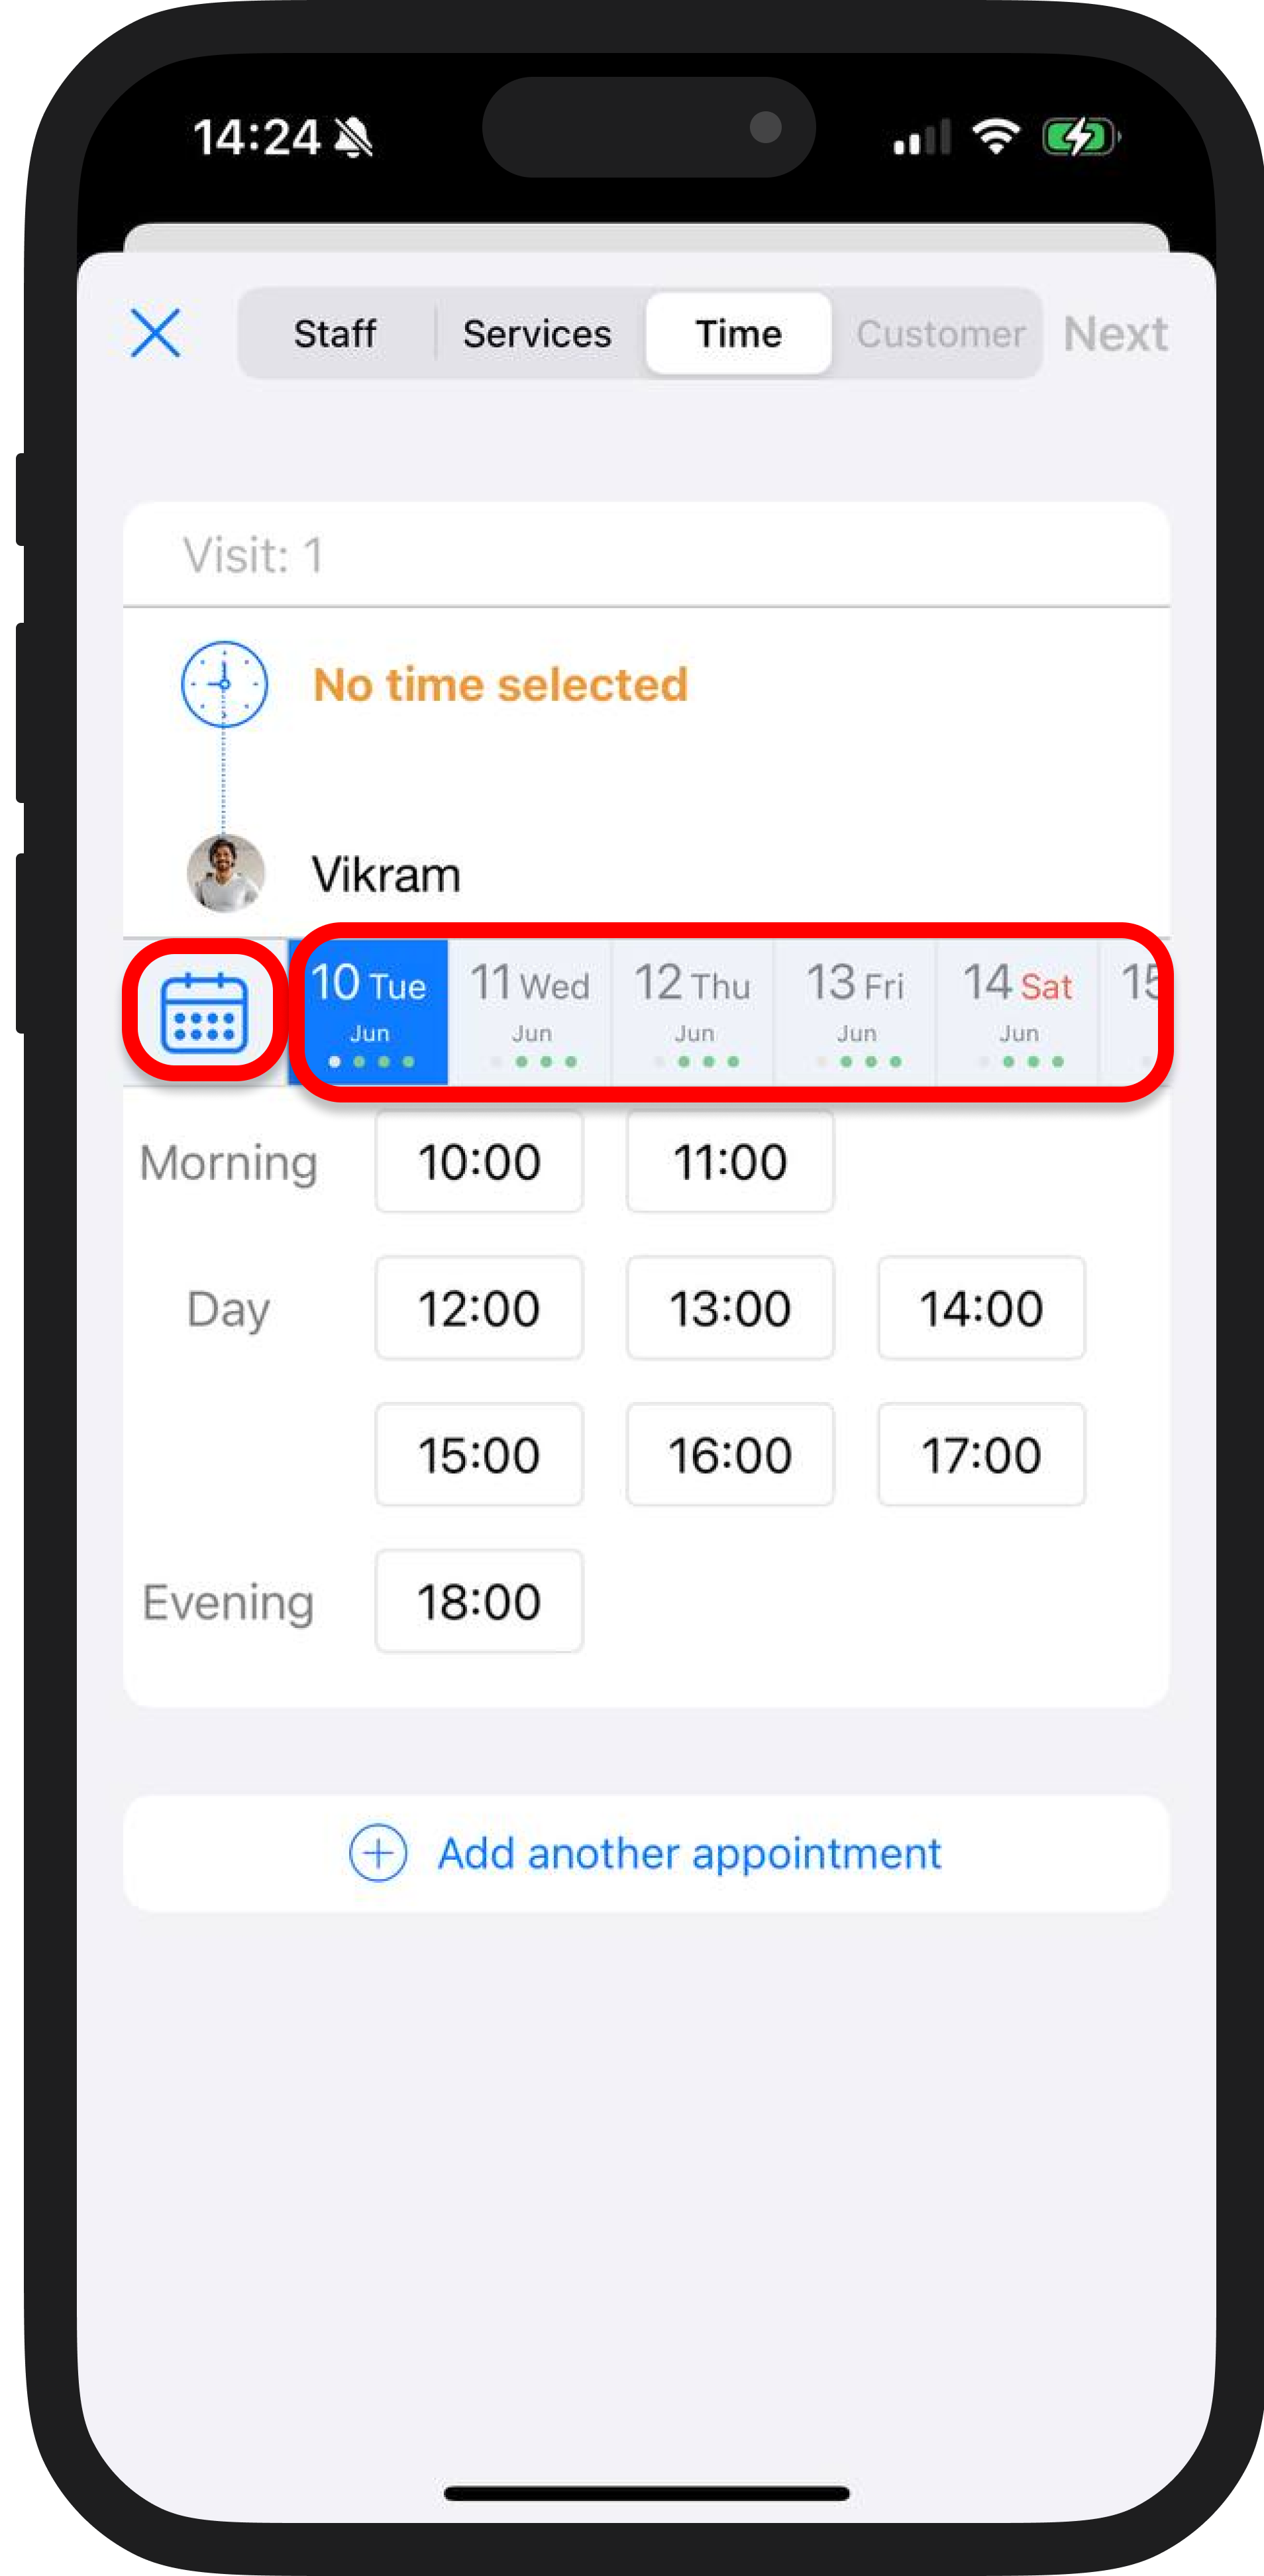
4. The system will show available slots; please choose the one that suits you best.

Interesting to know! 🧐
🟢 Green dots under the date show when a specialist has available time slots:
- 1 dot – night (12:00 AM–5:59 AM)
- 2 dots – morning (6:00 AM–11:59 AM)
- 3 dots – afternoon (12:00 PM–5:59 PM)
- 4 dots – evening (6:00 PM–11:59 PM)
🔘 Gray dots mean there is no suitable time available for the selected service.

5. If needed, you can add multiple appointments. For example, when services need to be provided regularly over a certain period of time.
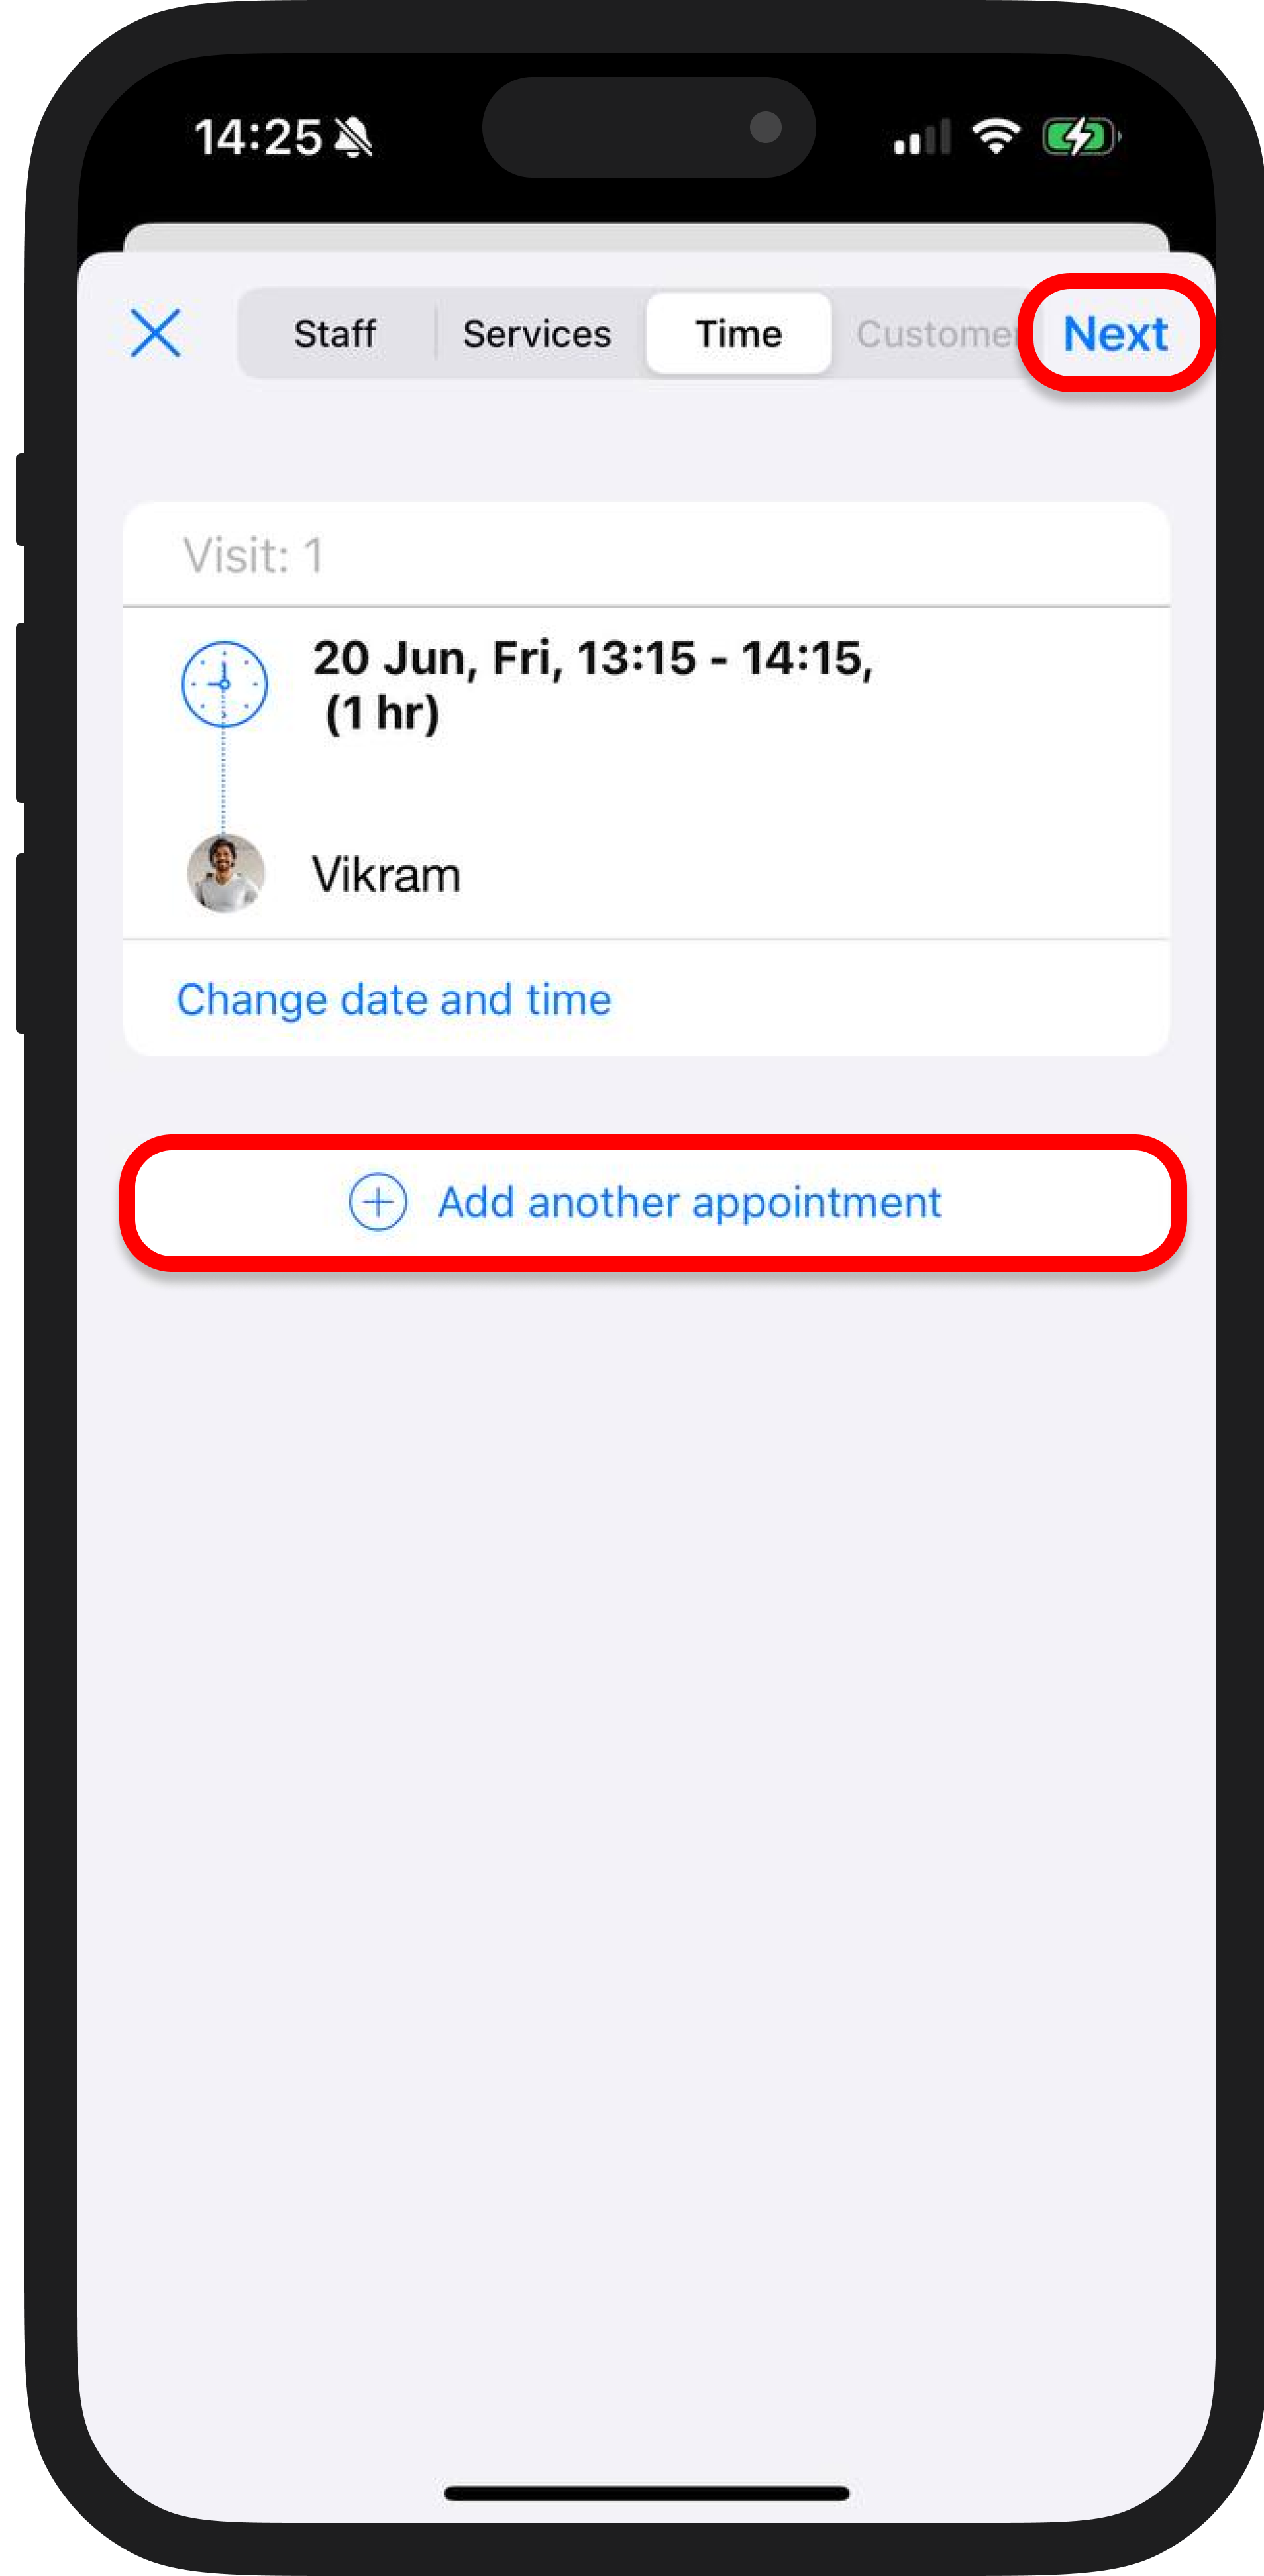
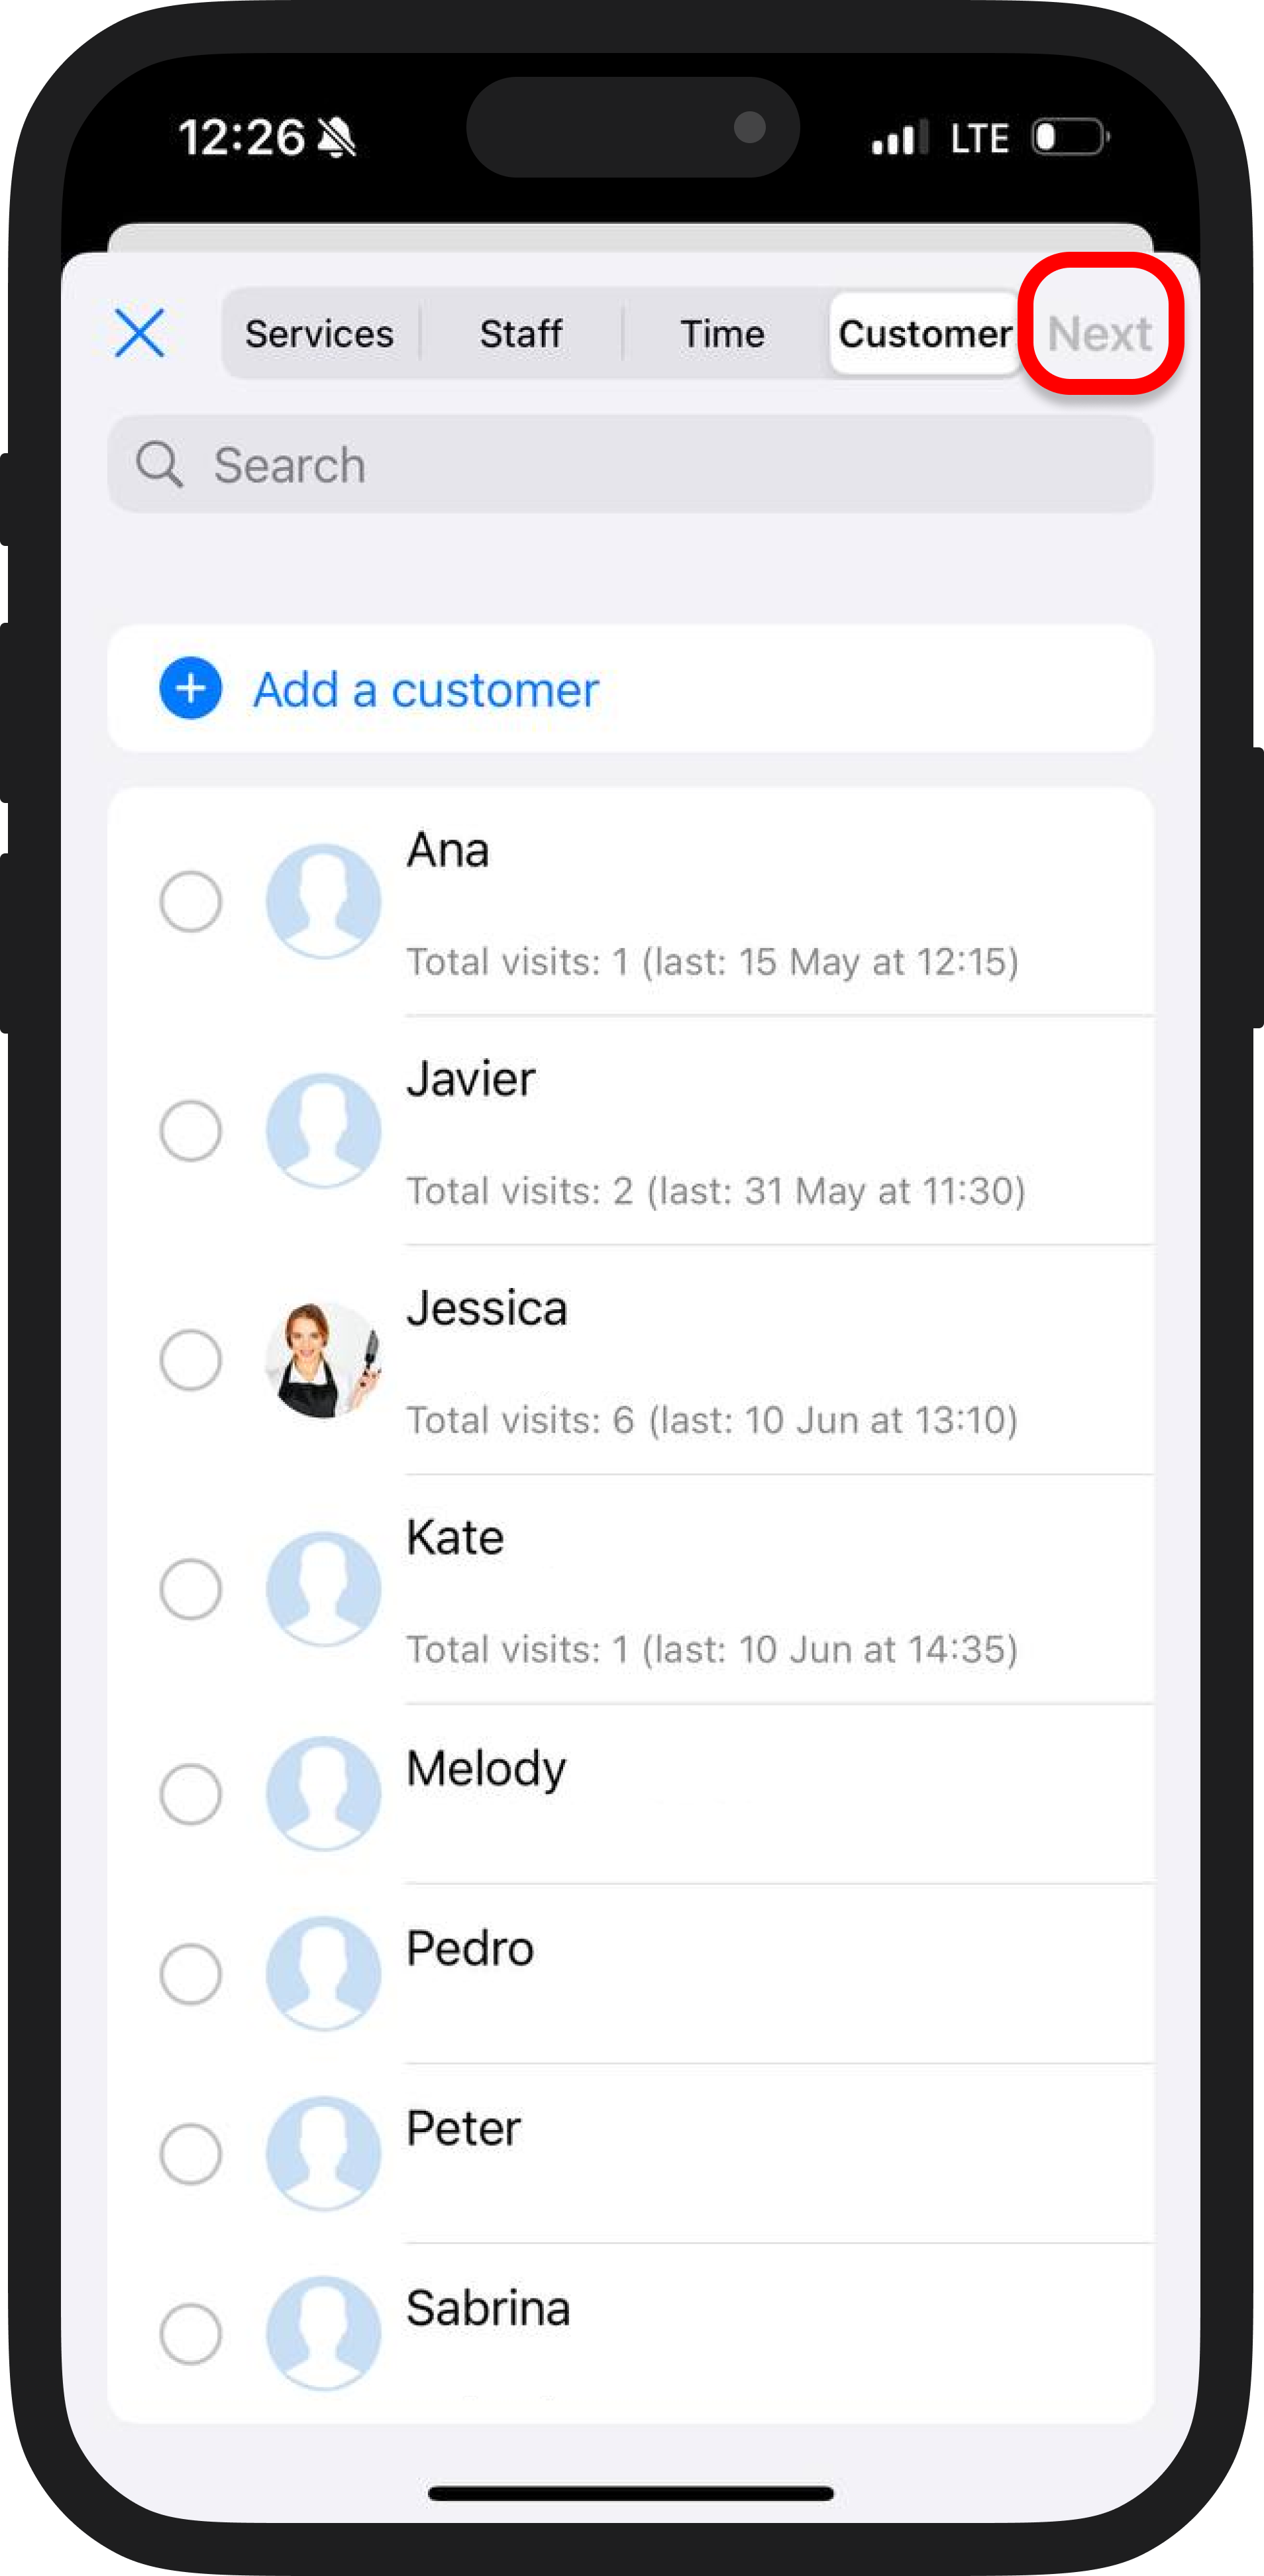
6. Next, select a customer or create a new one.

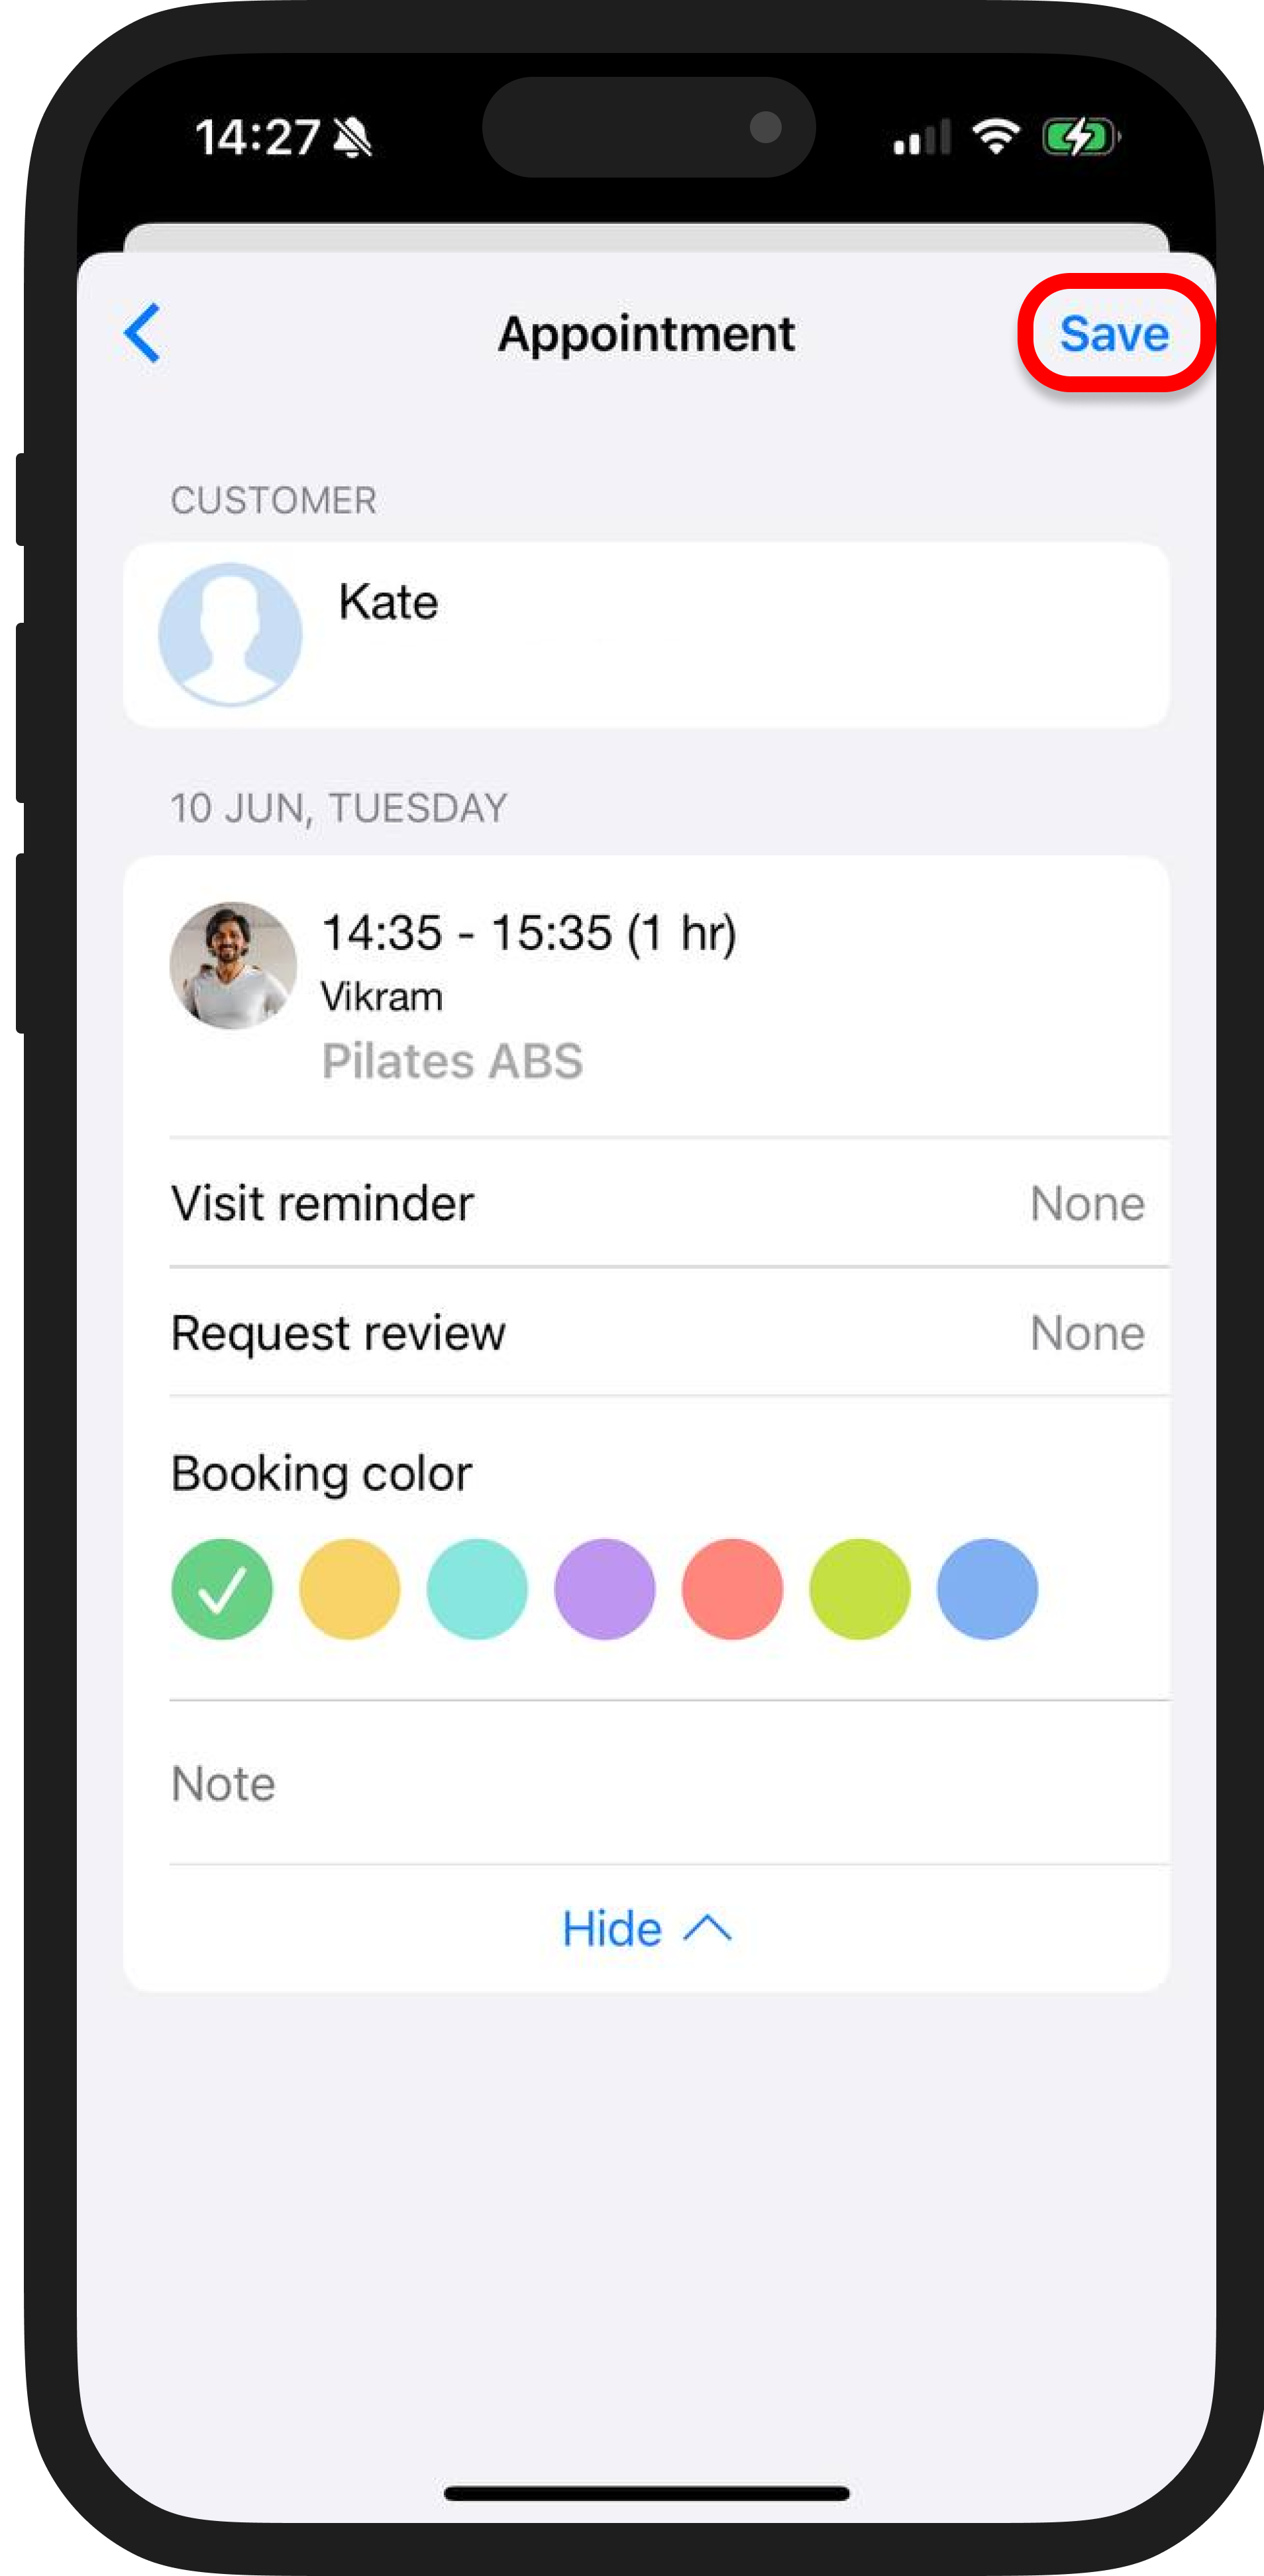
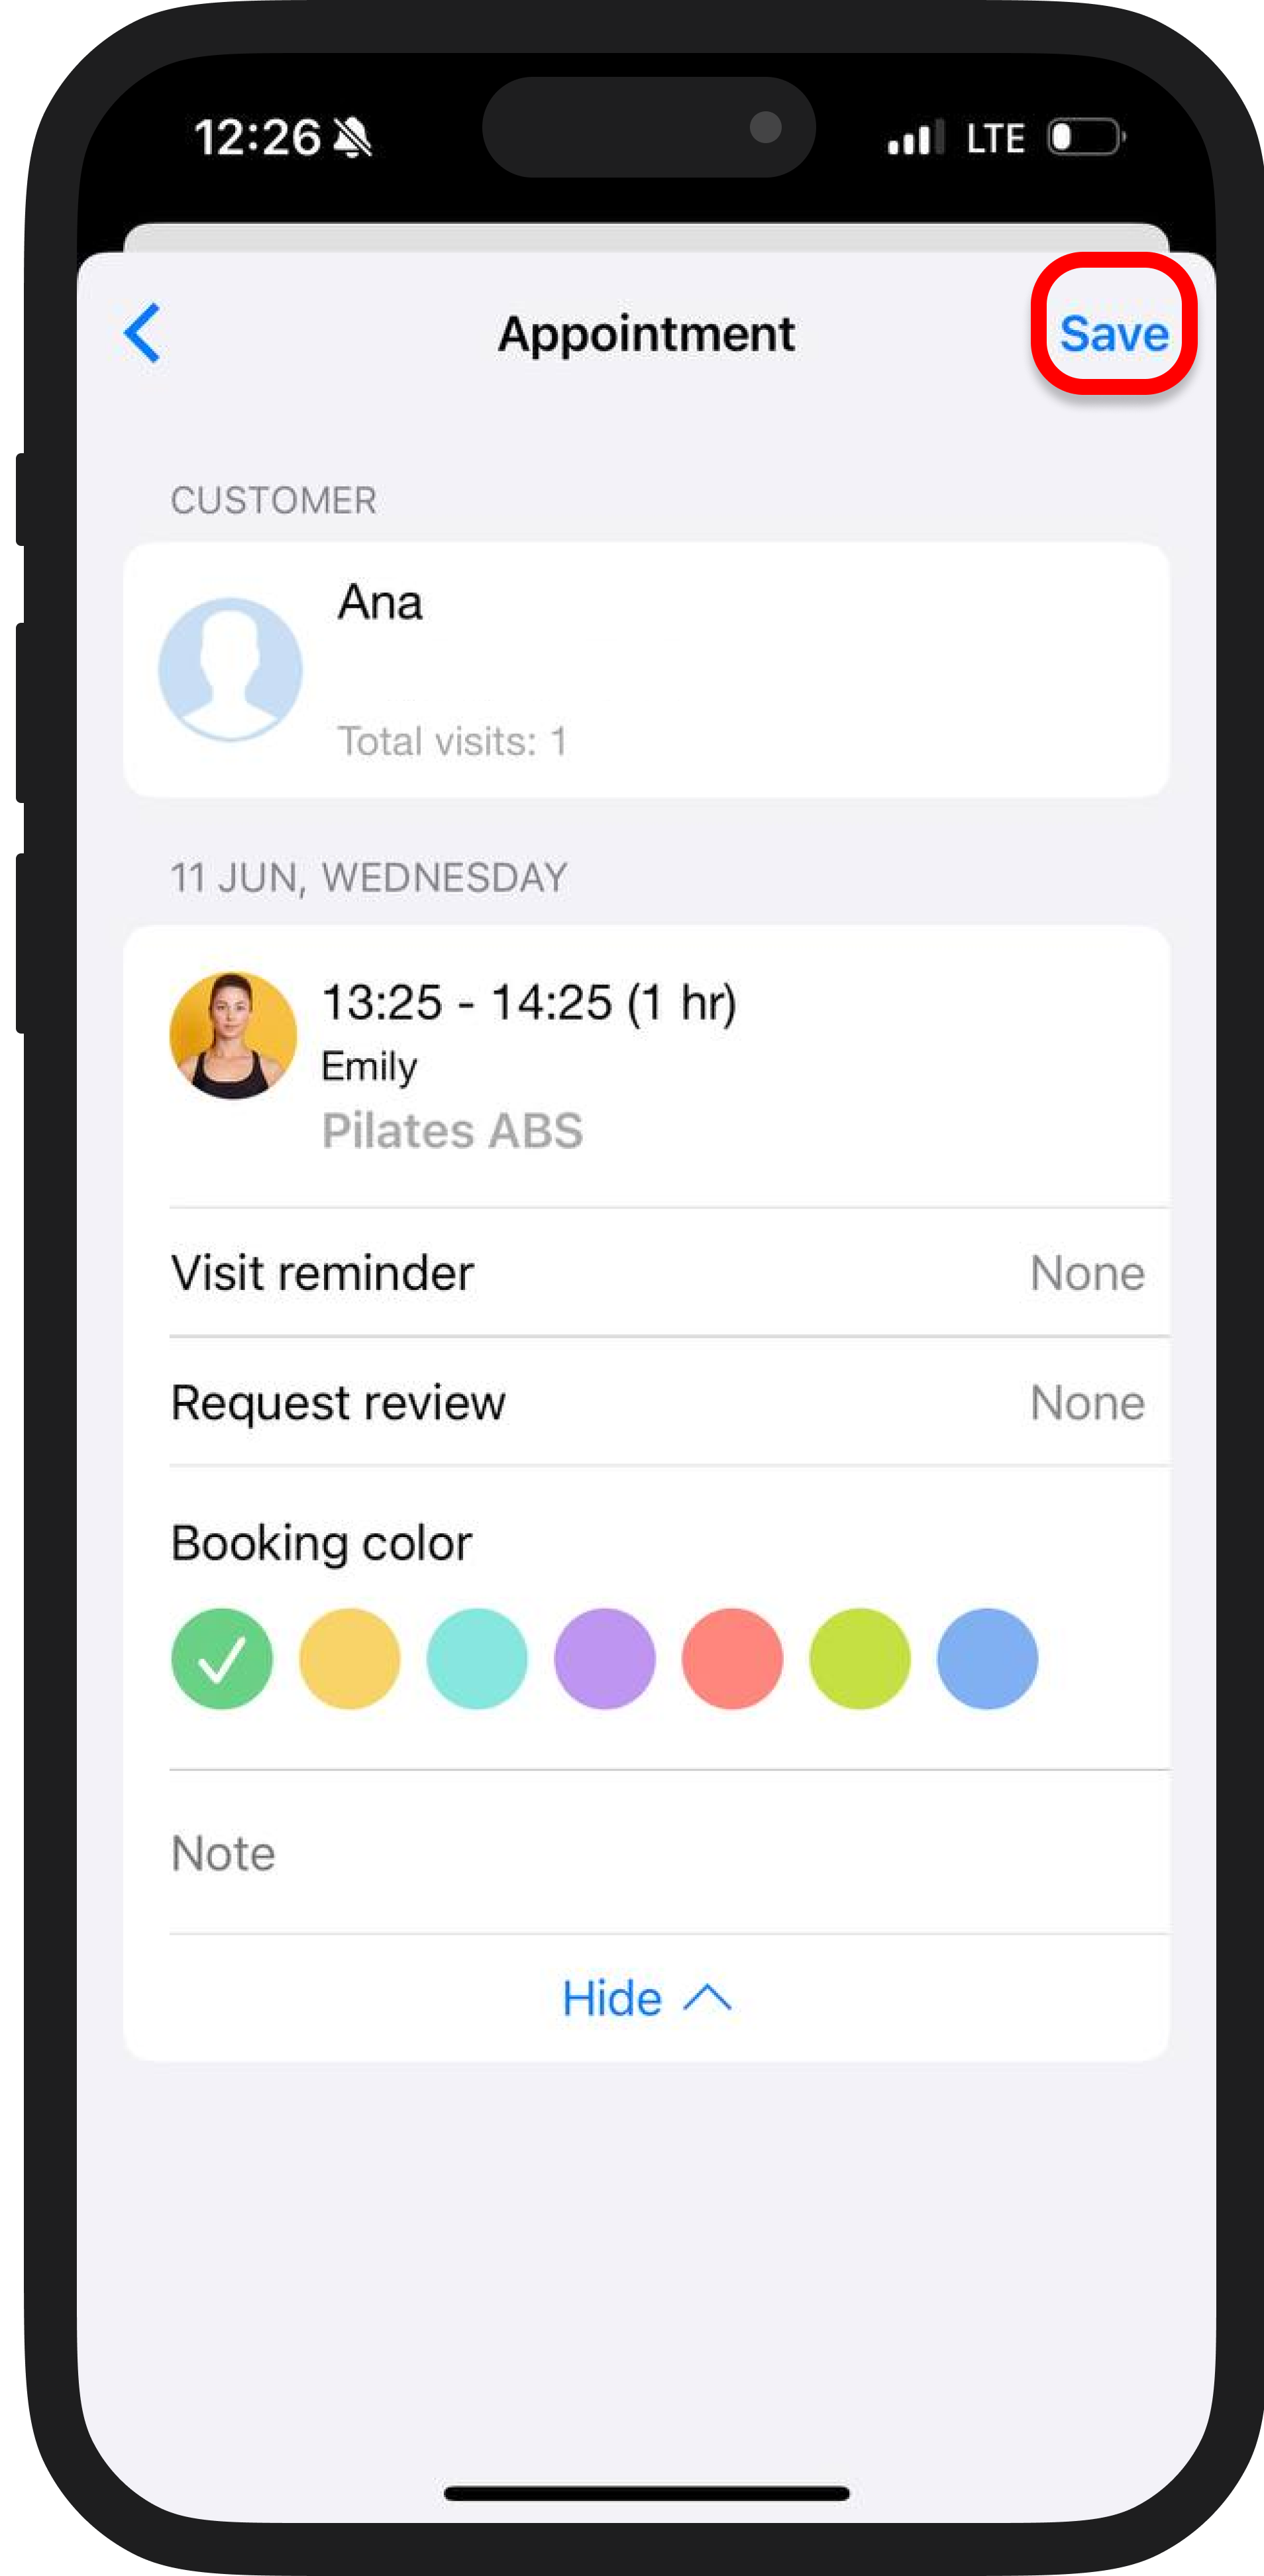
7. Set up notifications, choose the appointment color, and add a note.
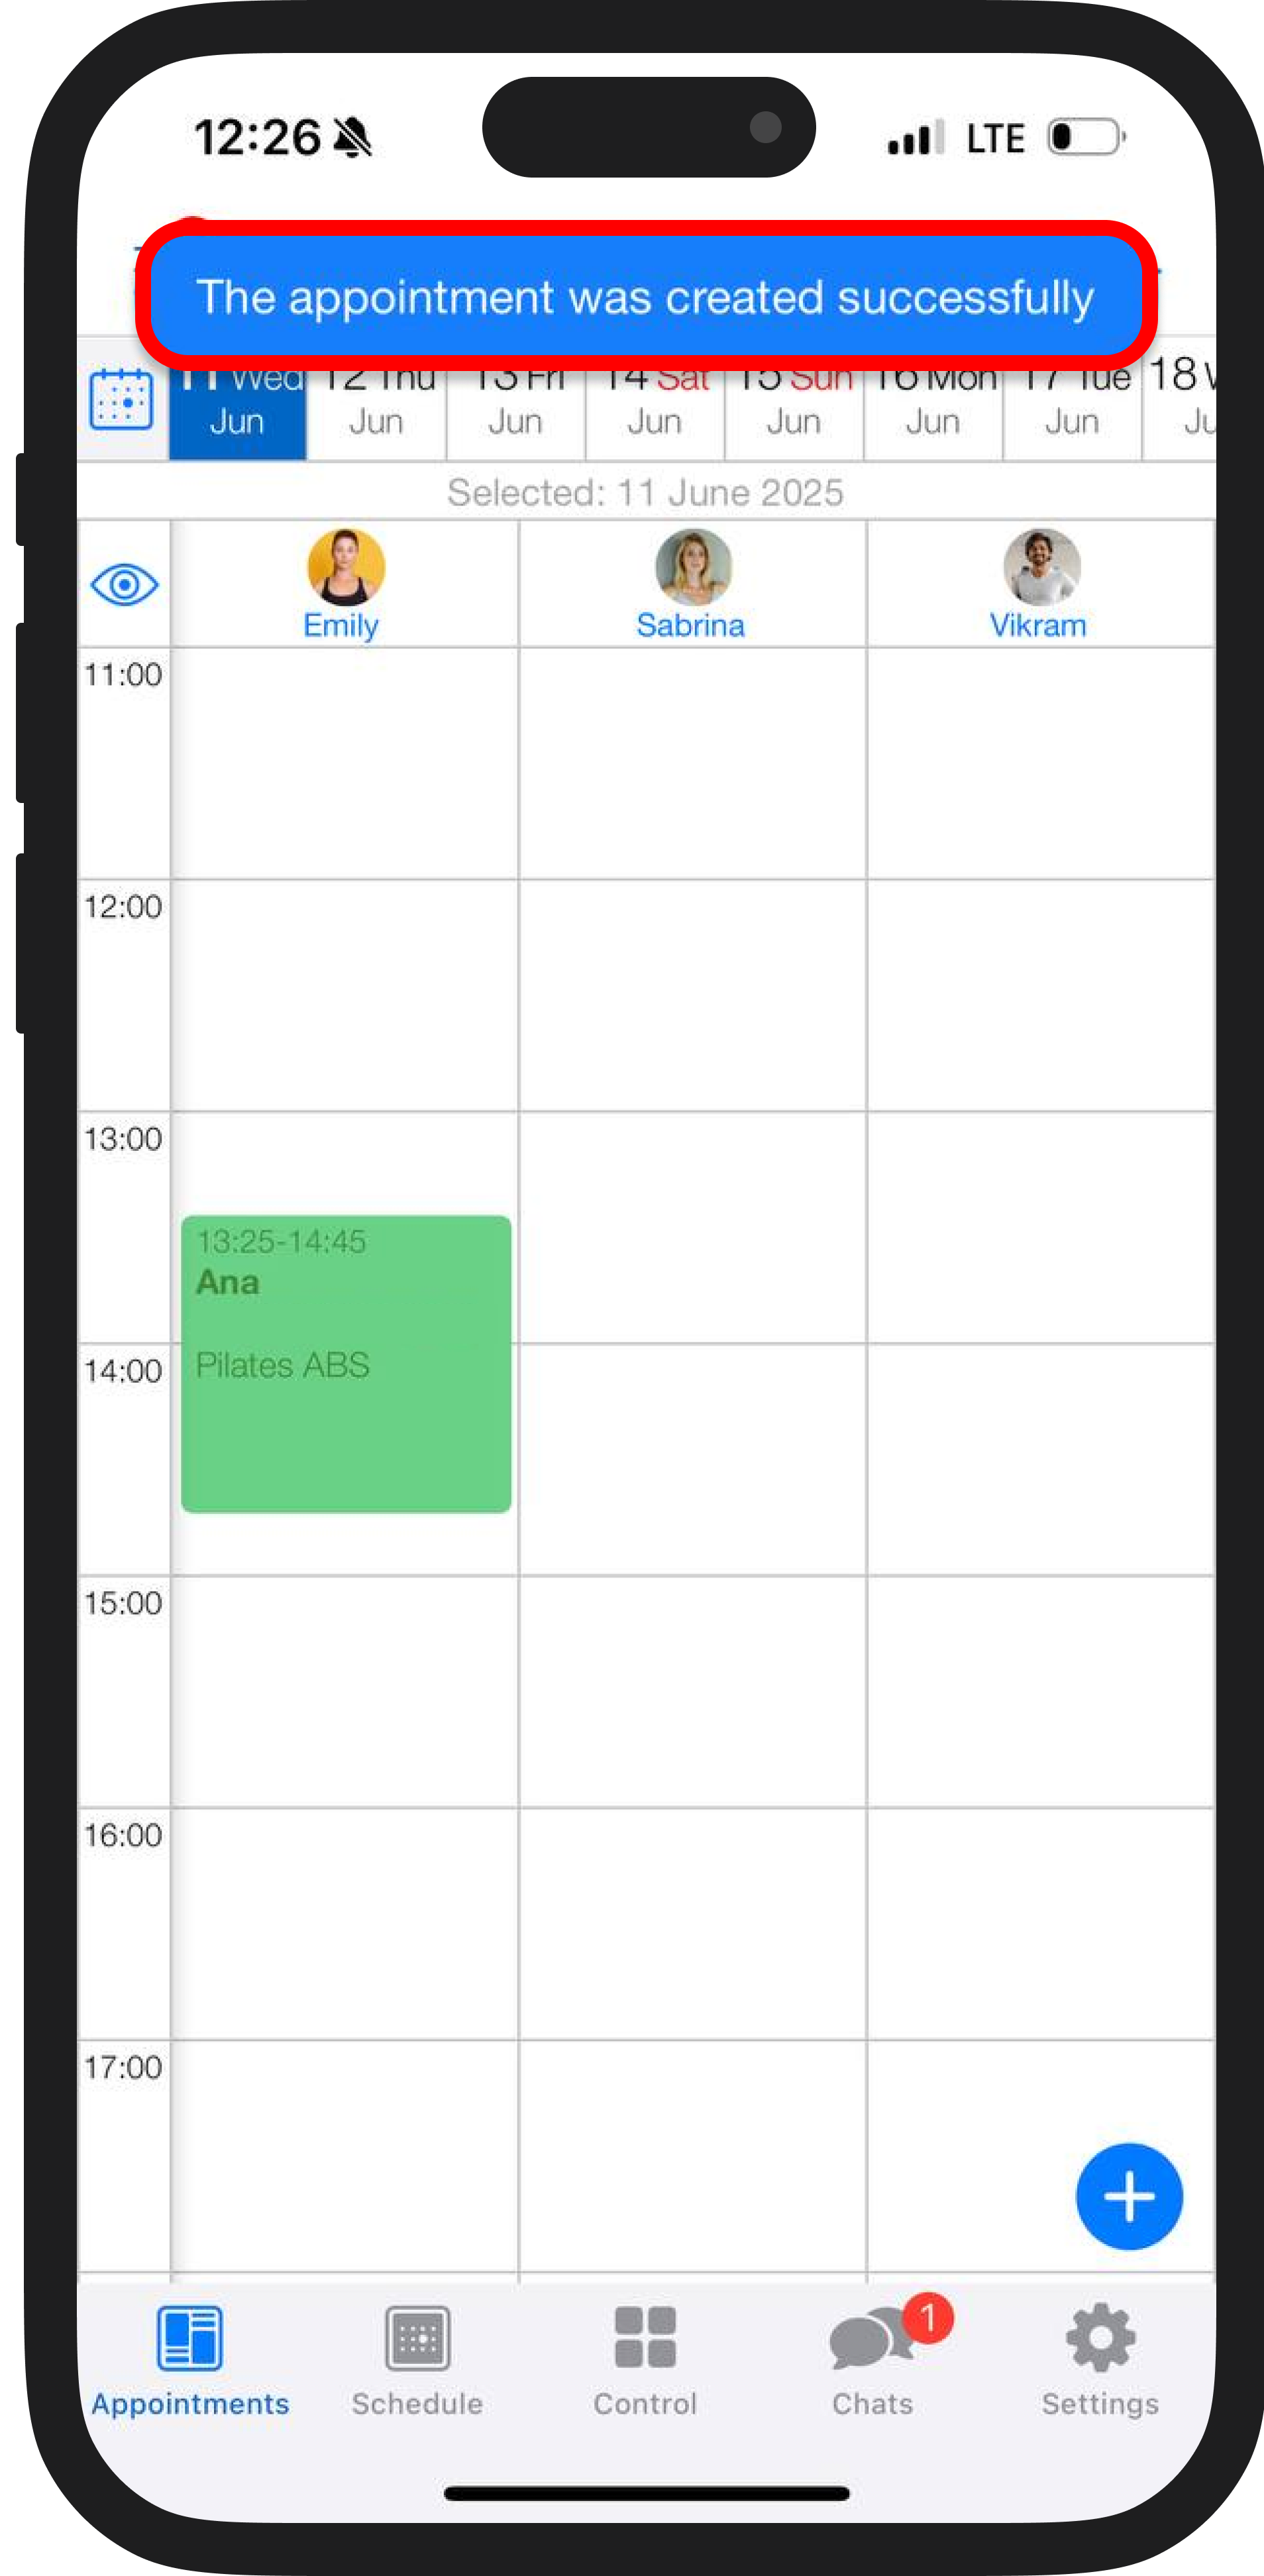
8. Click "Save" — the appointment will appear in the schedule.
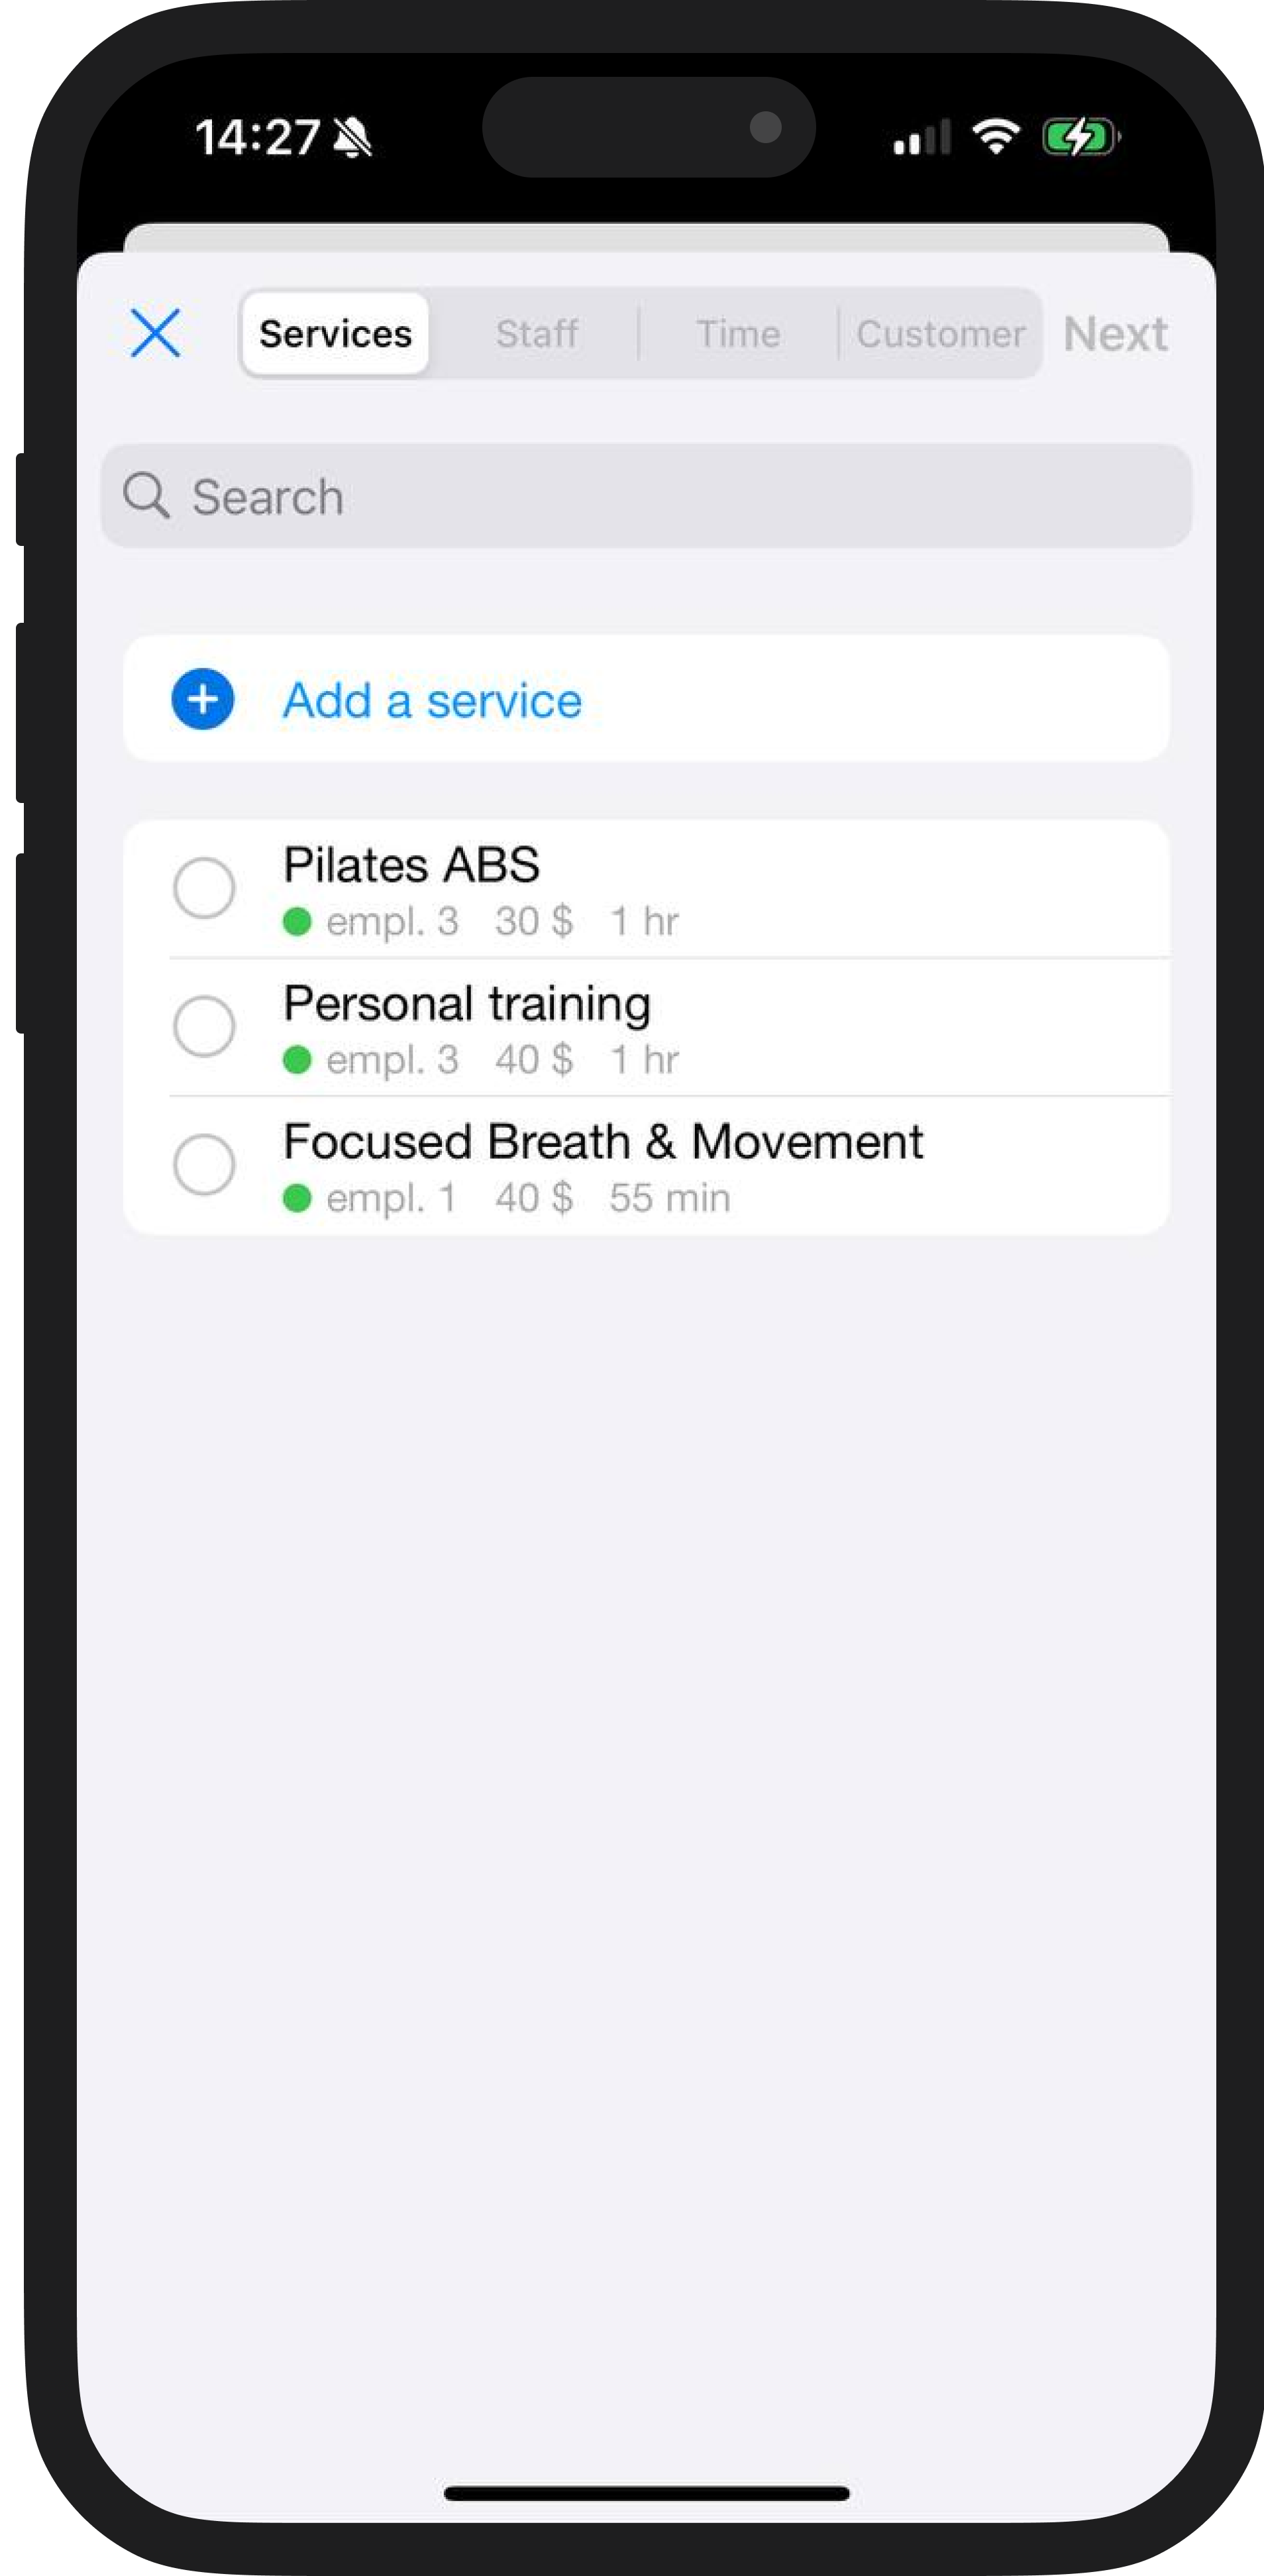
💅 Scenario 2. Start by choosing a service
1. Choose a service from the list or create a new one.
2. Select the staff member who can provide the service.
3. Next, select the date and time (same as in the previous scenario).
4. If needed, add multiple appointments in a row.
5. Specify the client or create a new one.
6. Edit the notifications and additional settings.
7. Click "Save" — it is done!

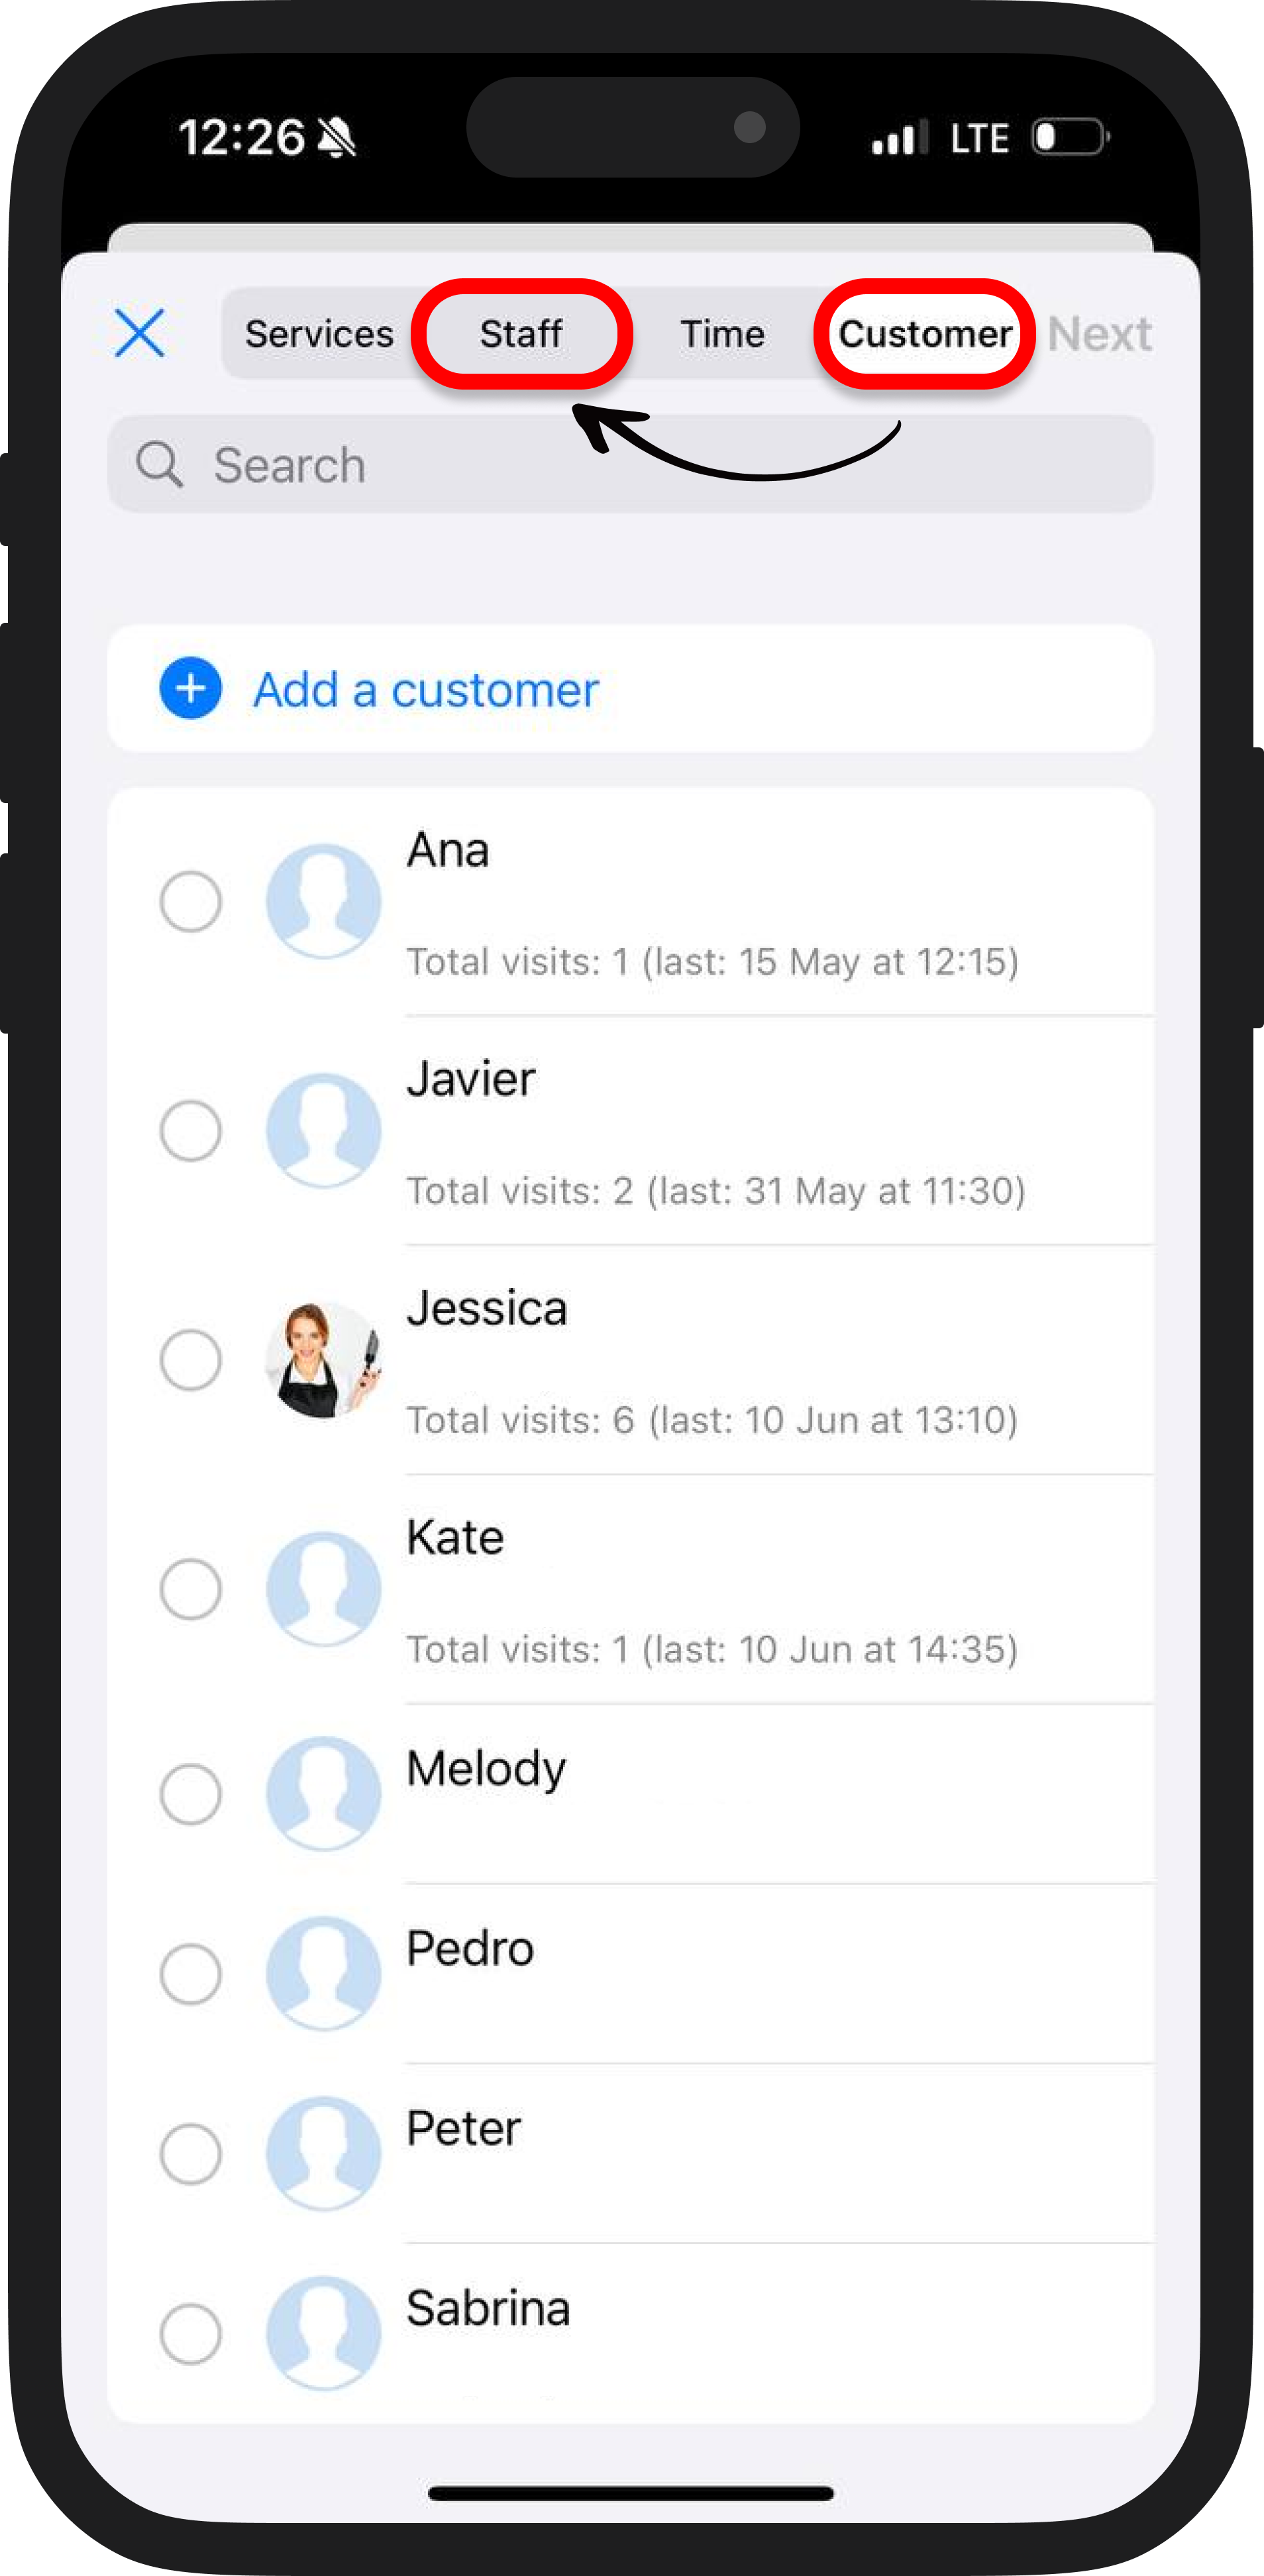
What if I need to go back? 🤔
If you want to return to a previous step in creating an appointment, just click the desired stage in the top menu. This is handy if you change your mind or made a mistake at any point.
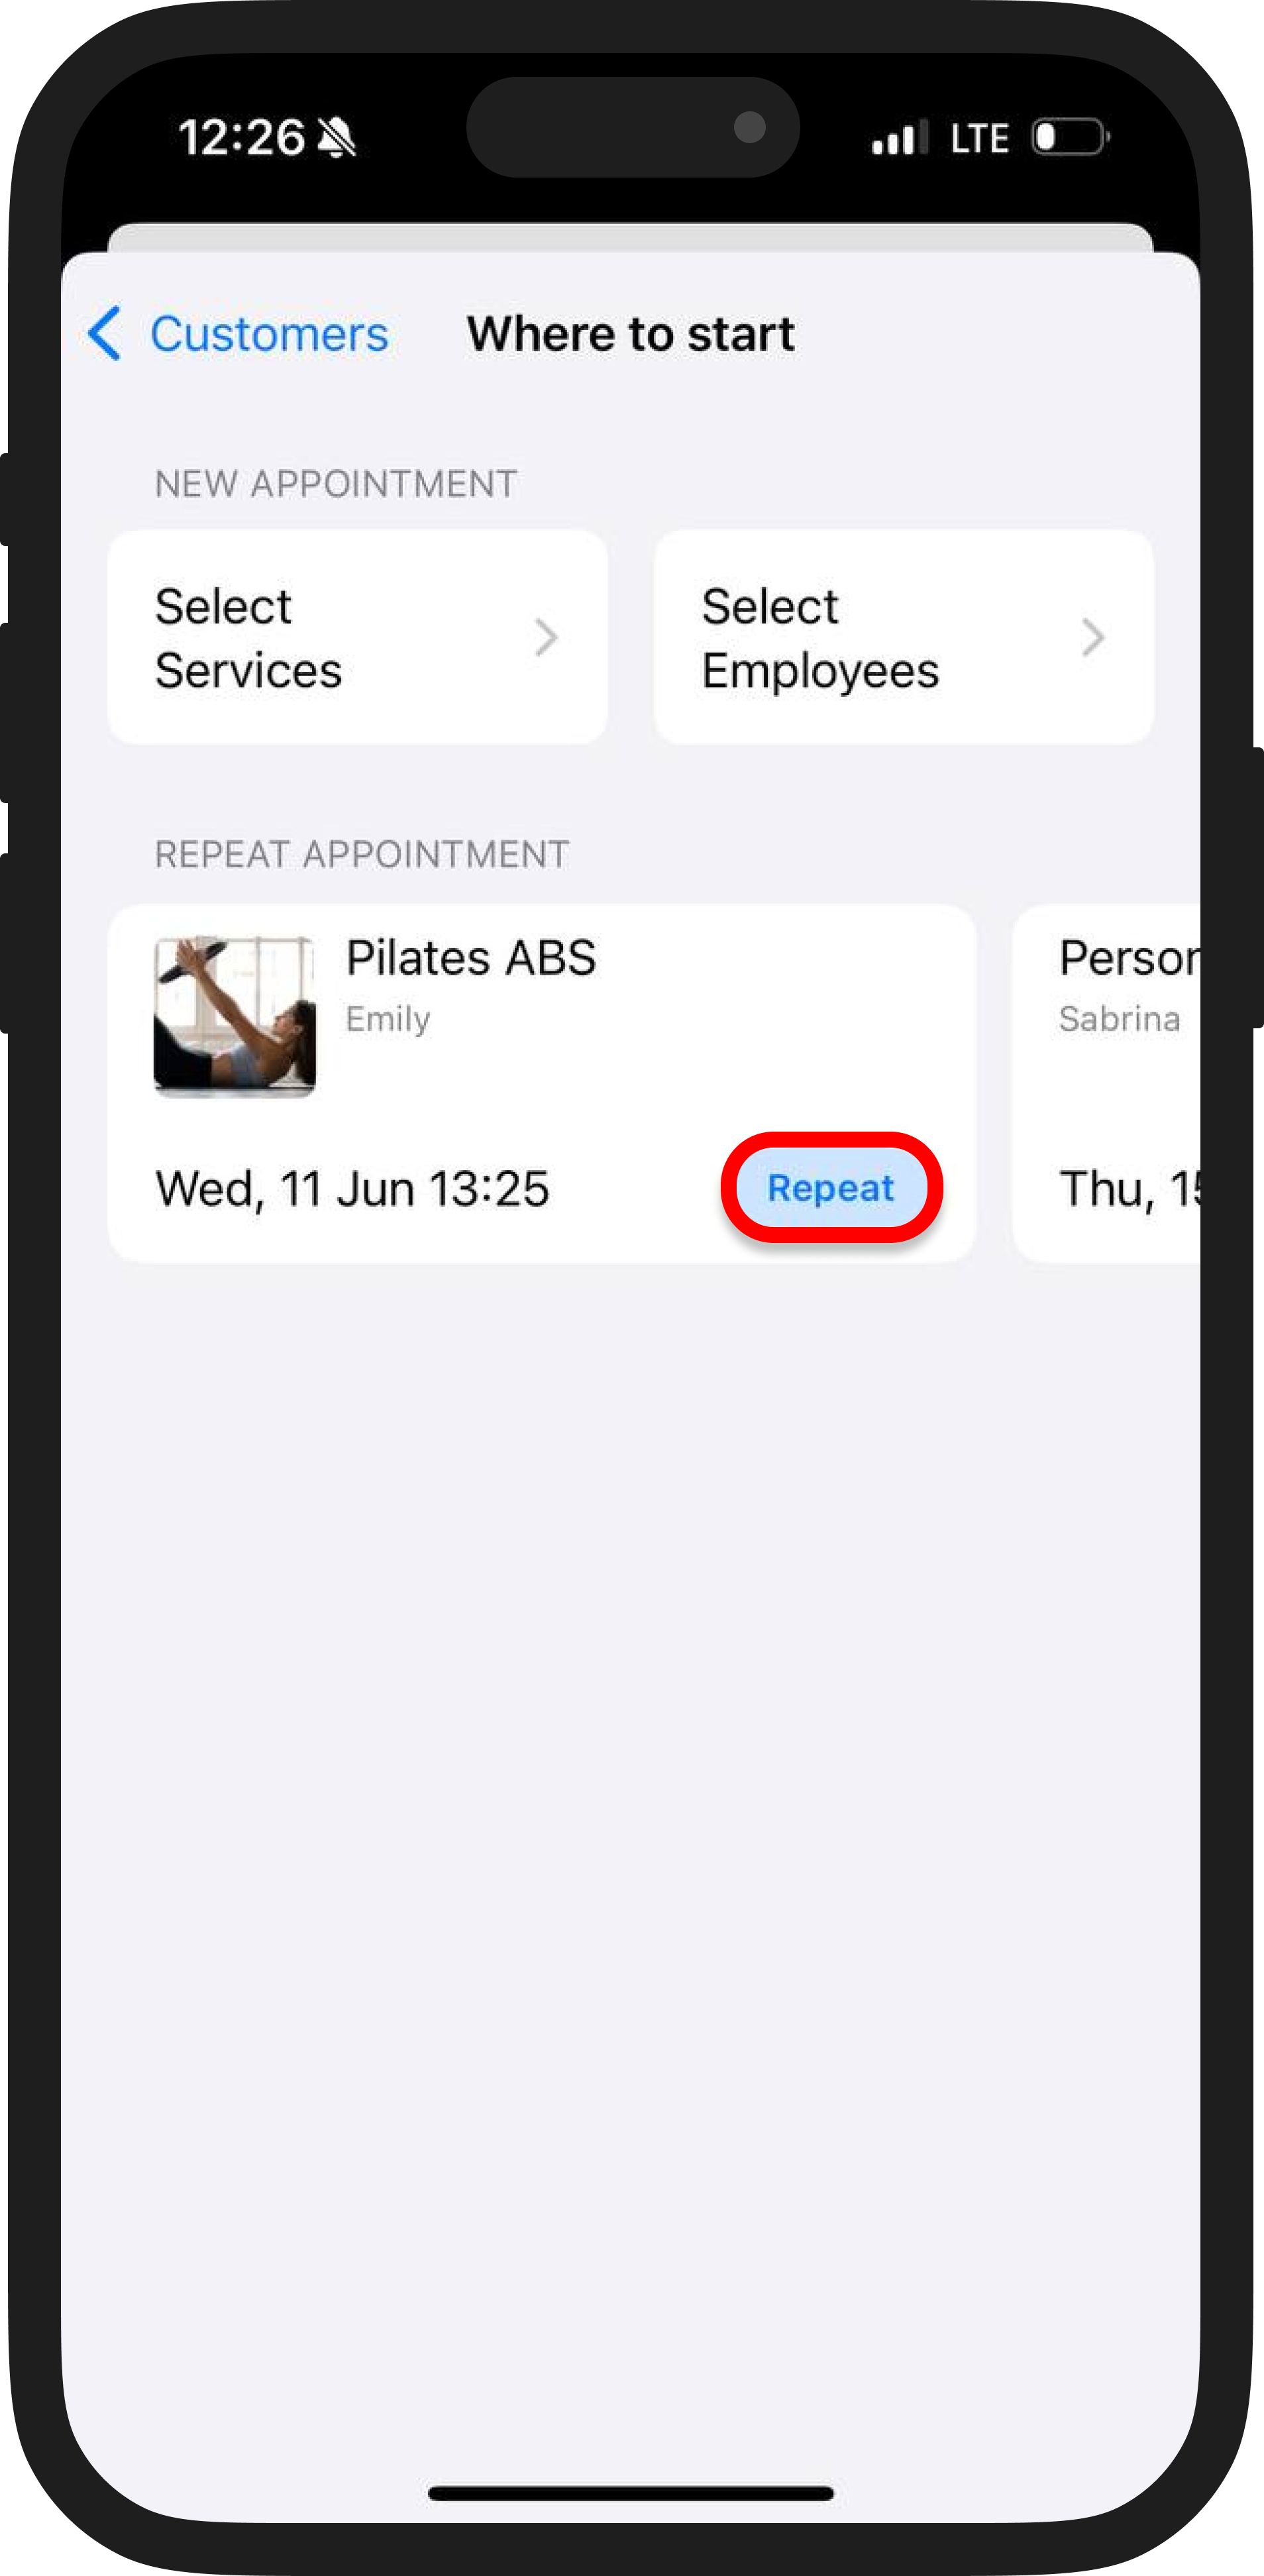
🧍♂️ Scenario 3. Start by choosing a customer
1. Find the customer in the list or create a new one.

2. If the client has visited you before, you can select a repeat appointment and specify the previous service. If the client is new or hasn’t used your services before, choose how you want to proceed: by staff member or by service.
3. Next, the process is the same: select the date, time, and create several appointments if necessary.
4. Edit the appointment and click "Save".
Start with whatever suits you best — whether it's the client, the service, or the staff member.
Use the "+" button in the "Appointments" section to quickly create a booking anytime — whether you're on the move, between tasks, or wrapping up your shift 😉
📲 Fast, flexible, and simple — everything with just one click!
📚 Read also: