How to Set Up a Break after Appointment
Last modified:
A break after appointment is needed when after customer's visit time is required to put a workplace in order and a specialist to rest.
How it works: You can enable a break when adding a service, or in the service settings. Then specify a break duration. So, it will be added to the appointment duration. In this case, a customer will see only the true duration of a procedure itself.
How to Add a Break After an Appointment in DIKIDI WEB
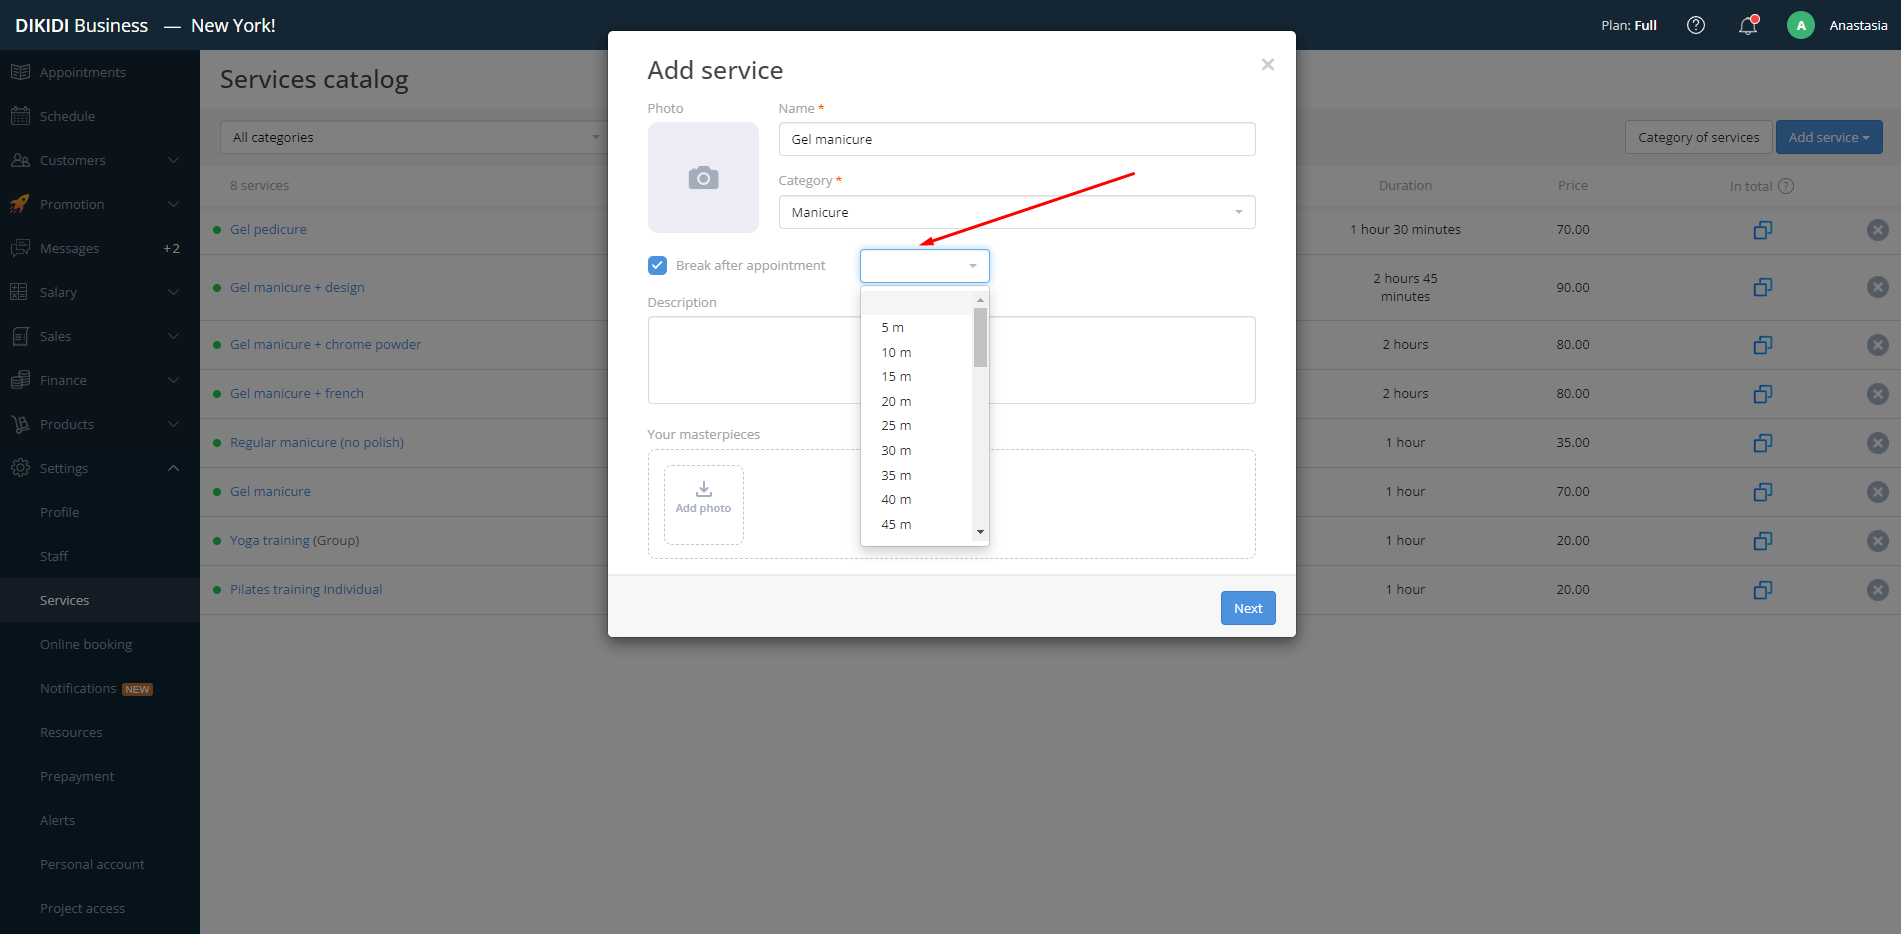
You can set up a break when adding a service in the "Services" section.
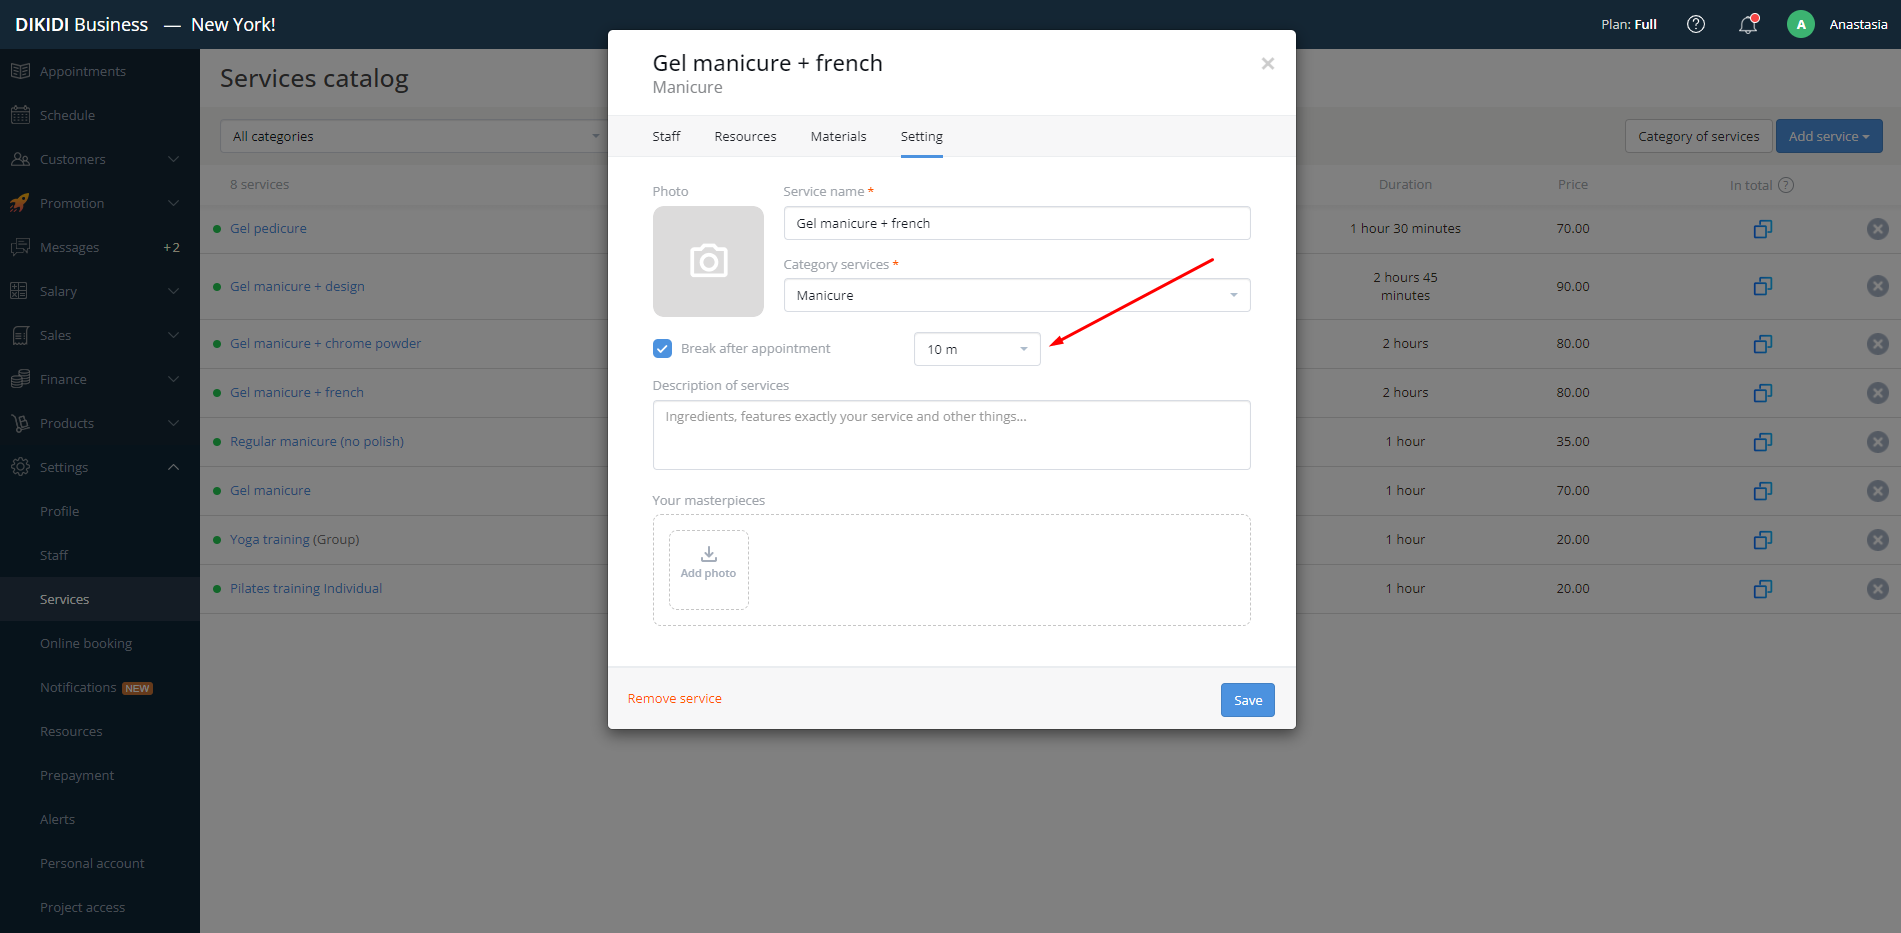
Or while editing an already created service. Check the "Break after appointment" checkbox and set its duration.
How to Add a Break After an Appointment in the DIKIDI Mobile App
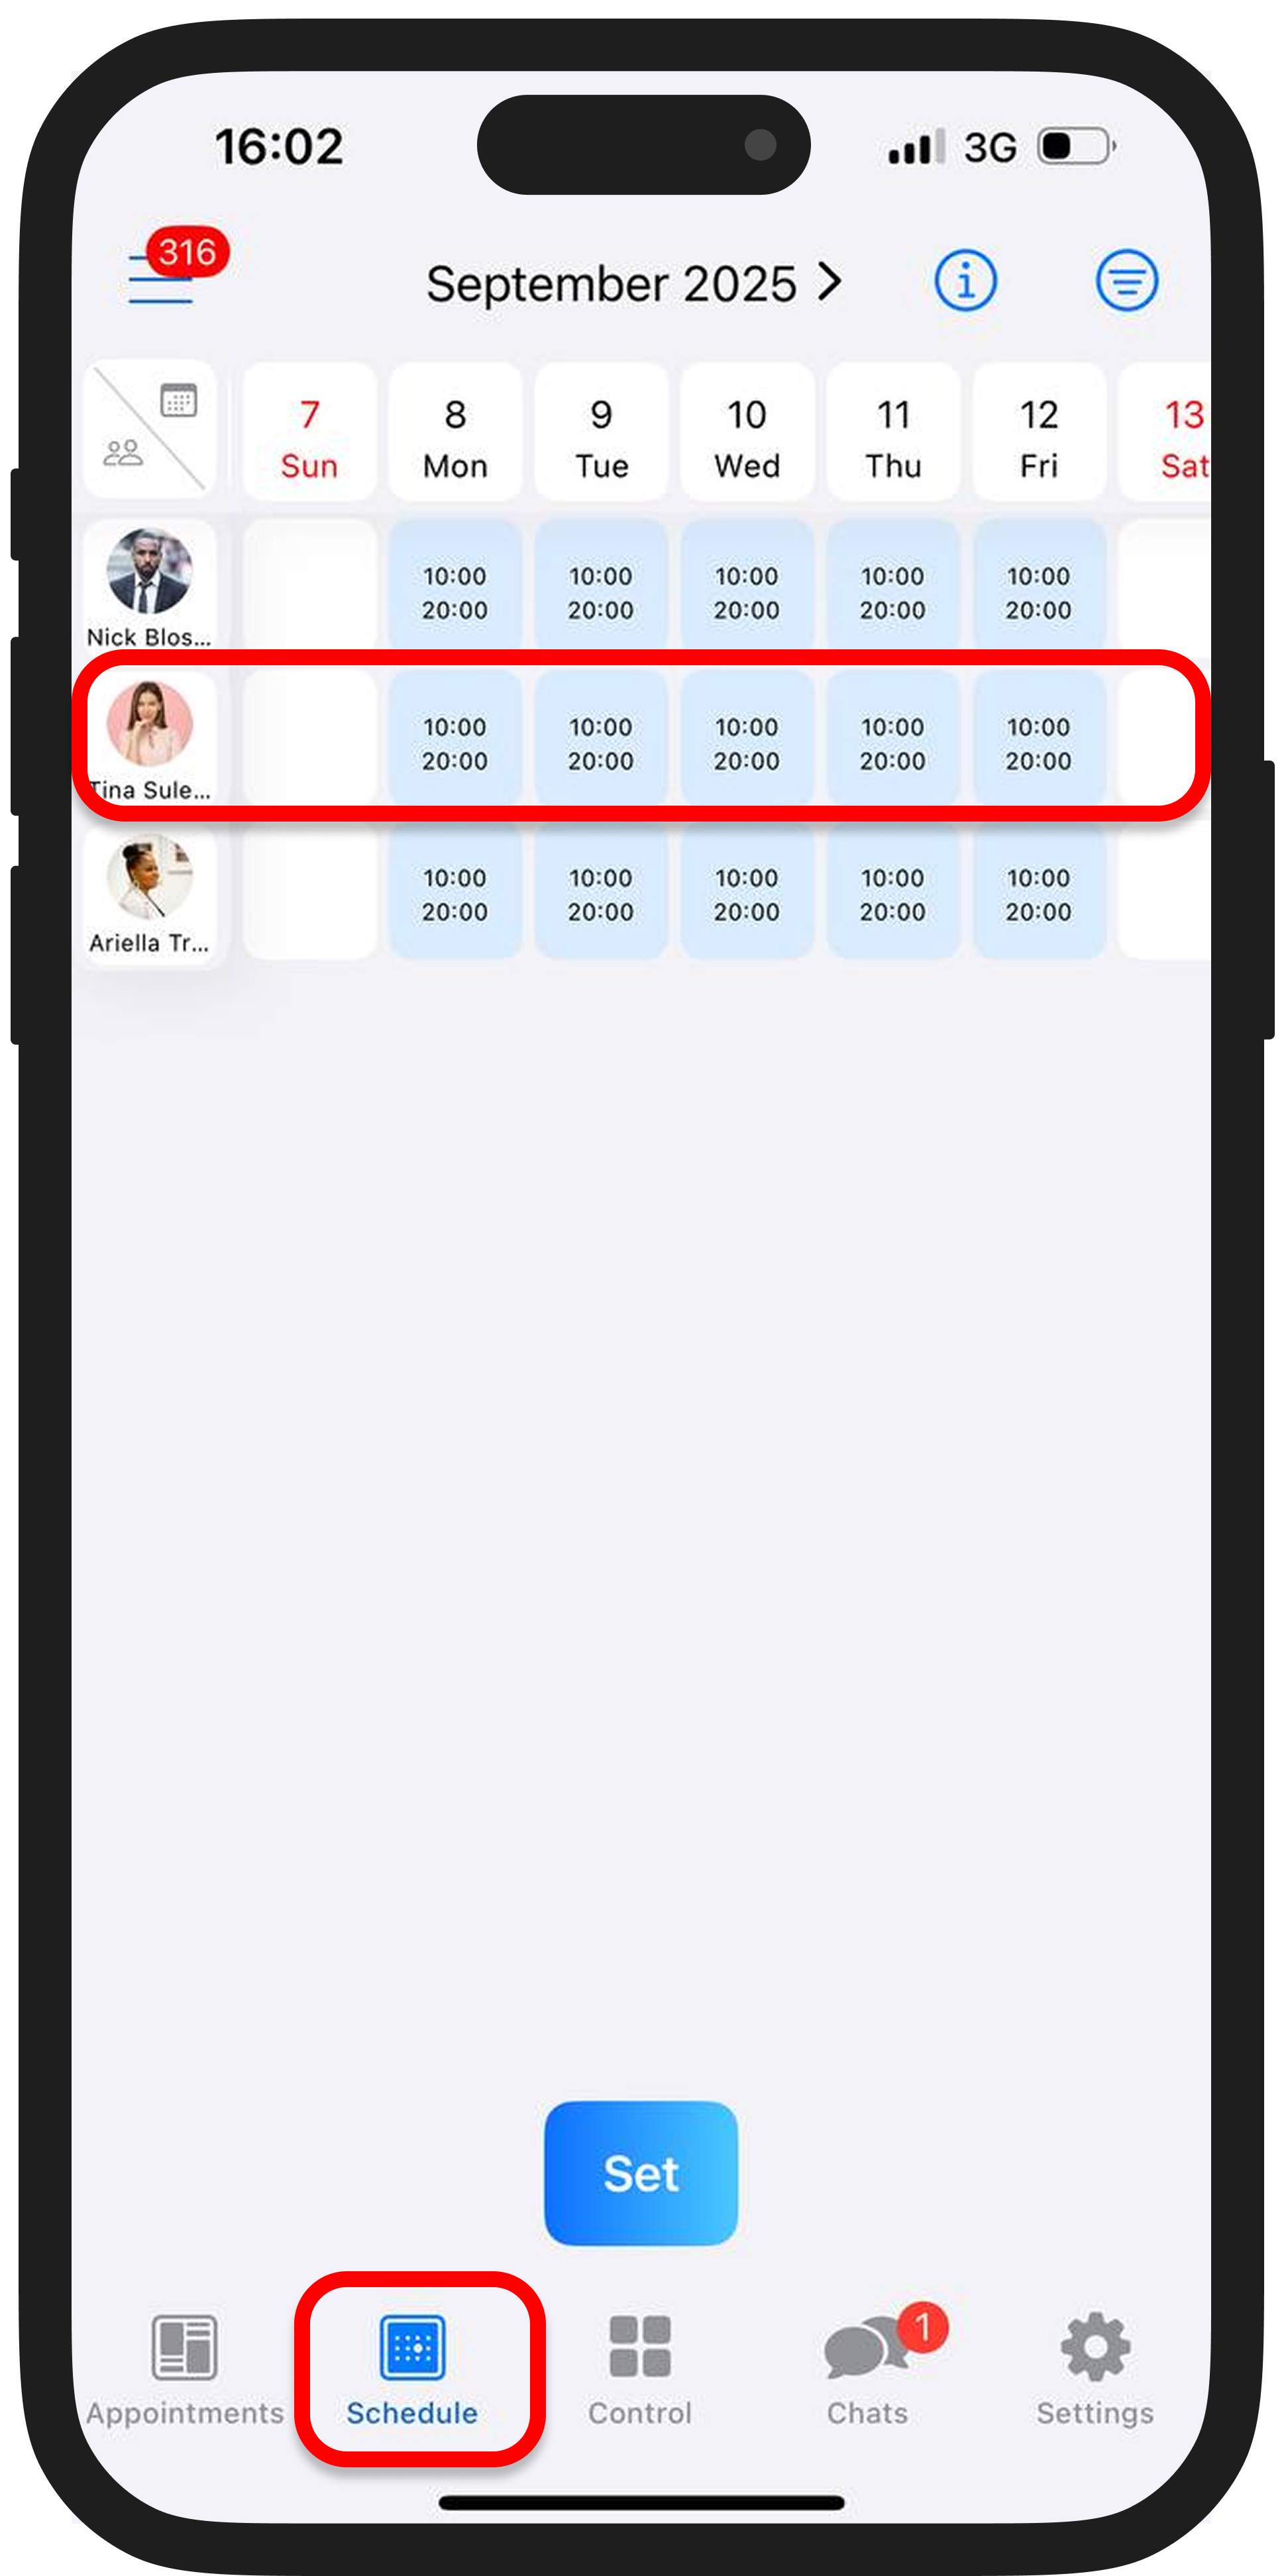
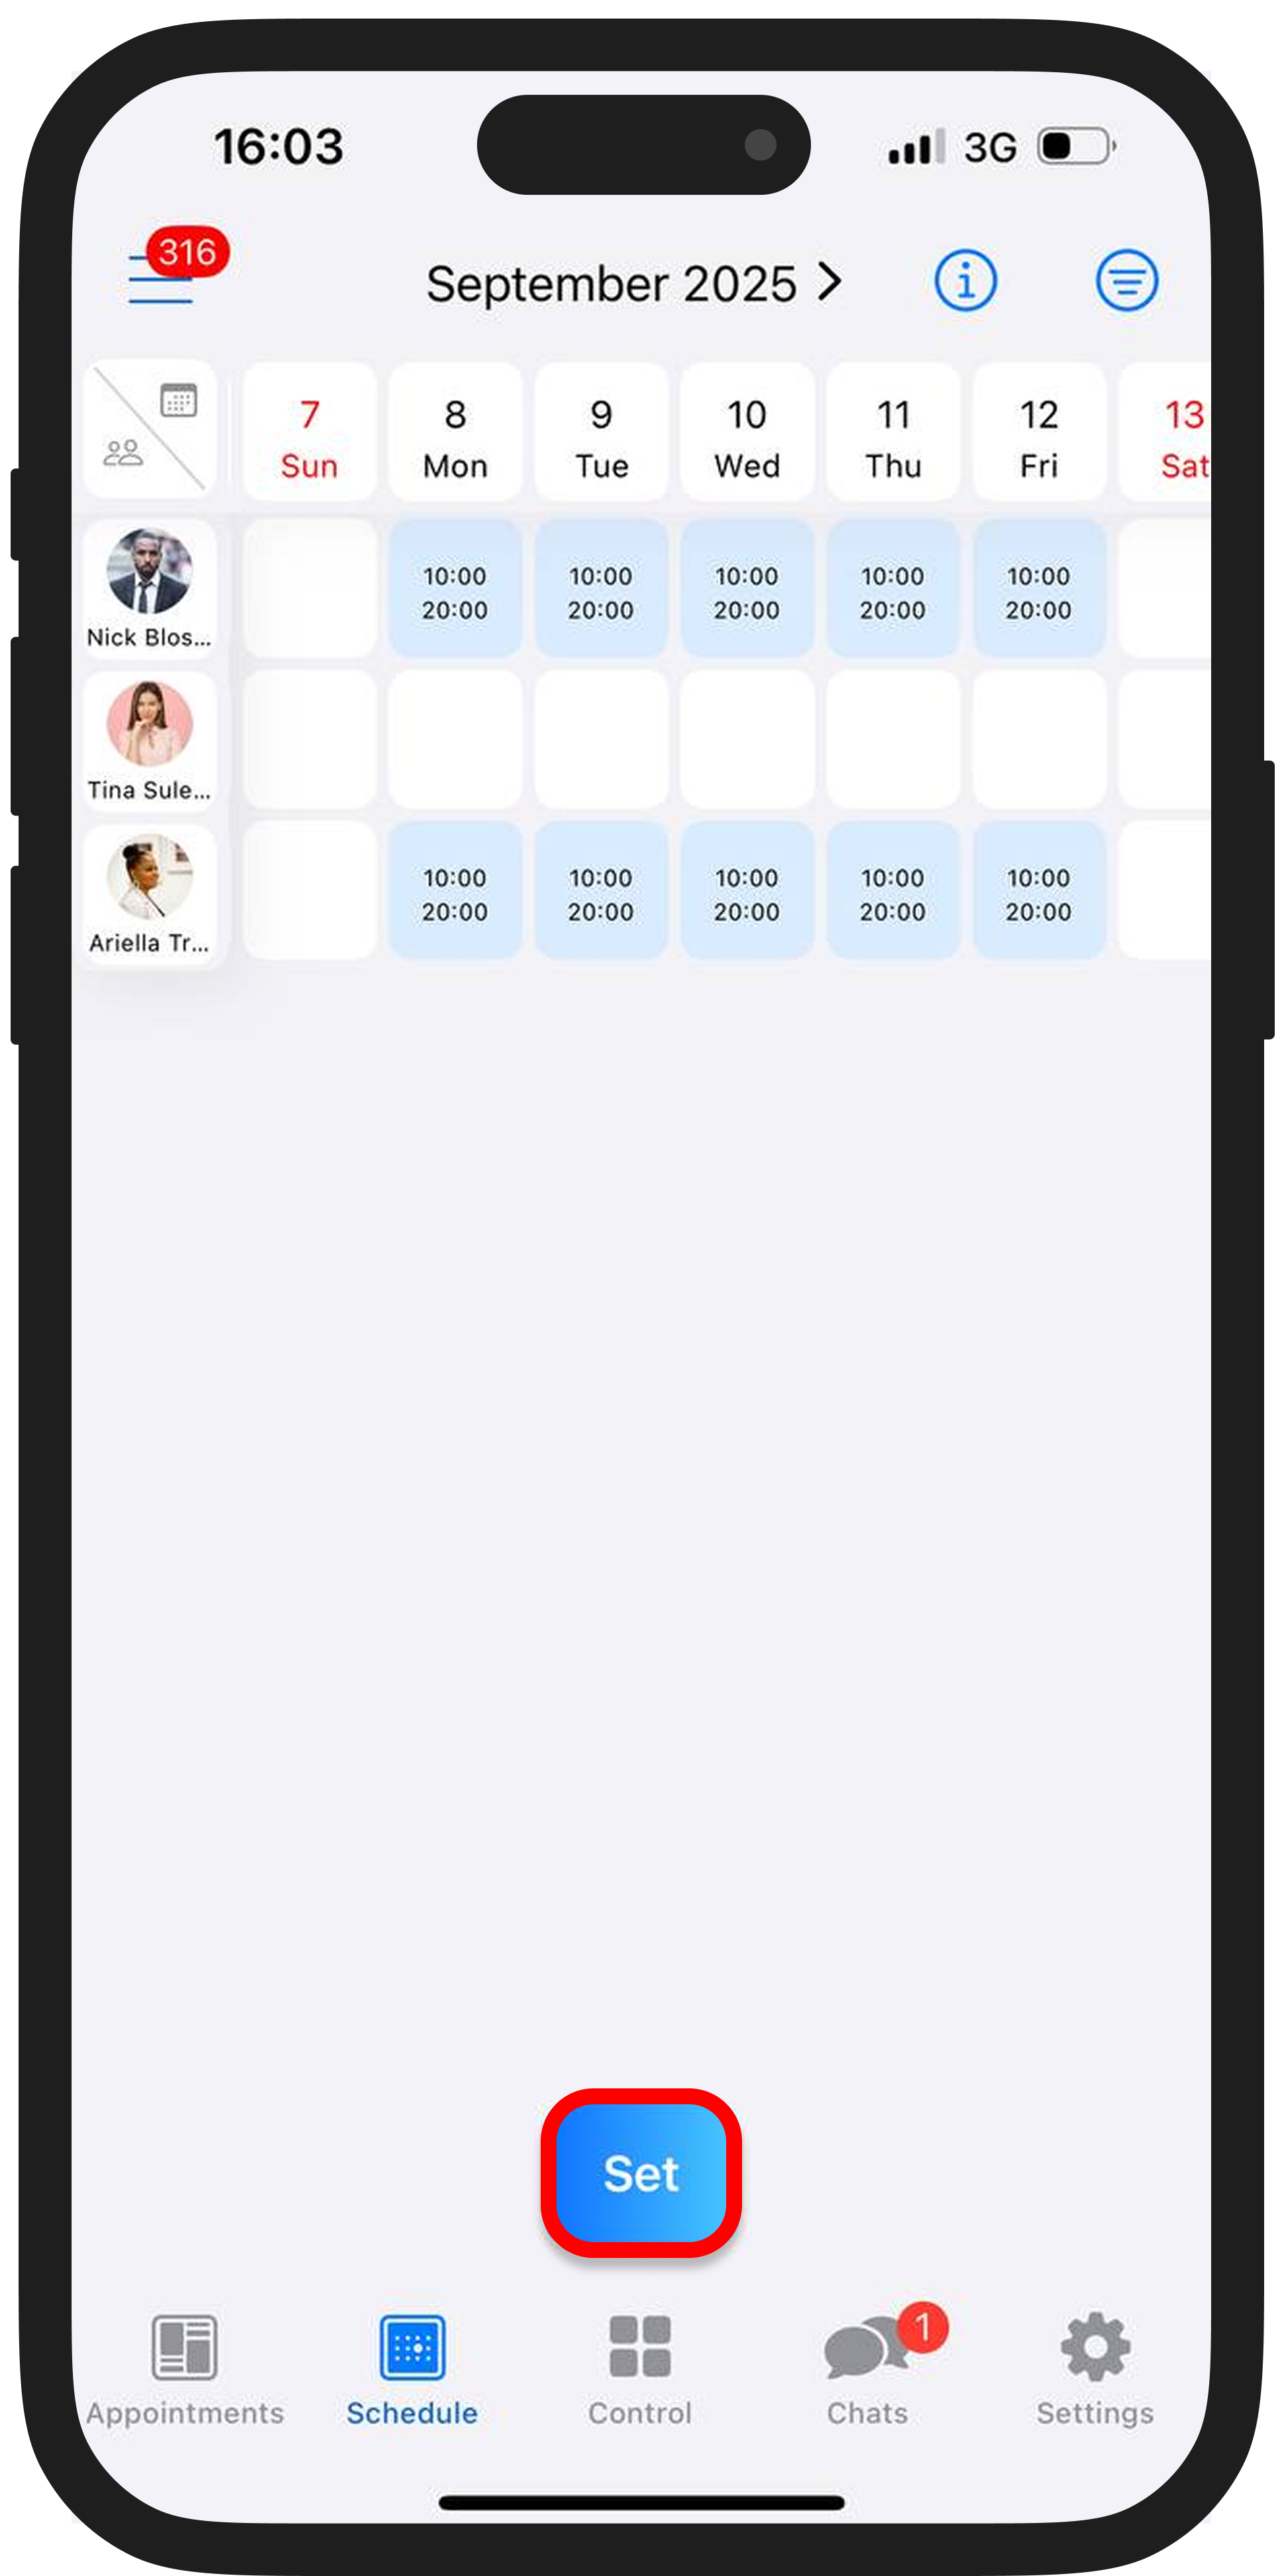
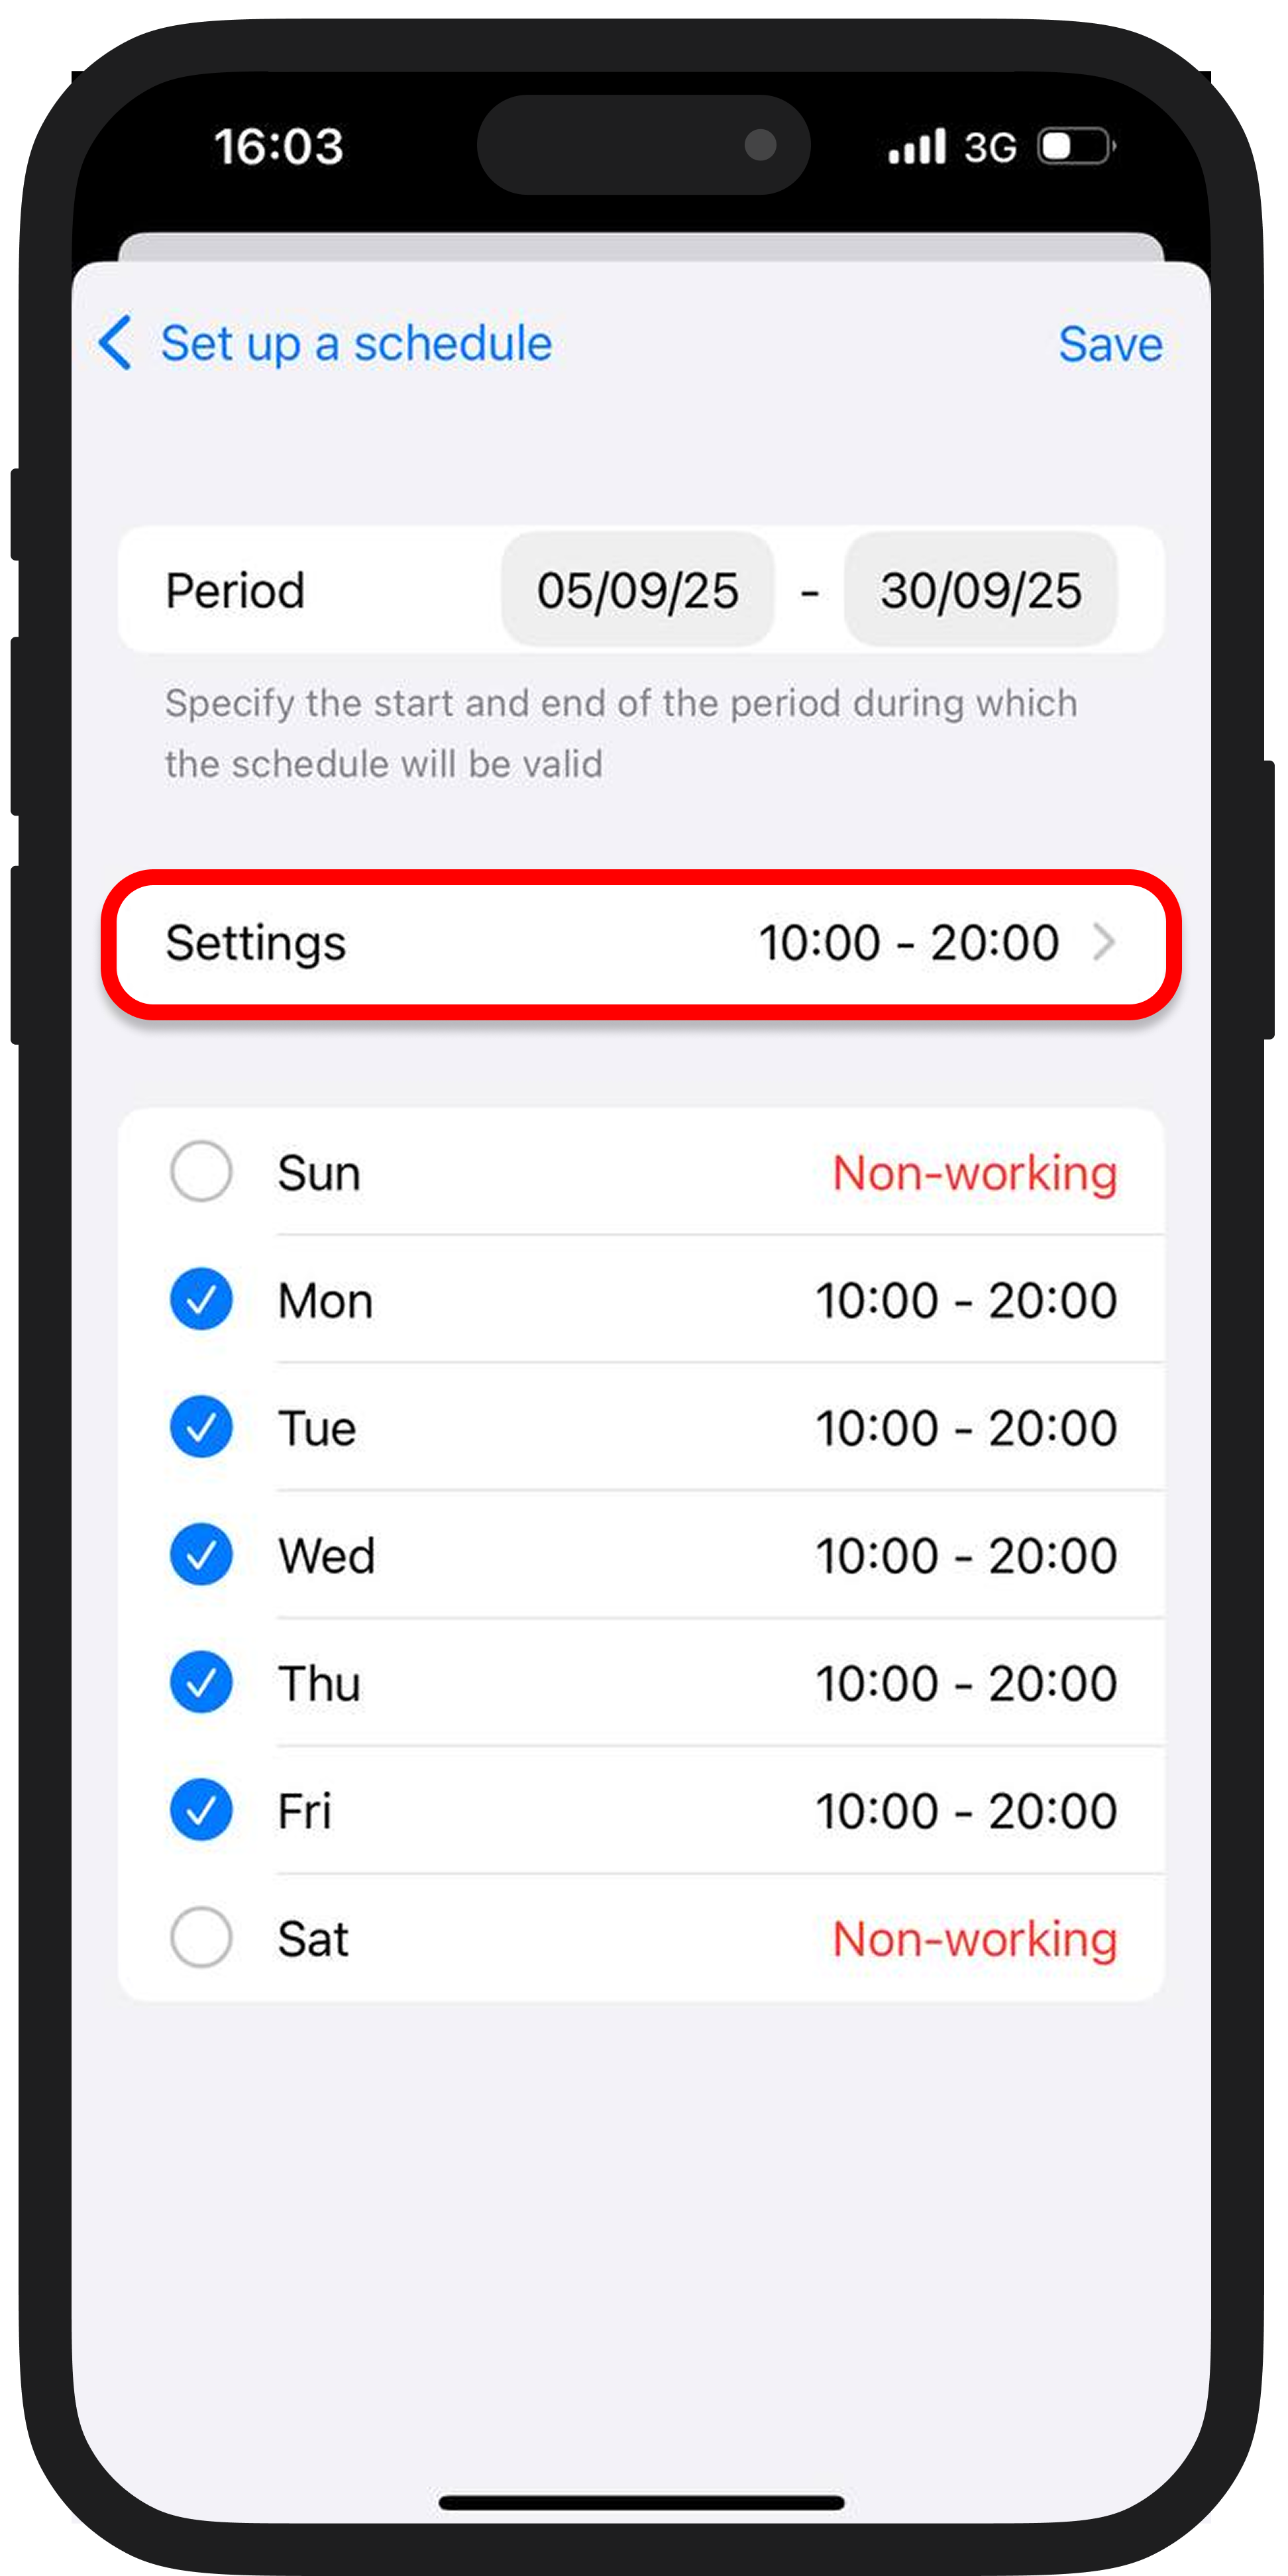
1️⃣ To add a break, go to the "Schedule" section and select an employee;
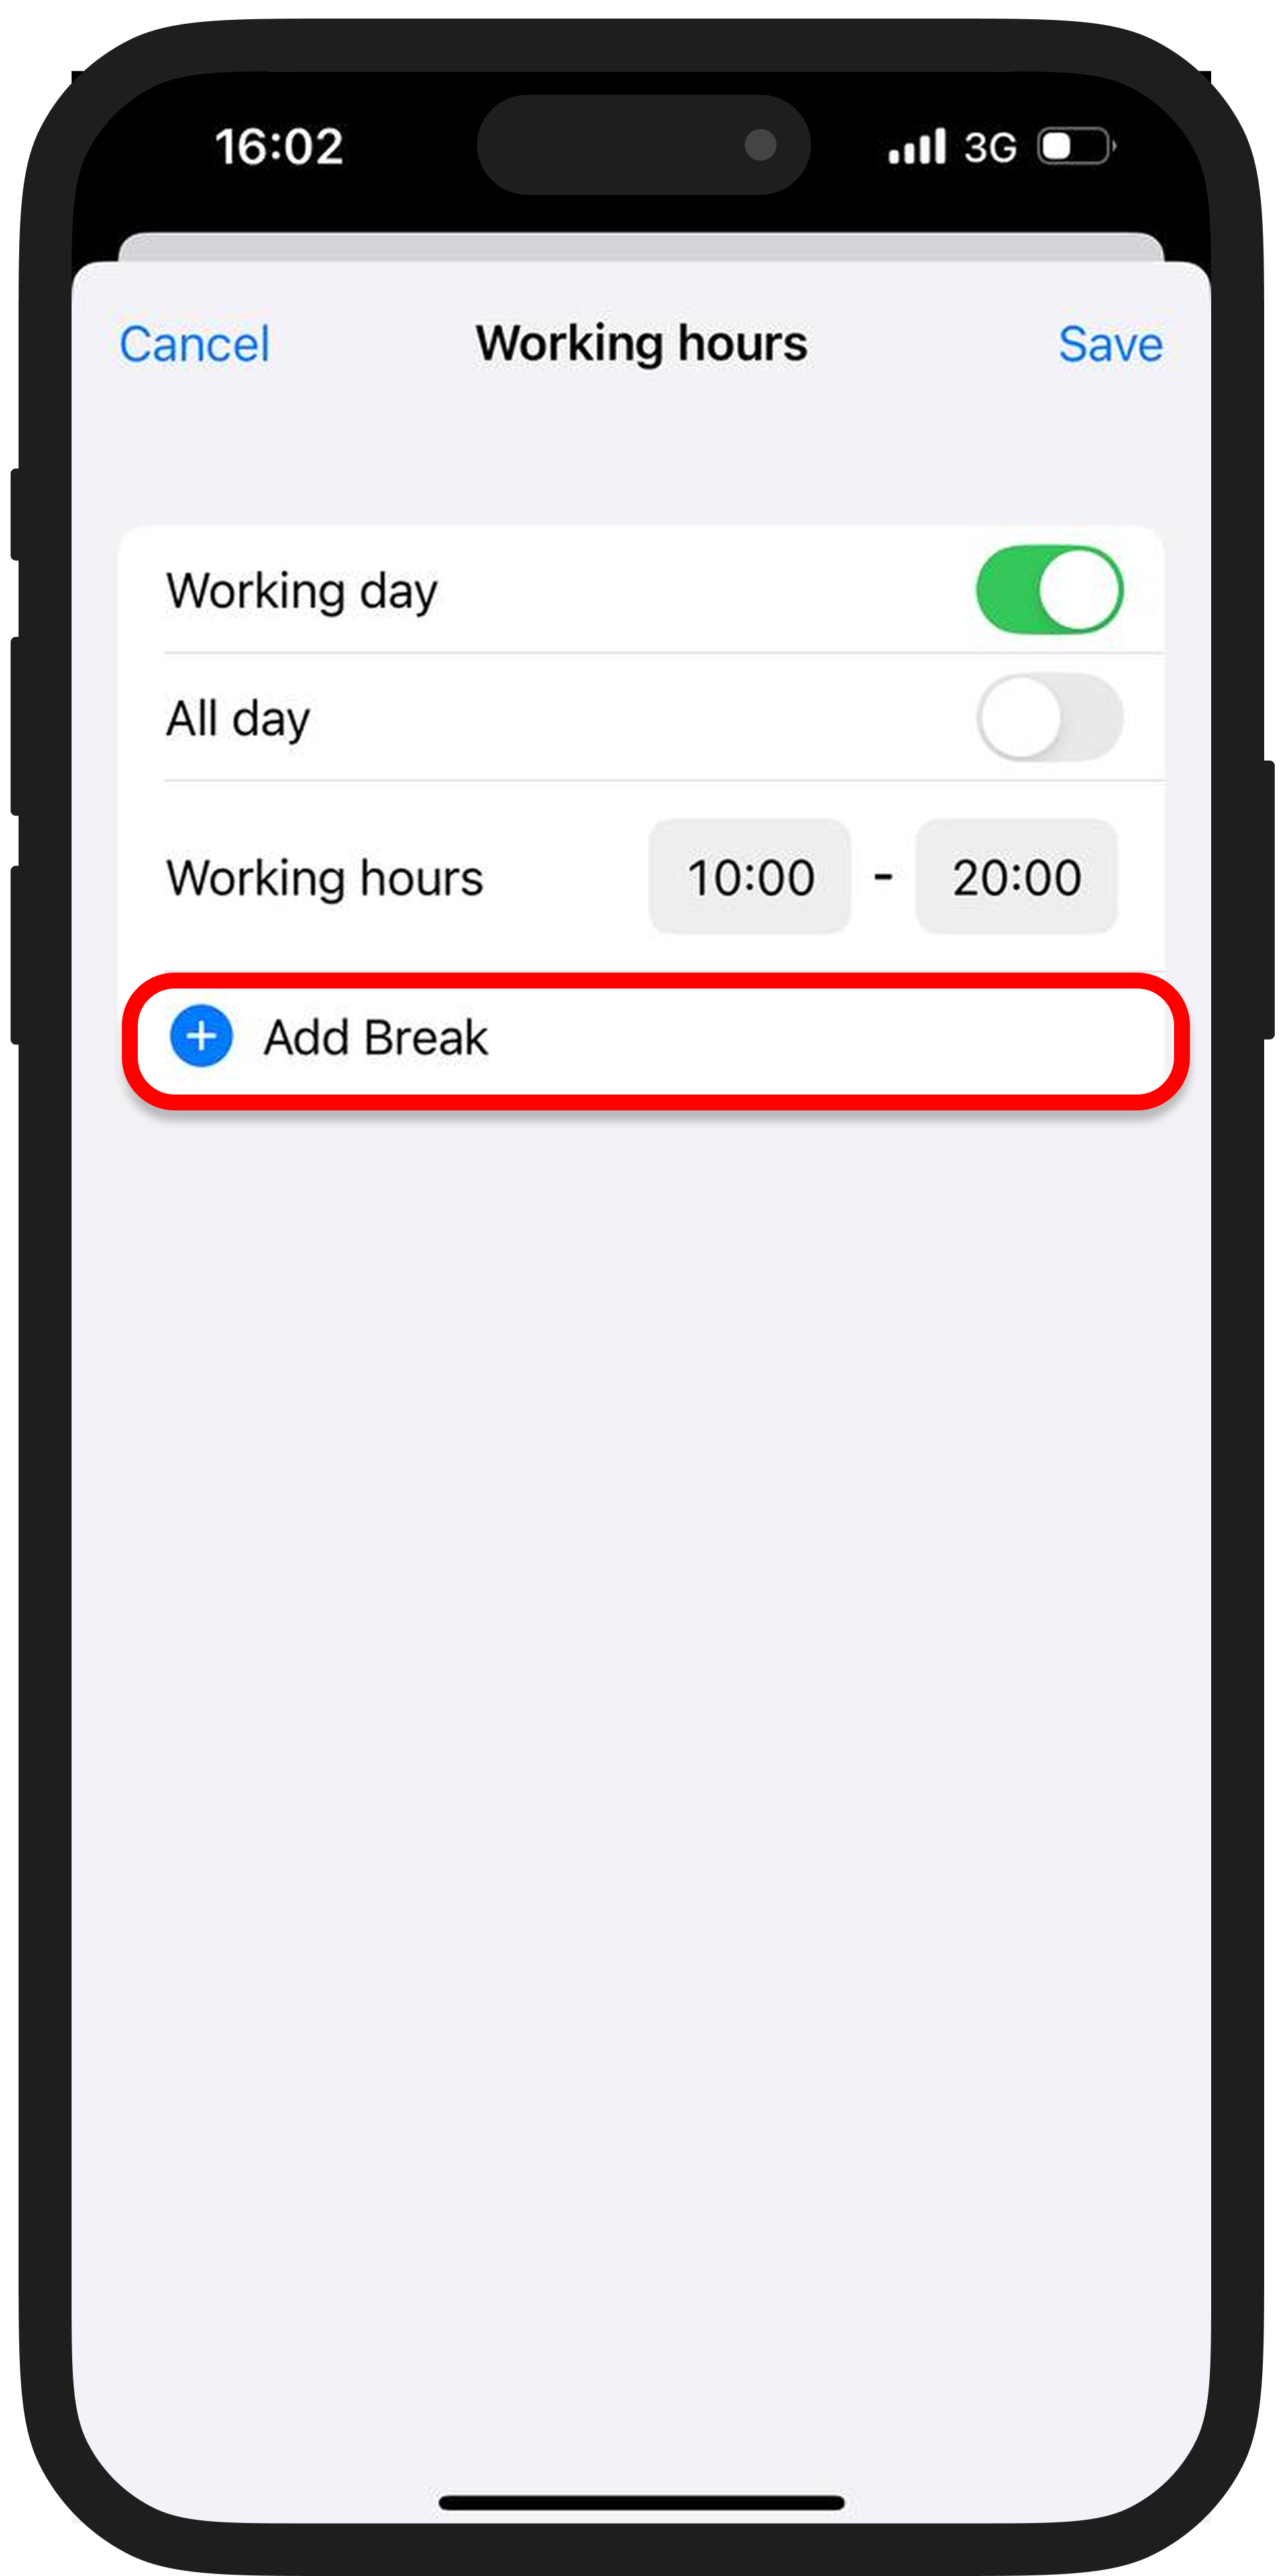
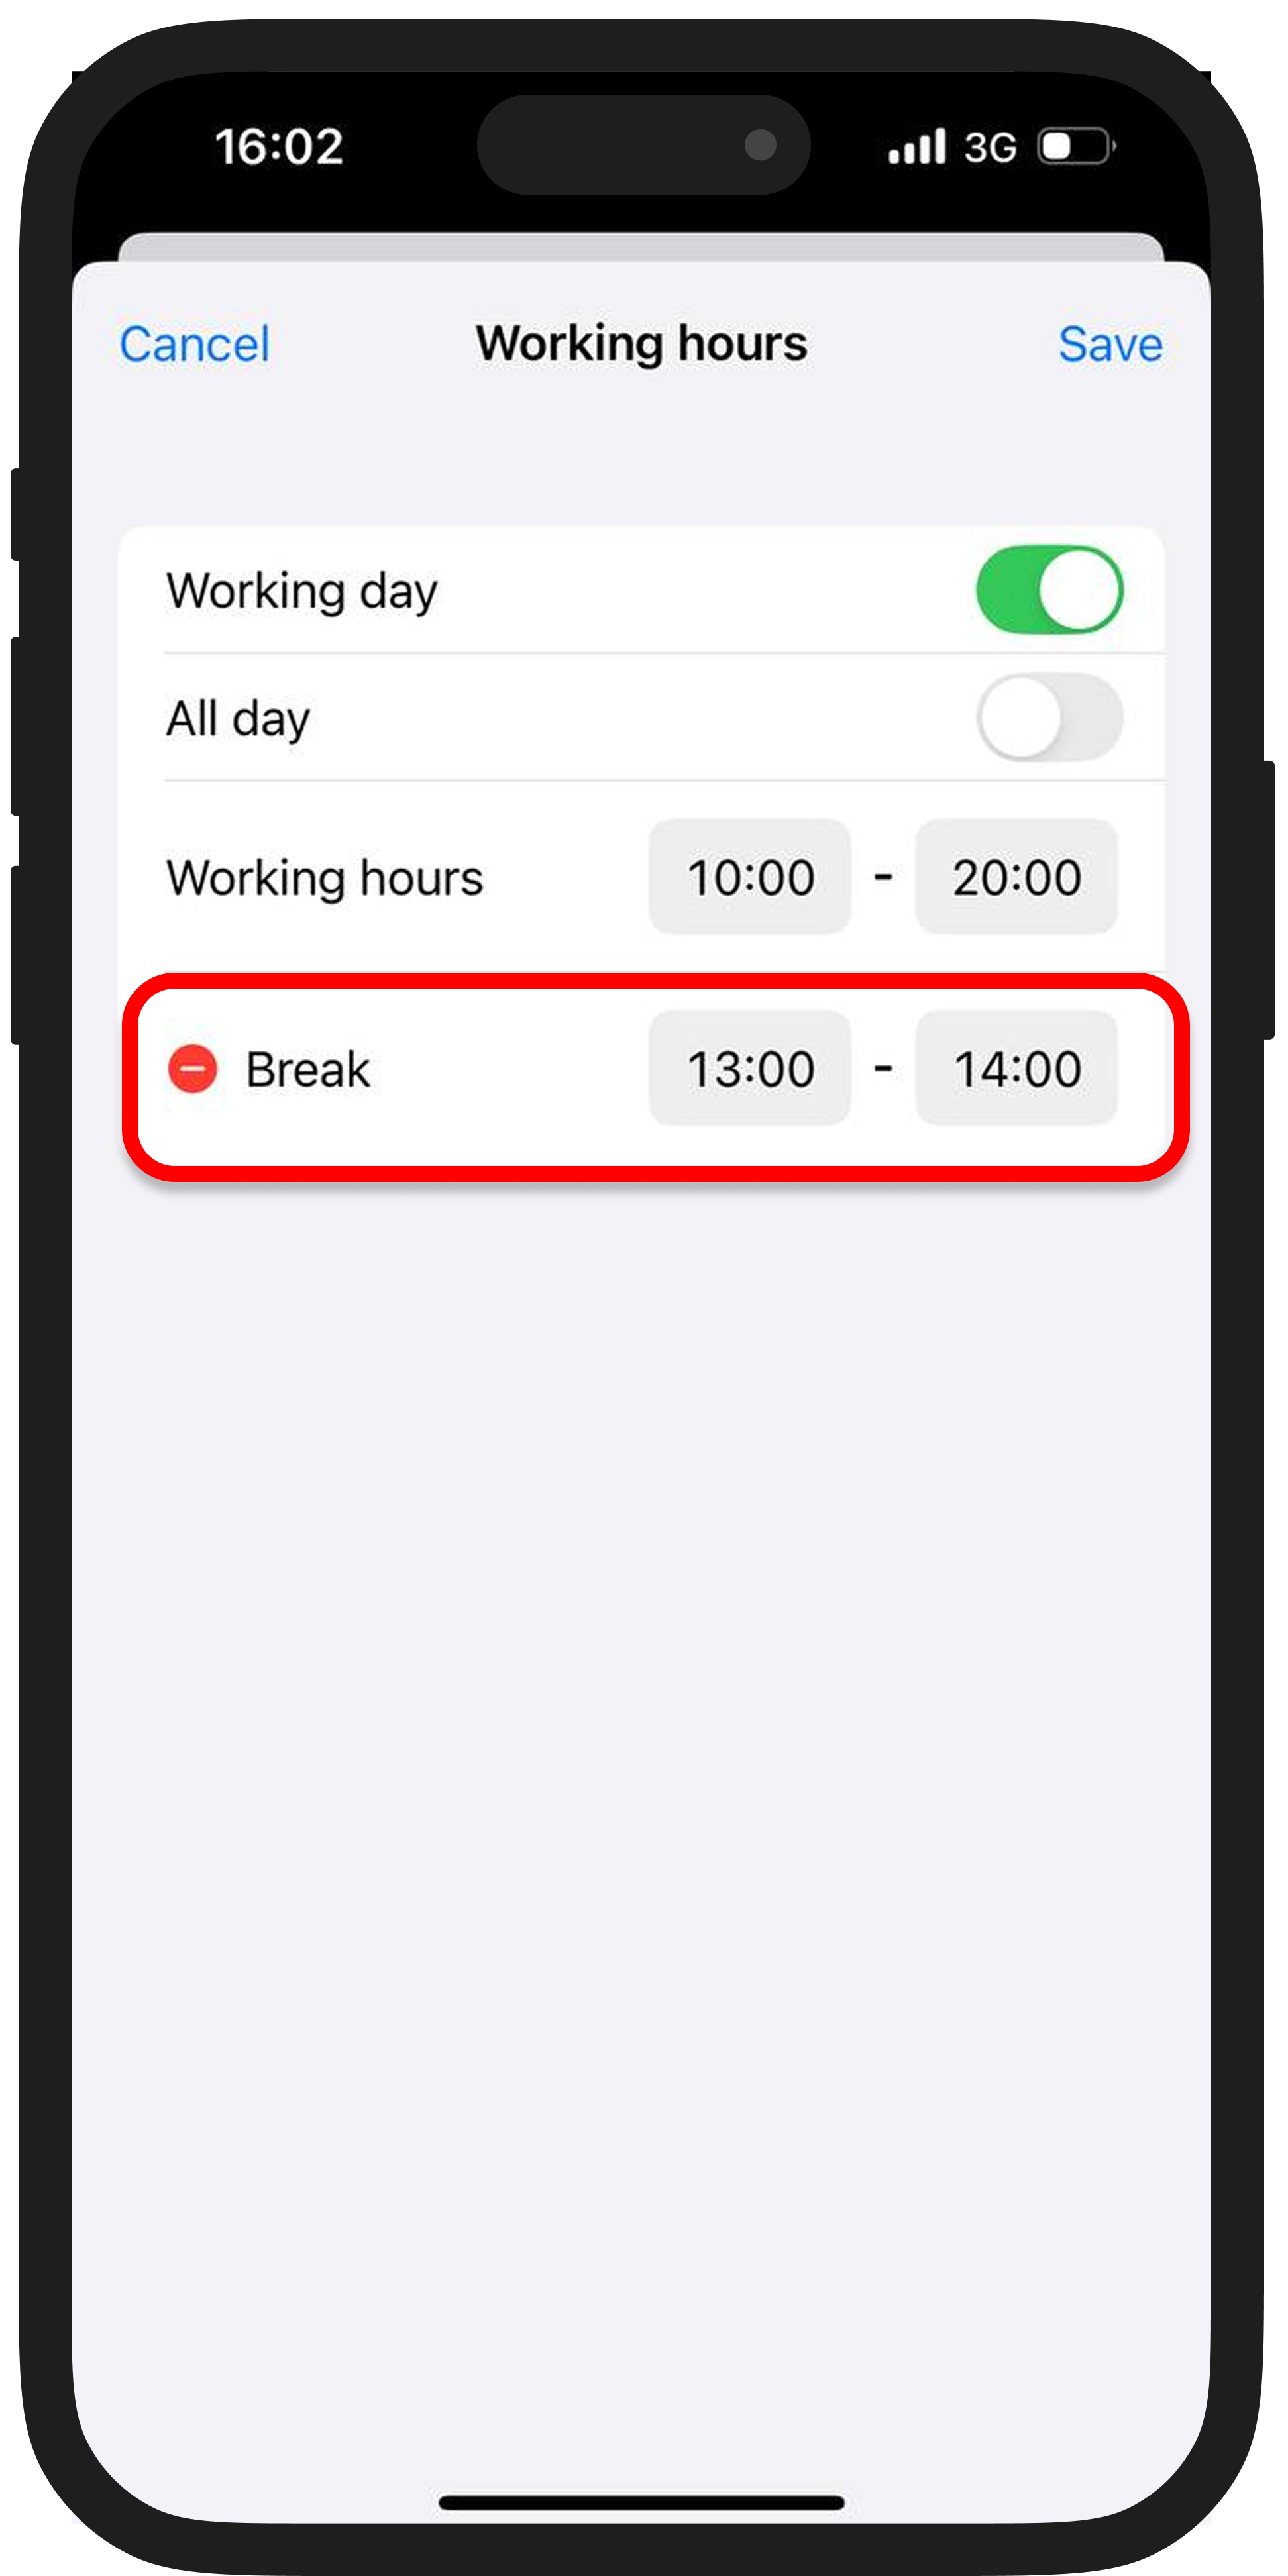
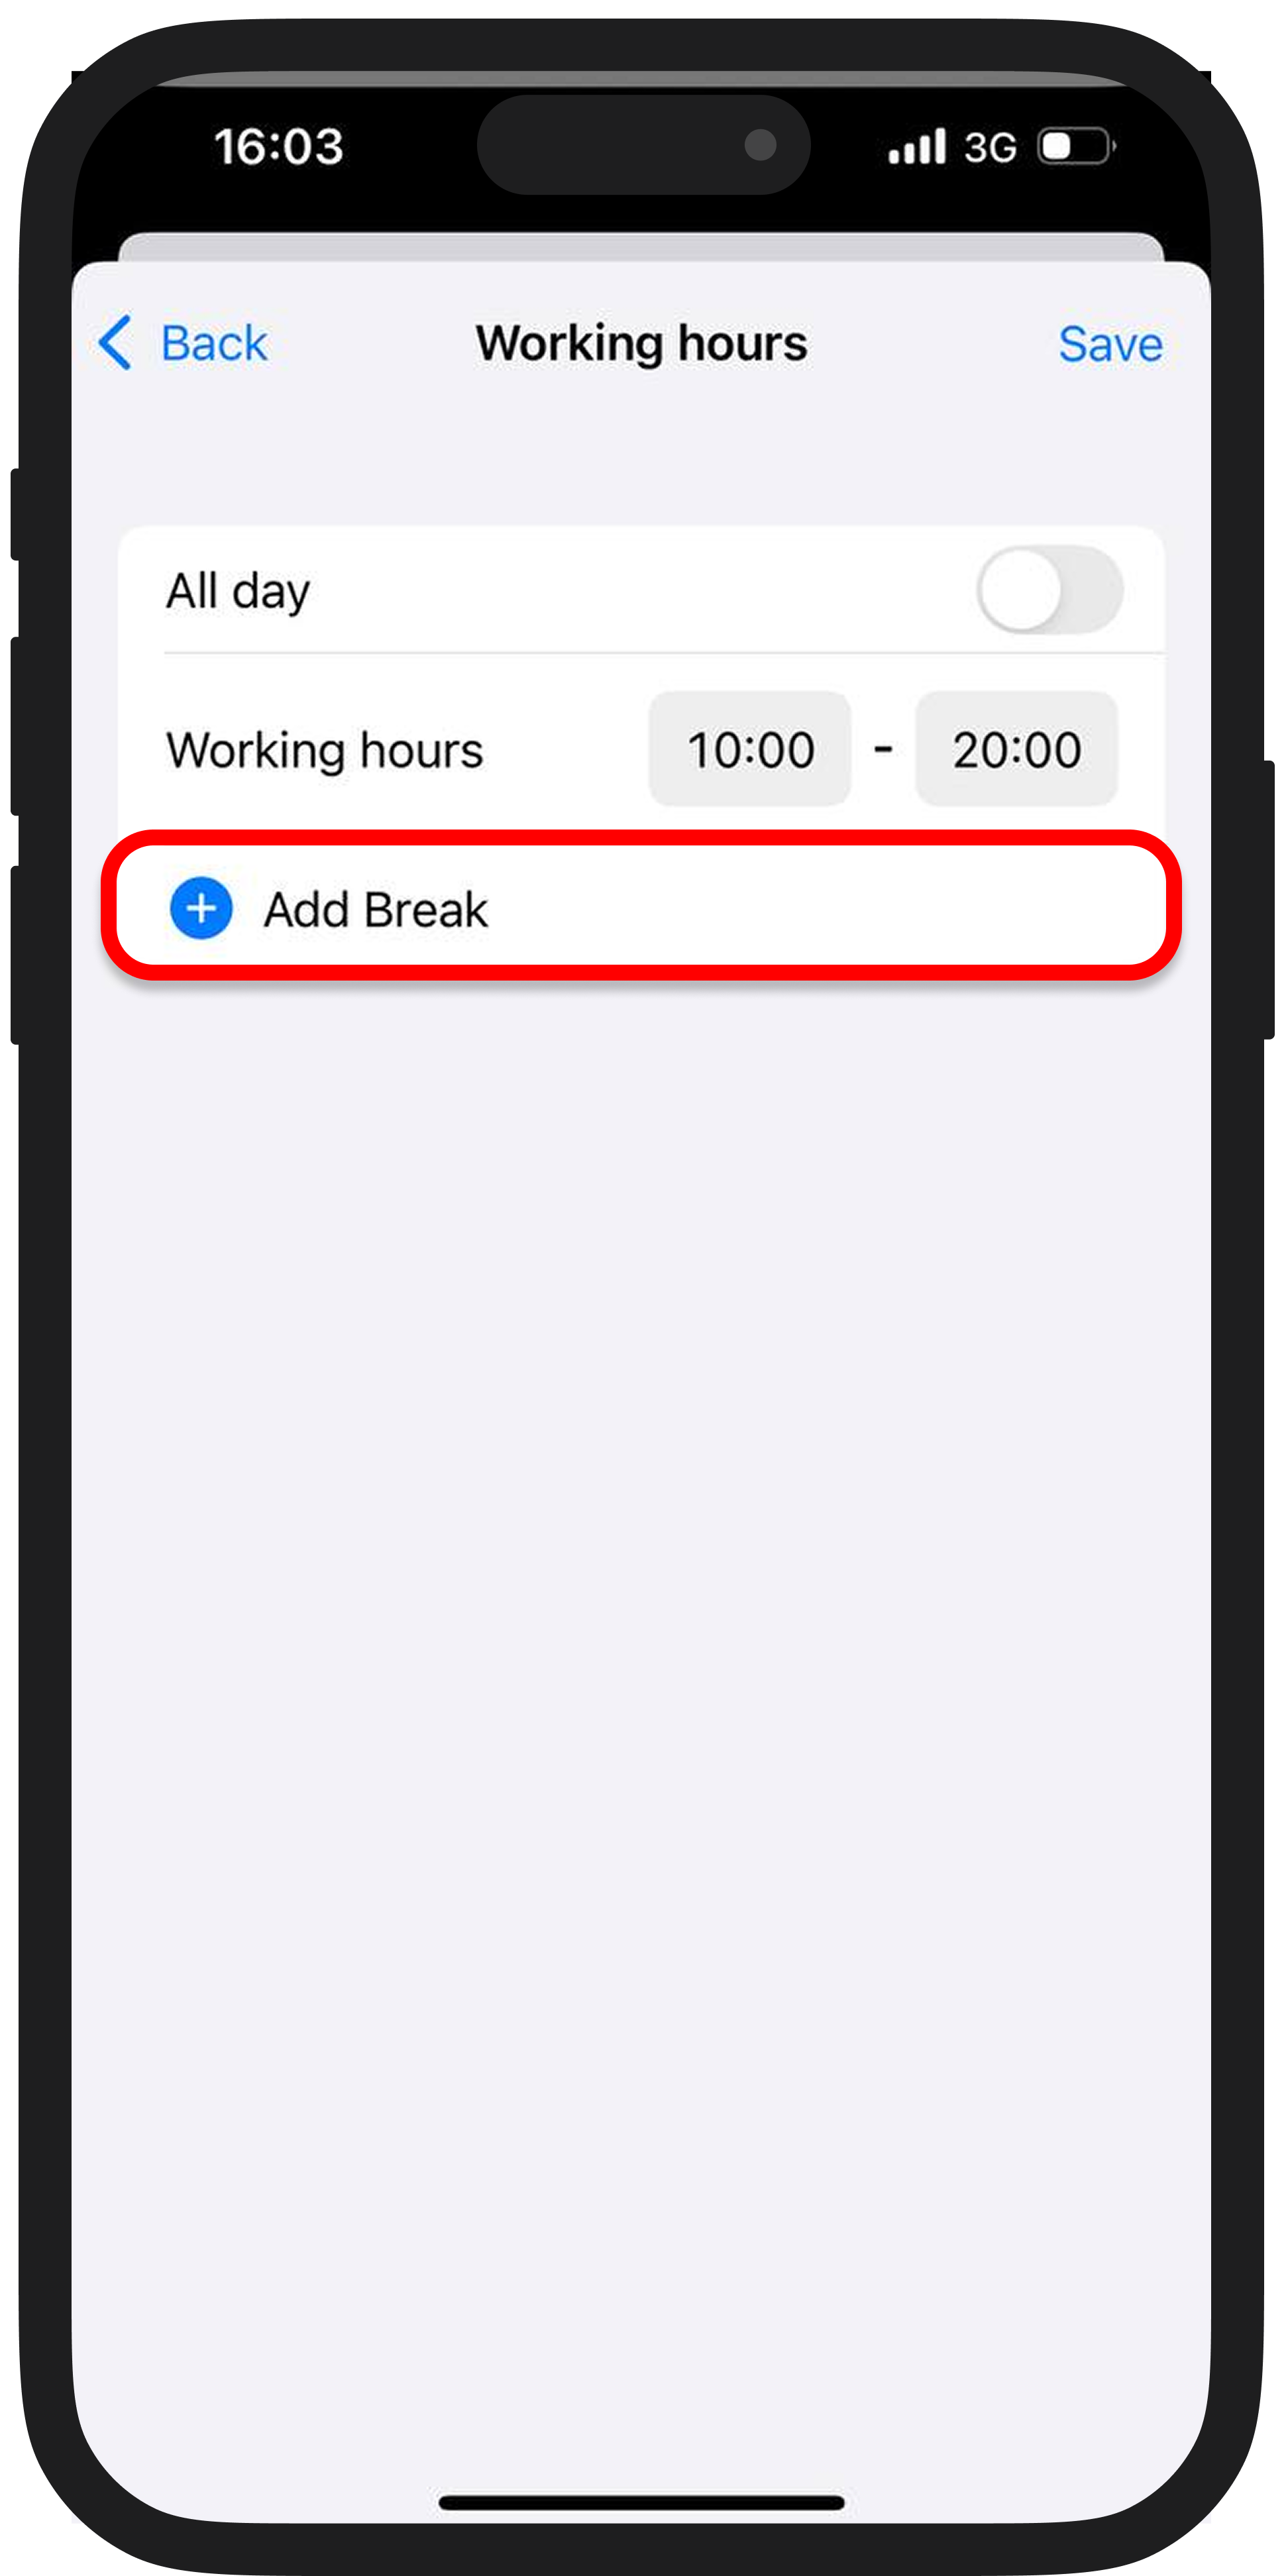
2️⃣ Go to the working hours settings and add a break by clicking the "Set" → "Add Break" button;

3️⃣ Save the changes.

You can add or change a break through the work schedule settings.
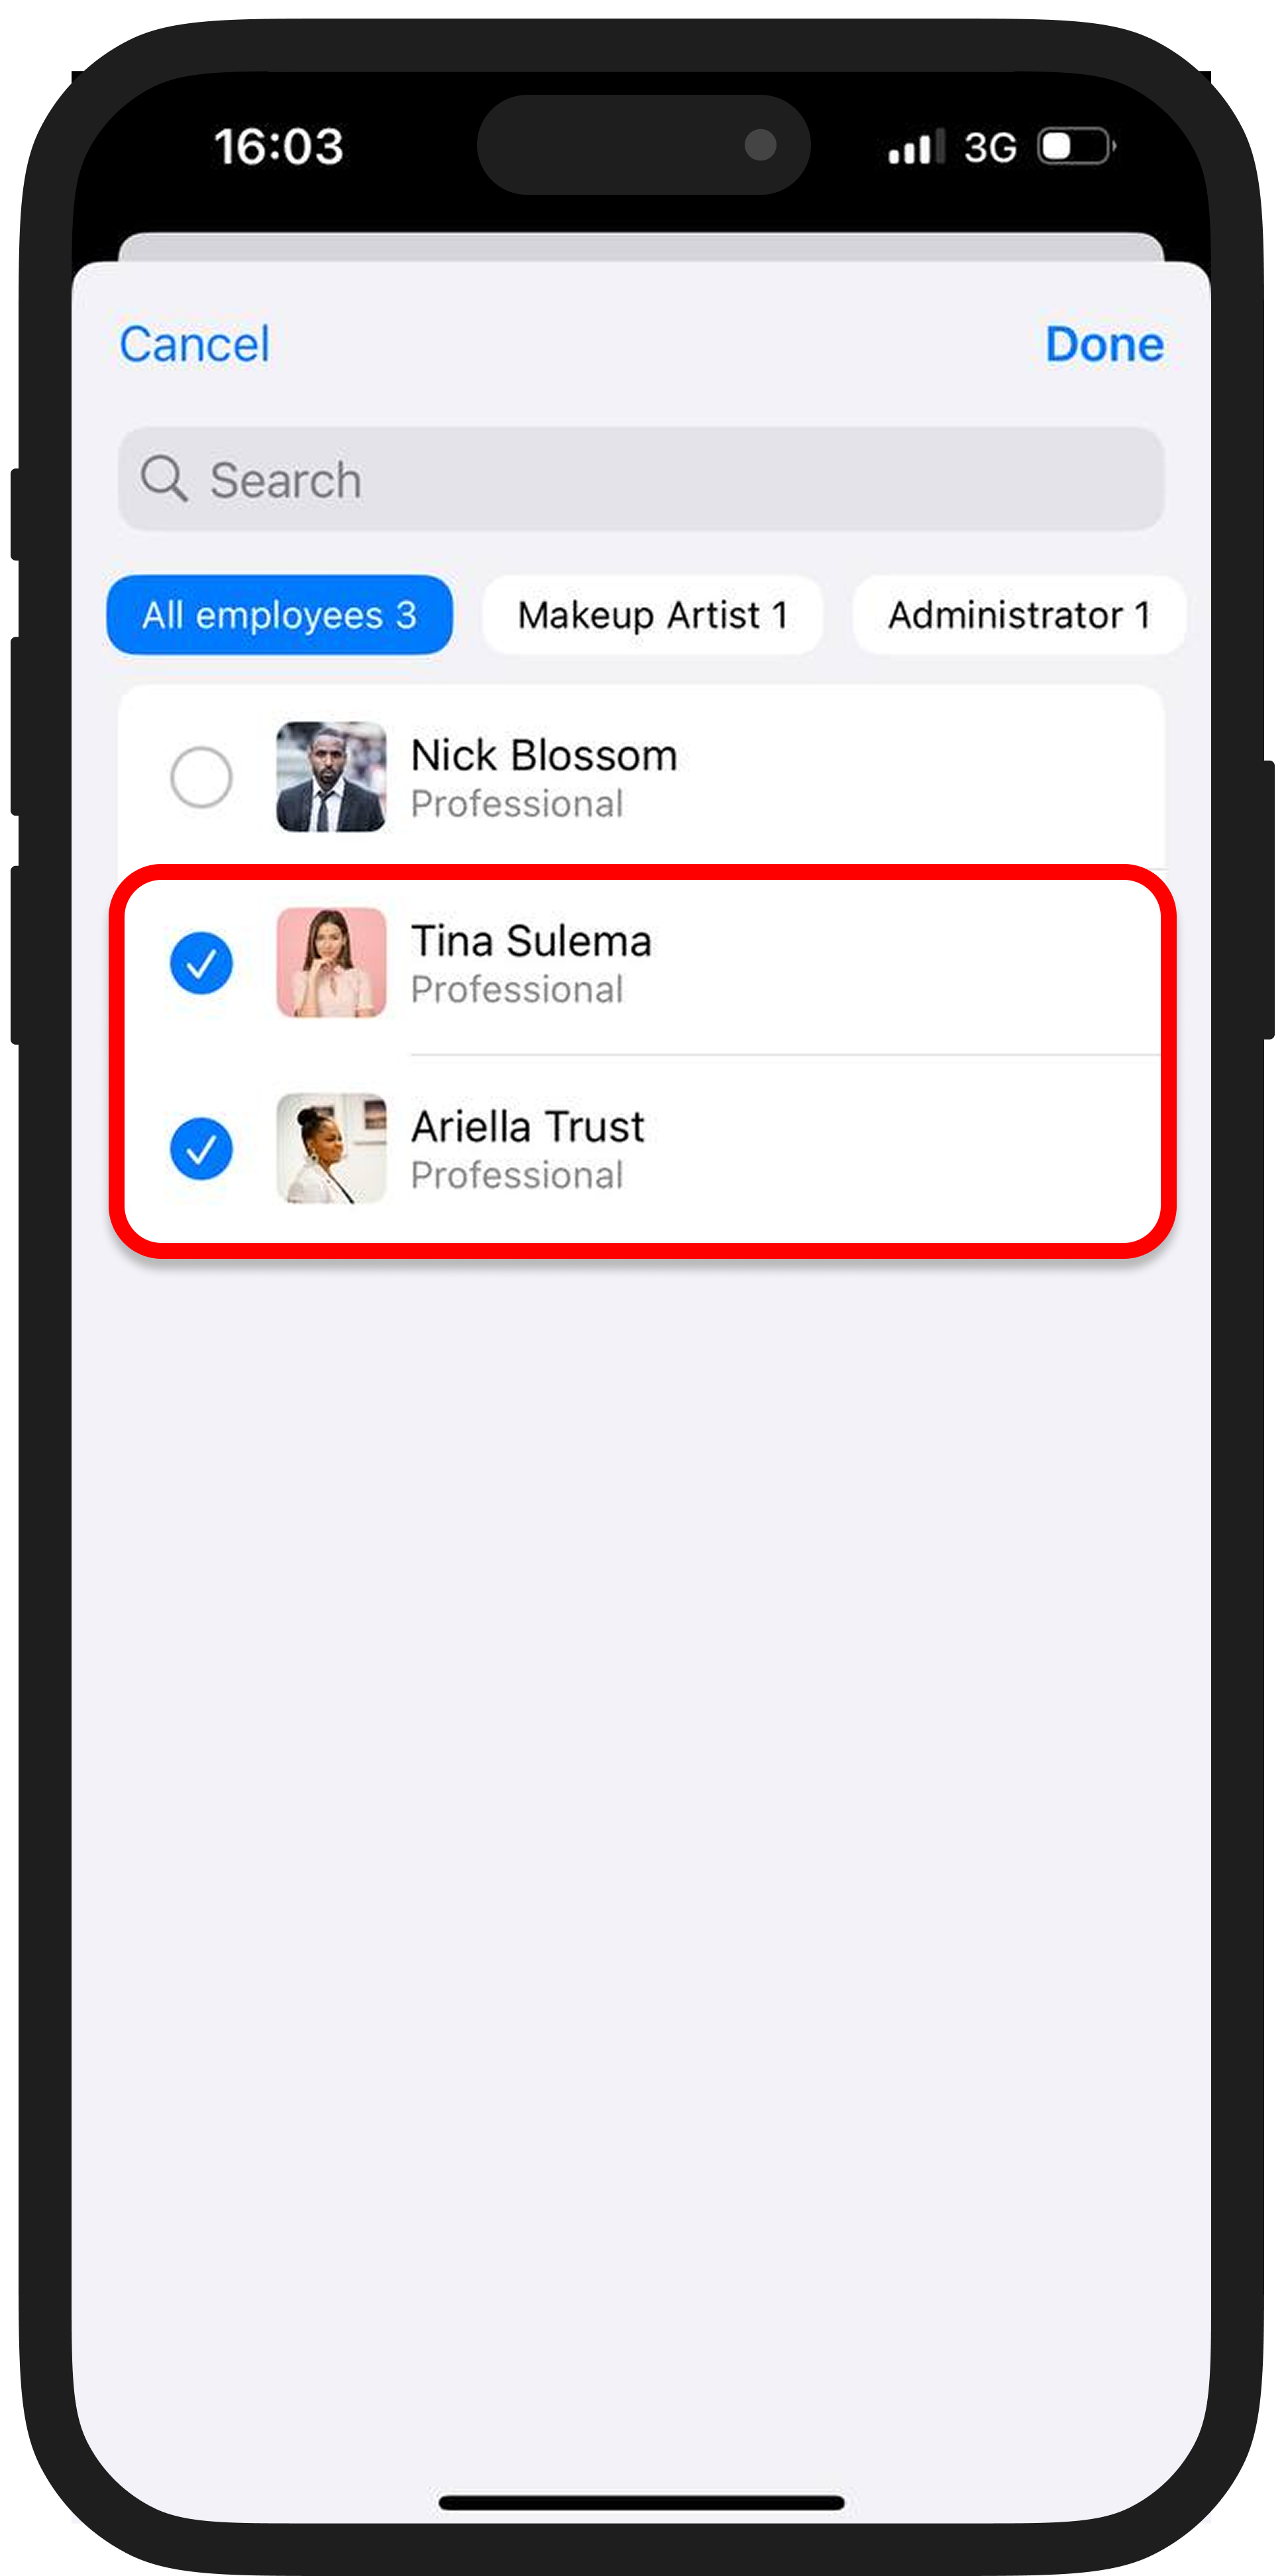
1️⃣ Go to the "Schedule" section and click the "Set" button. Select which specialists need to have a break added or changed;
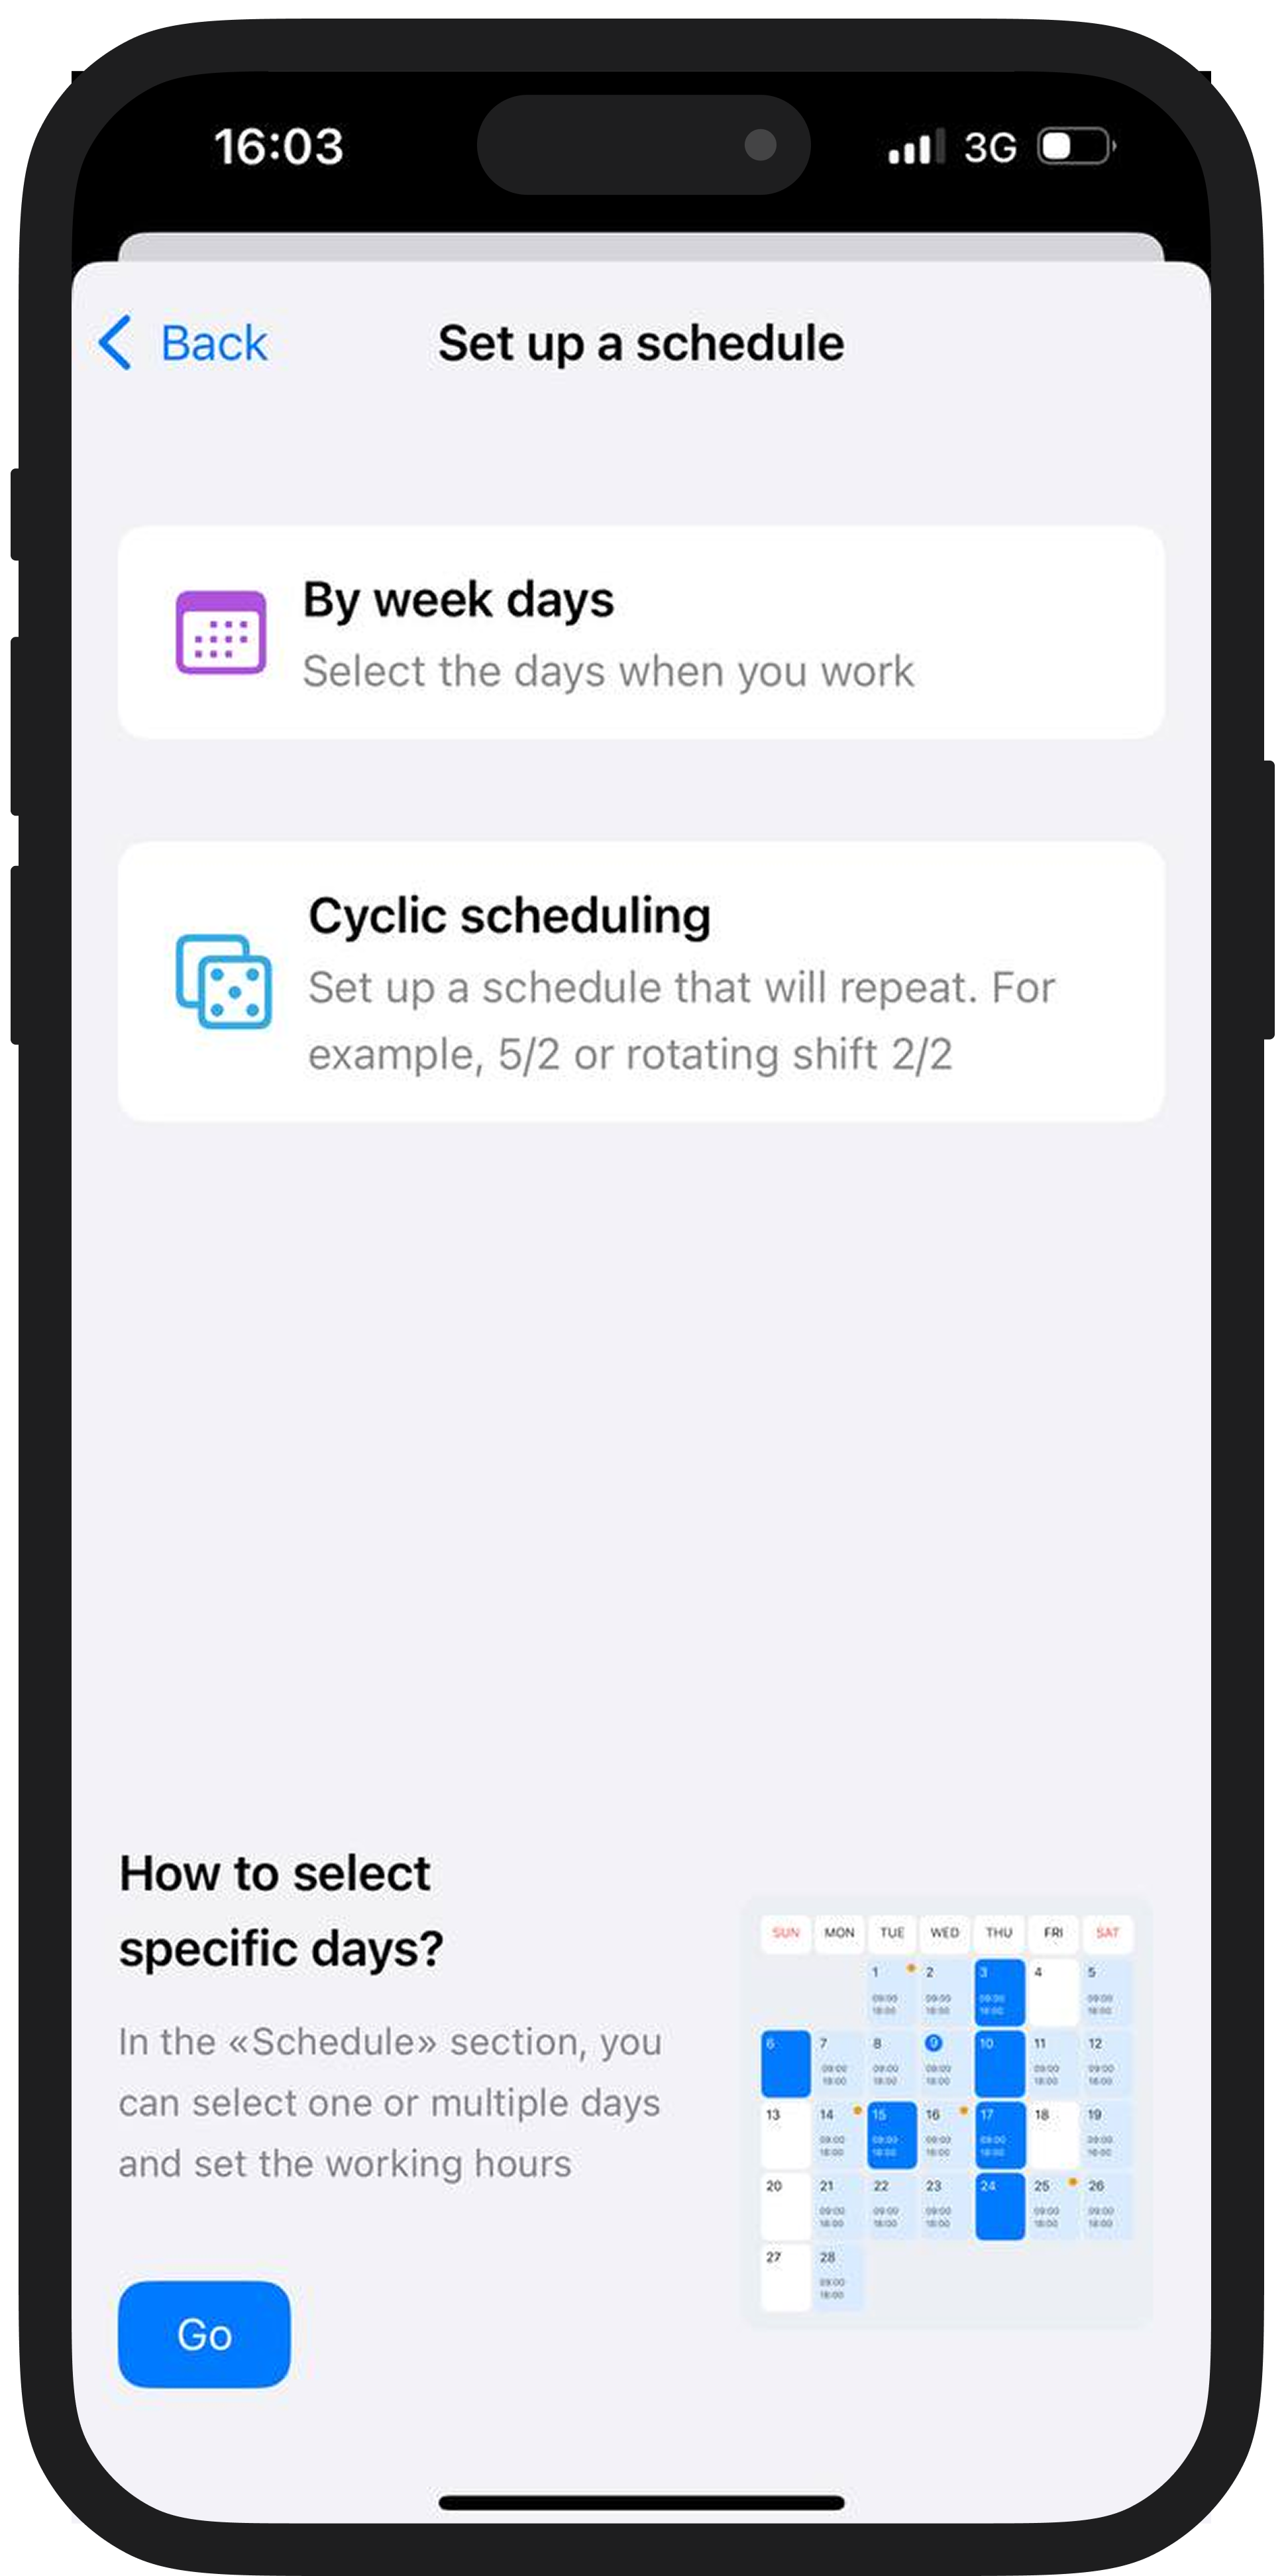
2️⃣ Choose the schedule type: by weekdays or cyclic;
3️⃣ Go to the time settings and add the break;
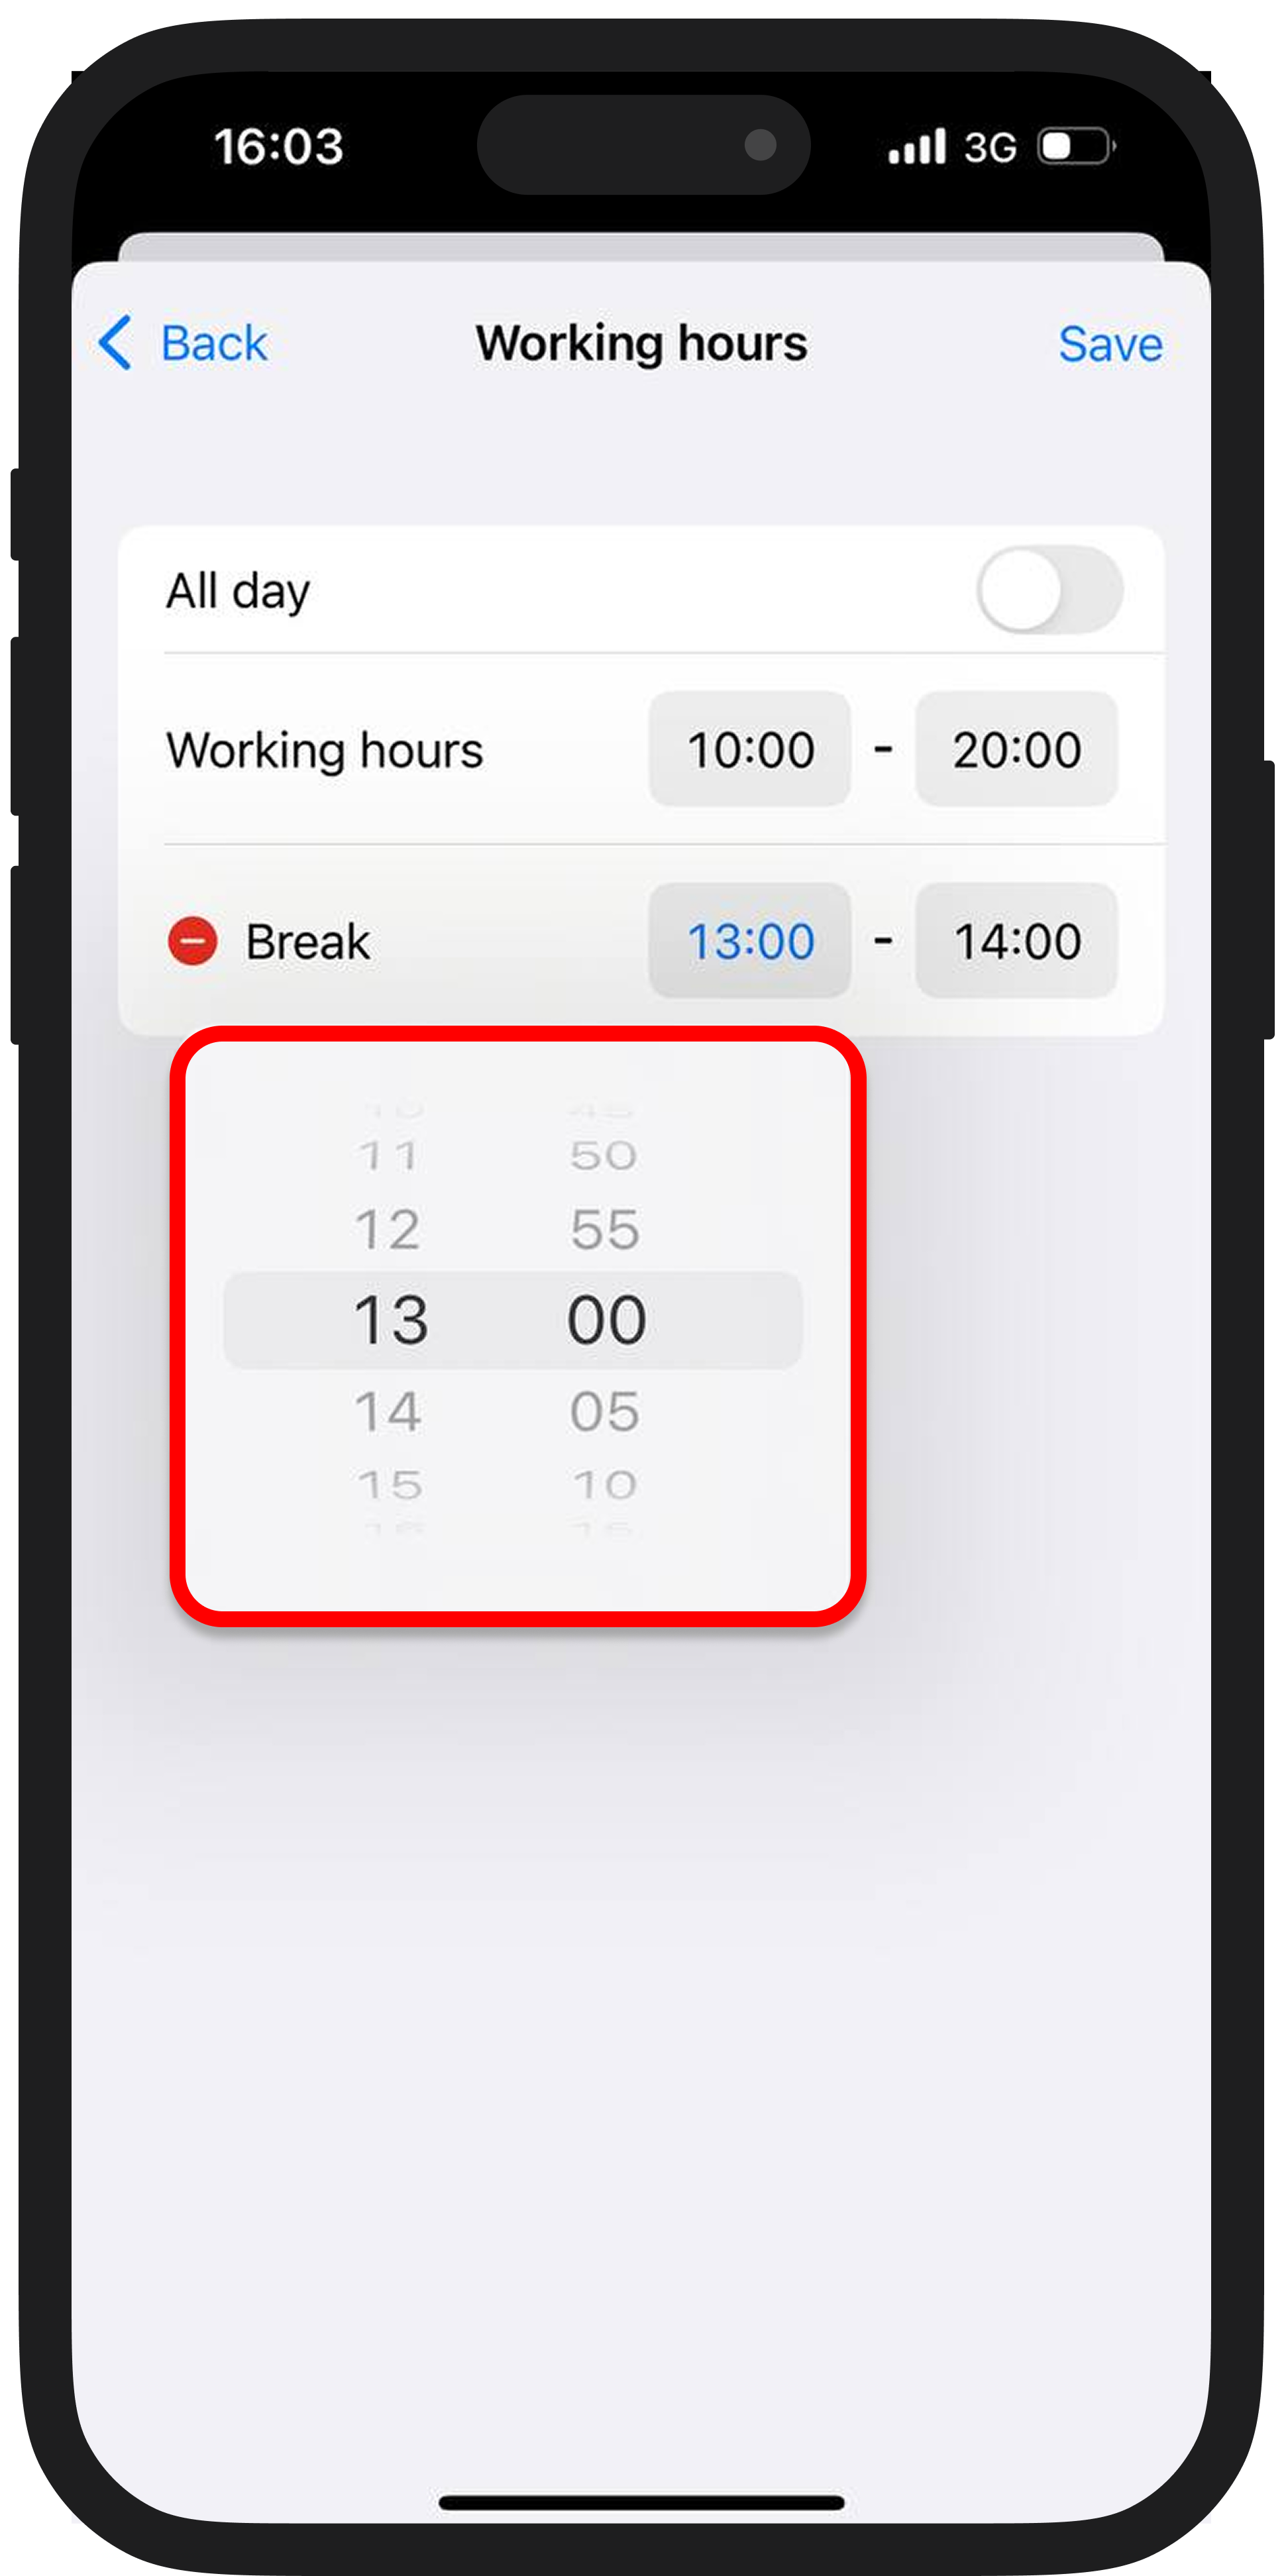
Save the changes.
Adding a break after an appointment in the mobile app is currently available only on iOS. The Android version will have this feature soon. ✨