How to Create a Network of Branches (Projects) in DIKIDI
Last modified:
Follow this guide to create a unified network of branches (projects) and analyze them within a single dashboard.
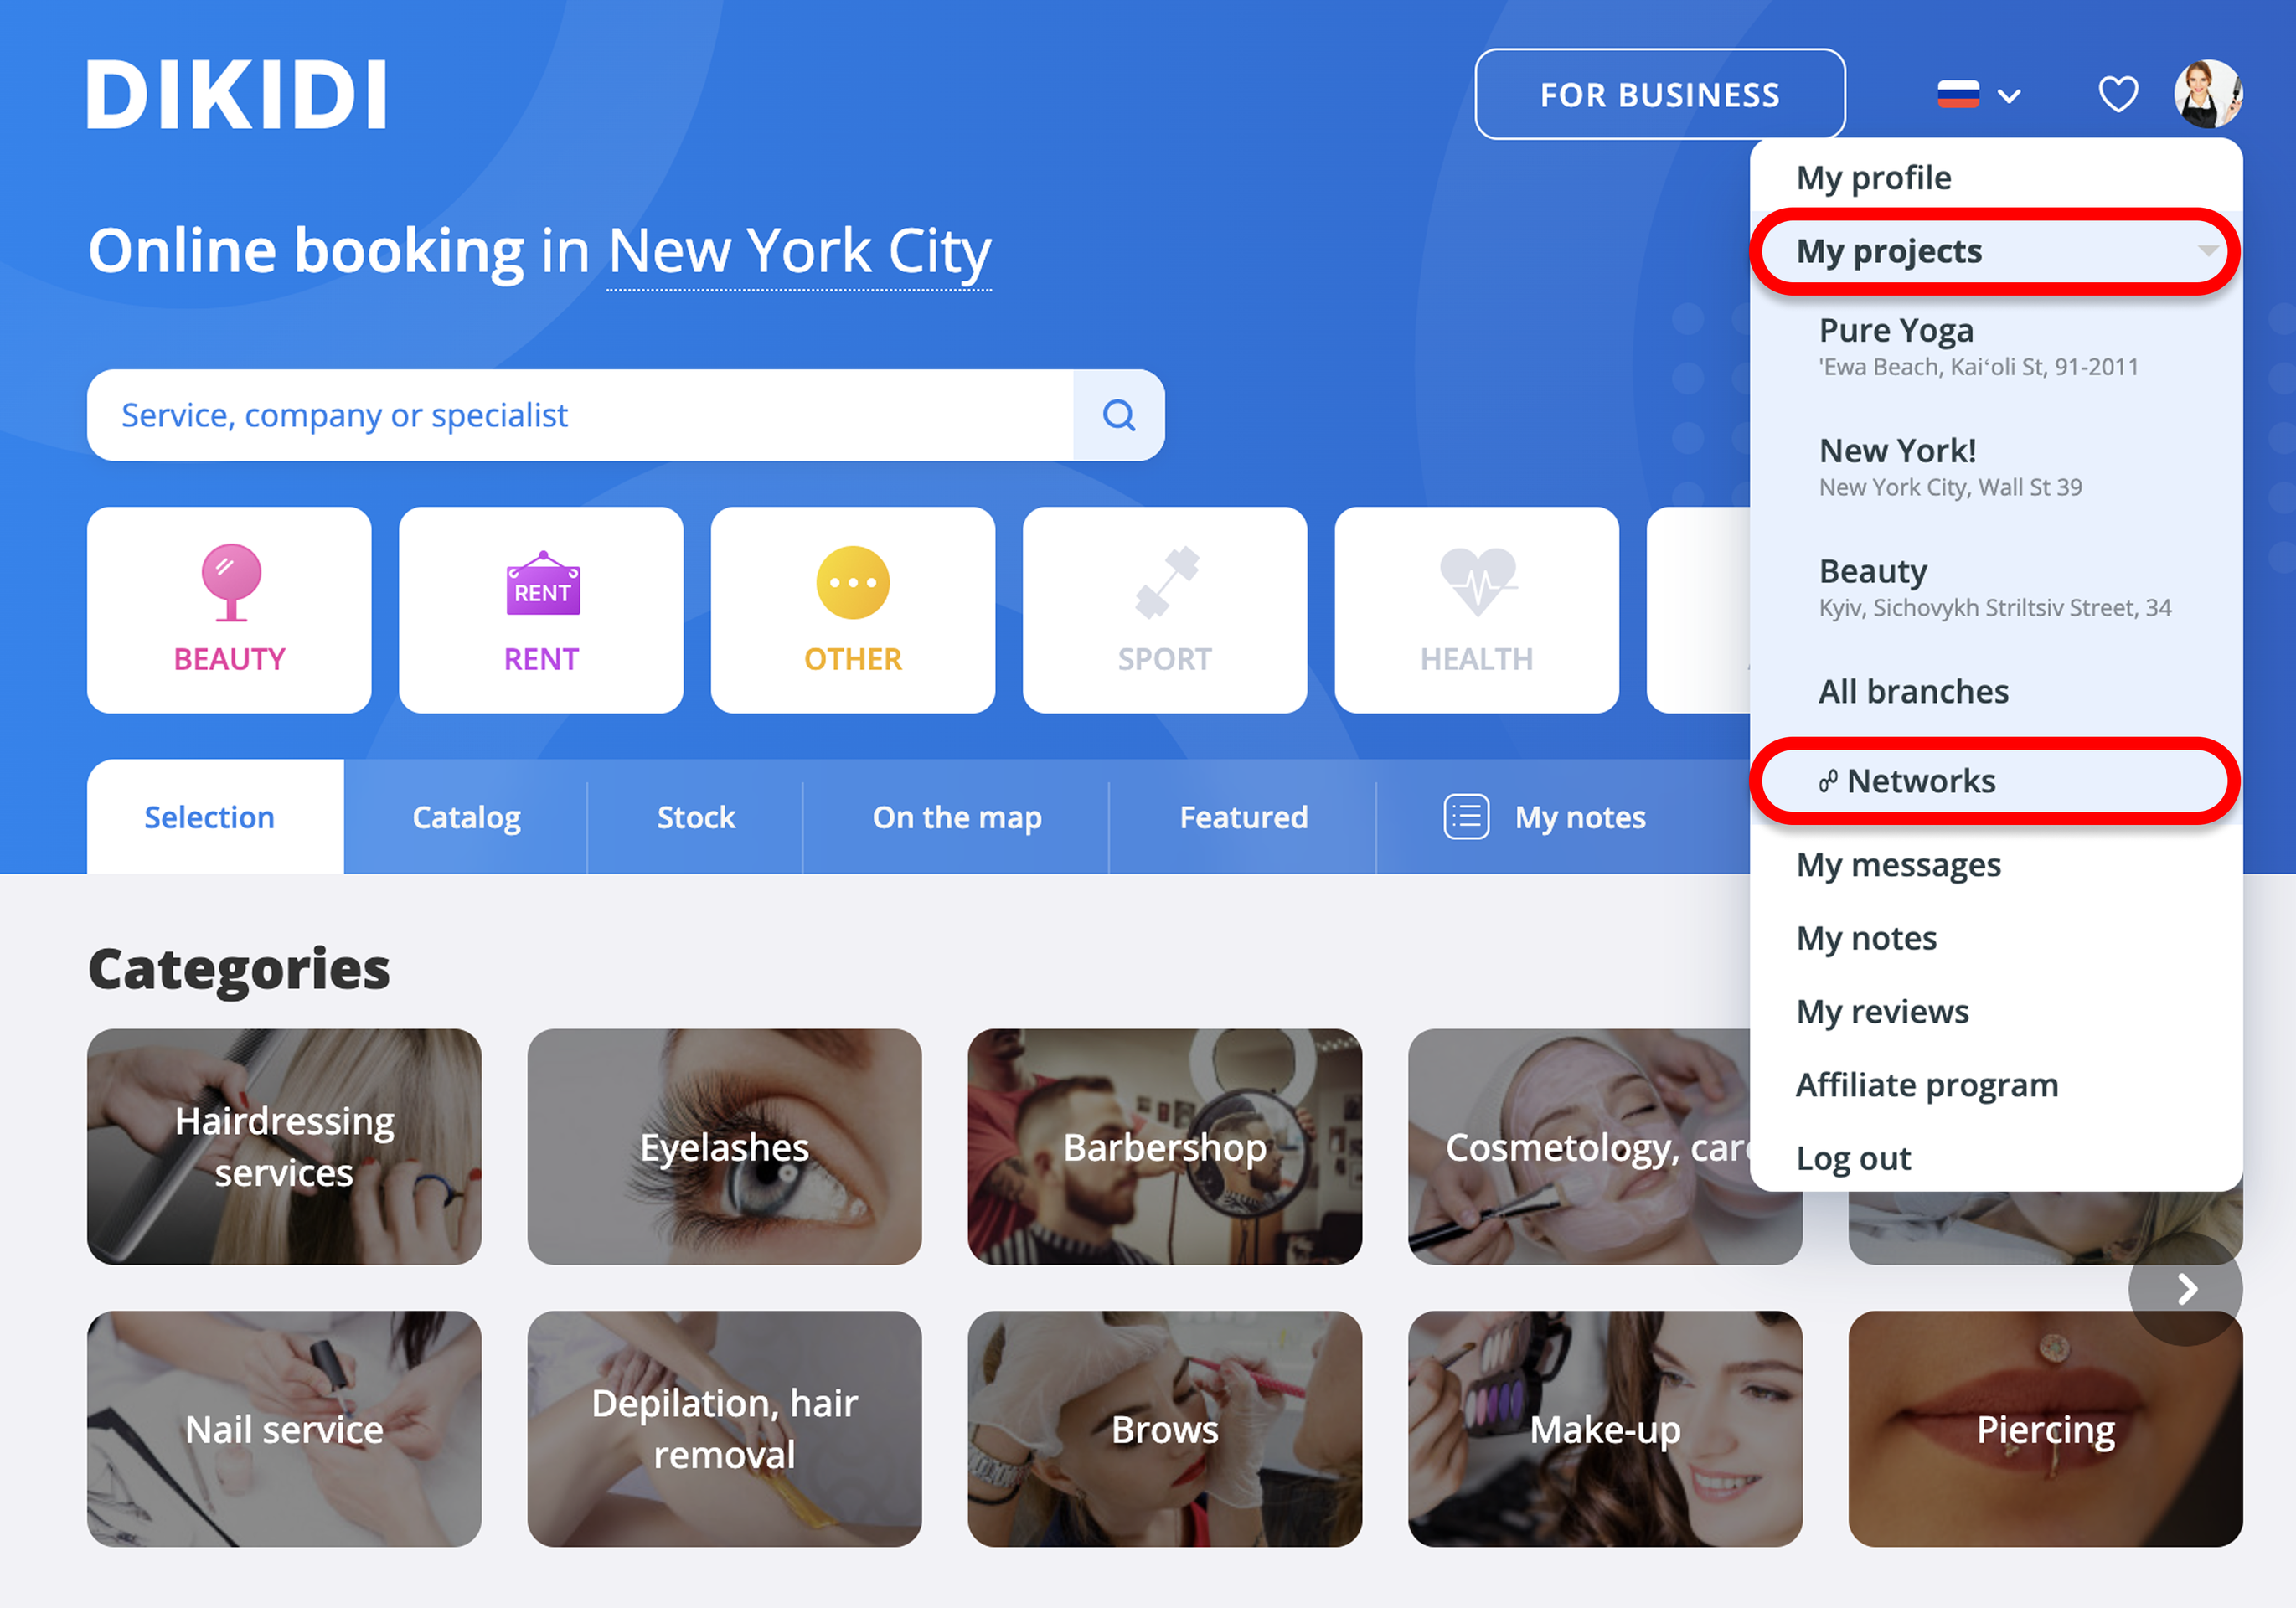
1️⃣ Navigate to the "Networks" Section
To create a network, you need to be a registered DIKIDI user. Access this feature in two ways:
🔹 On the website dikidi.net, click "For Business" in the upper right corner.

🔹 On dikidi.net, click on your profile, select "My Projects" and from the dropdown menu, click "Networks"
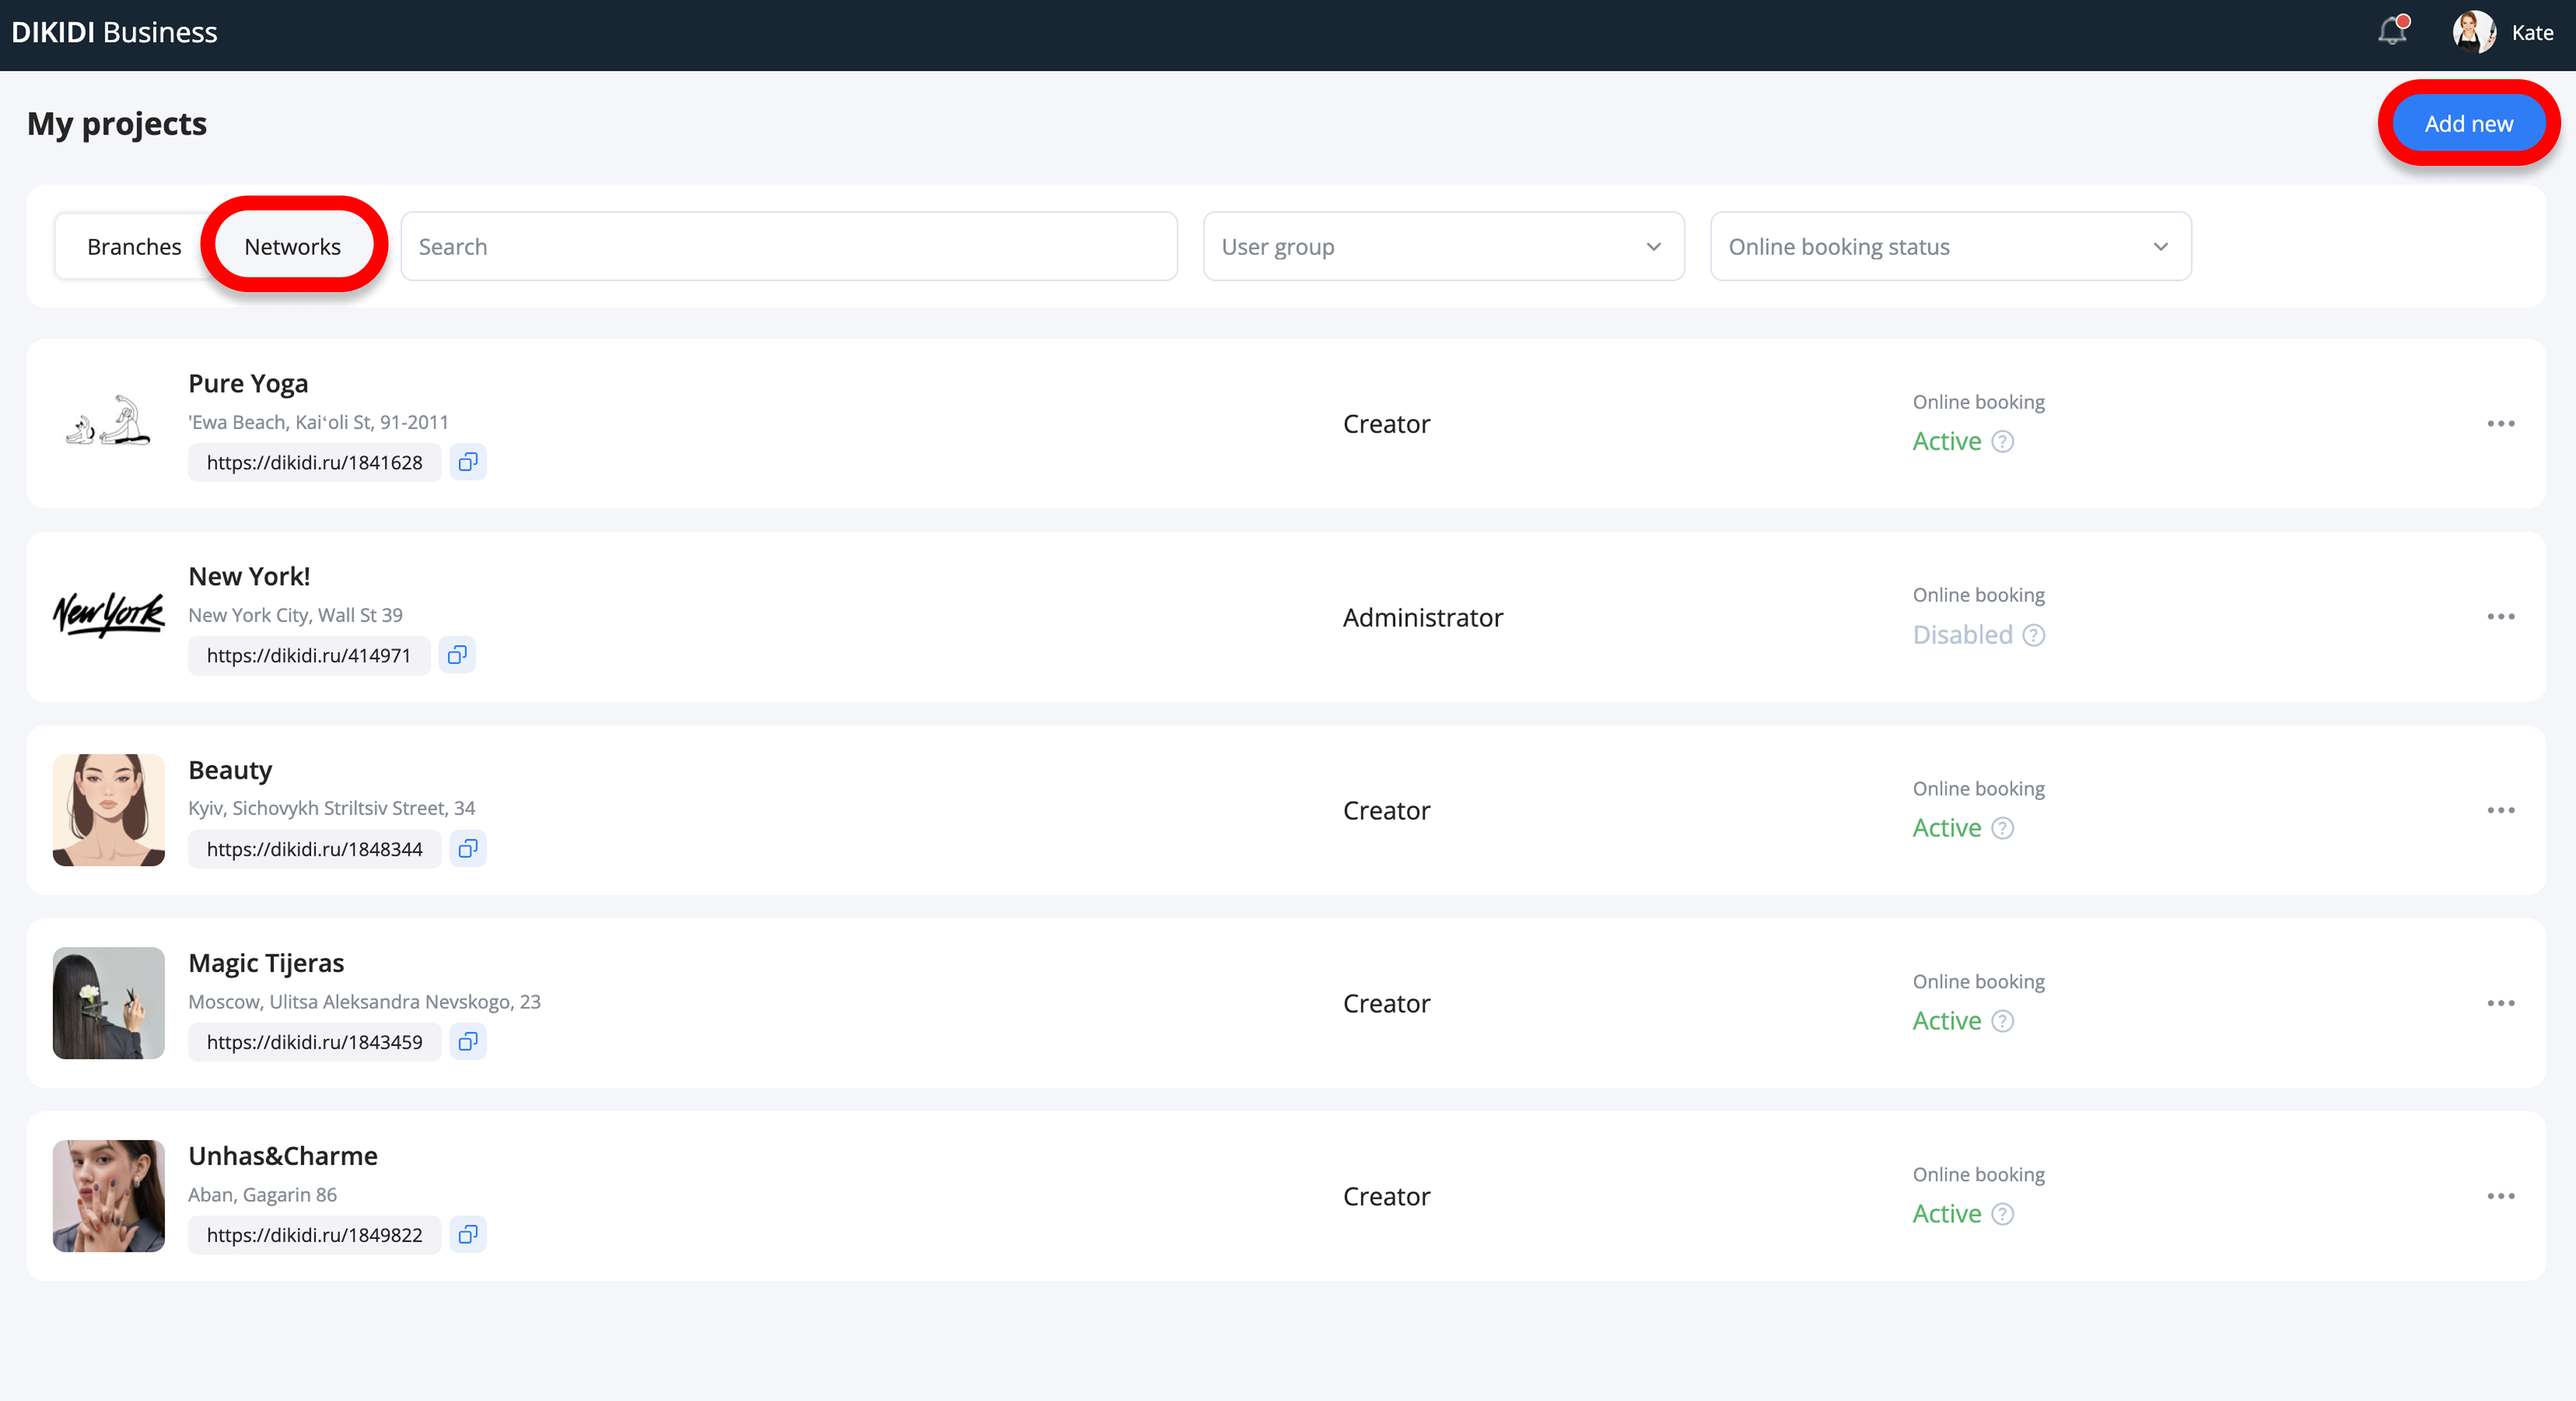
2️⃣ Create a New Network
You're now in the "Networks" section. To create a network:
-
Go to the "Networks" tab → click "Add new" (button located in the center of the screen and in the upper right corner).
-
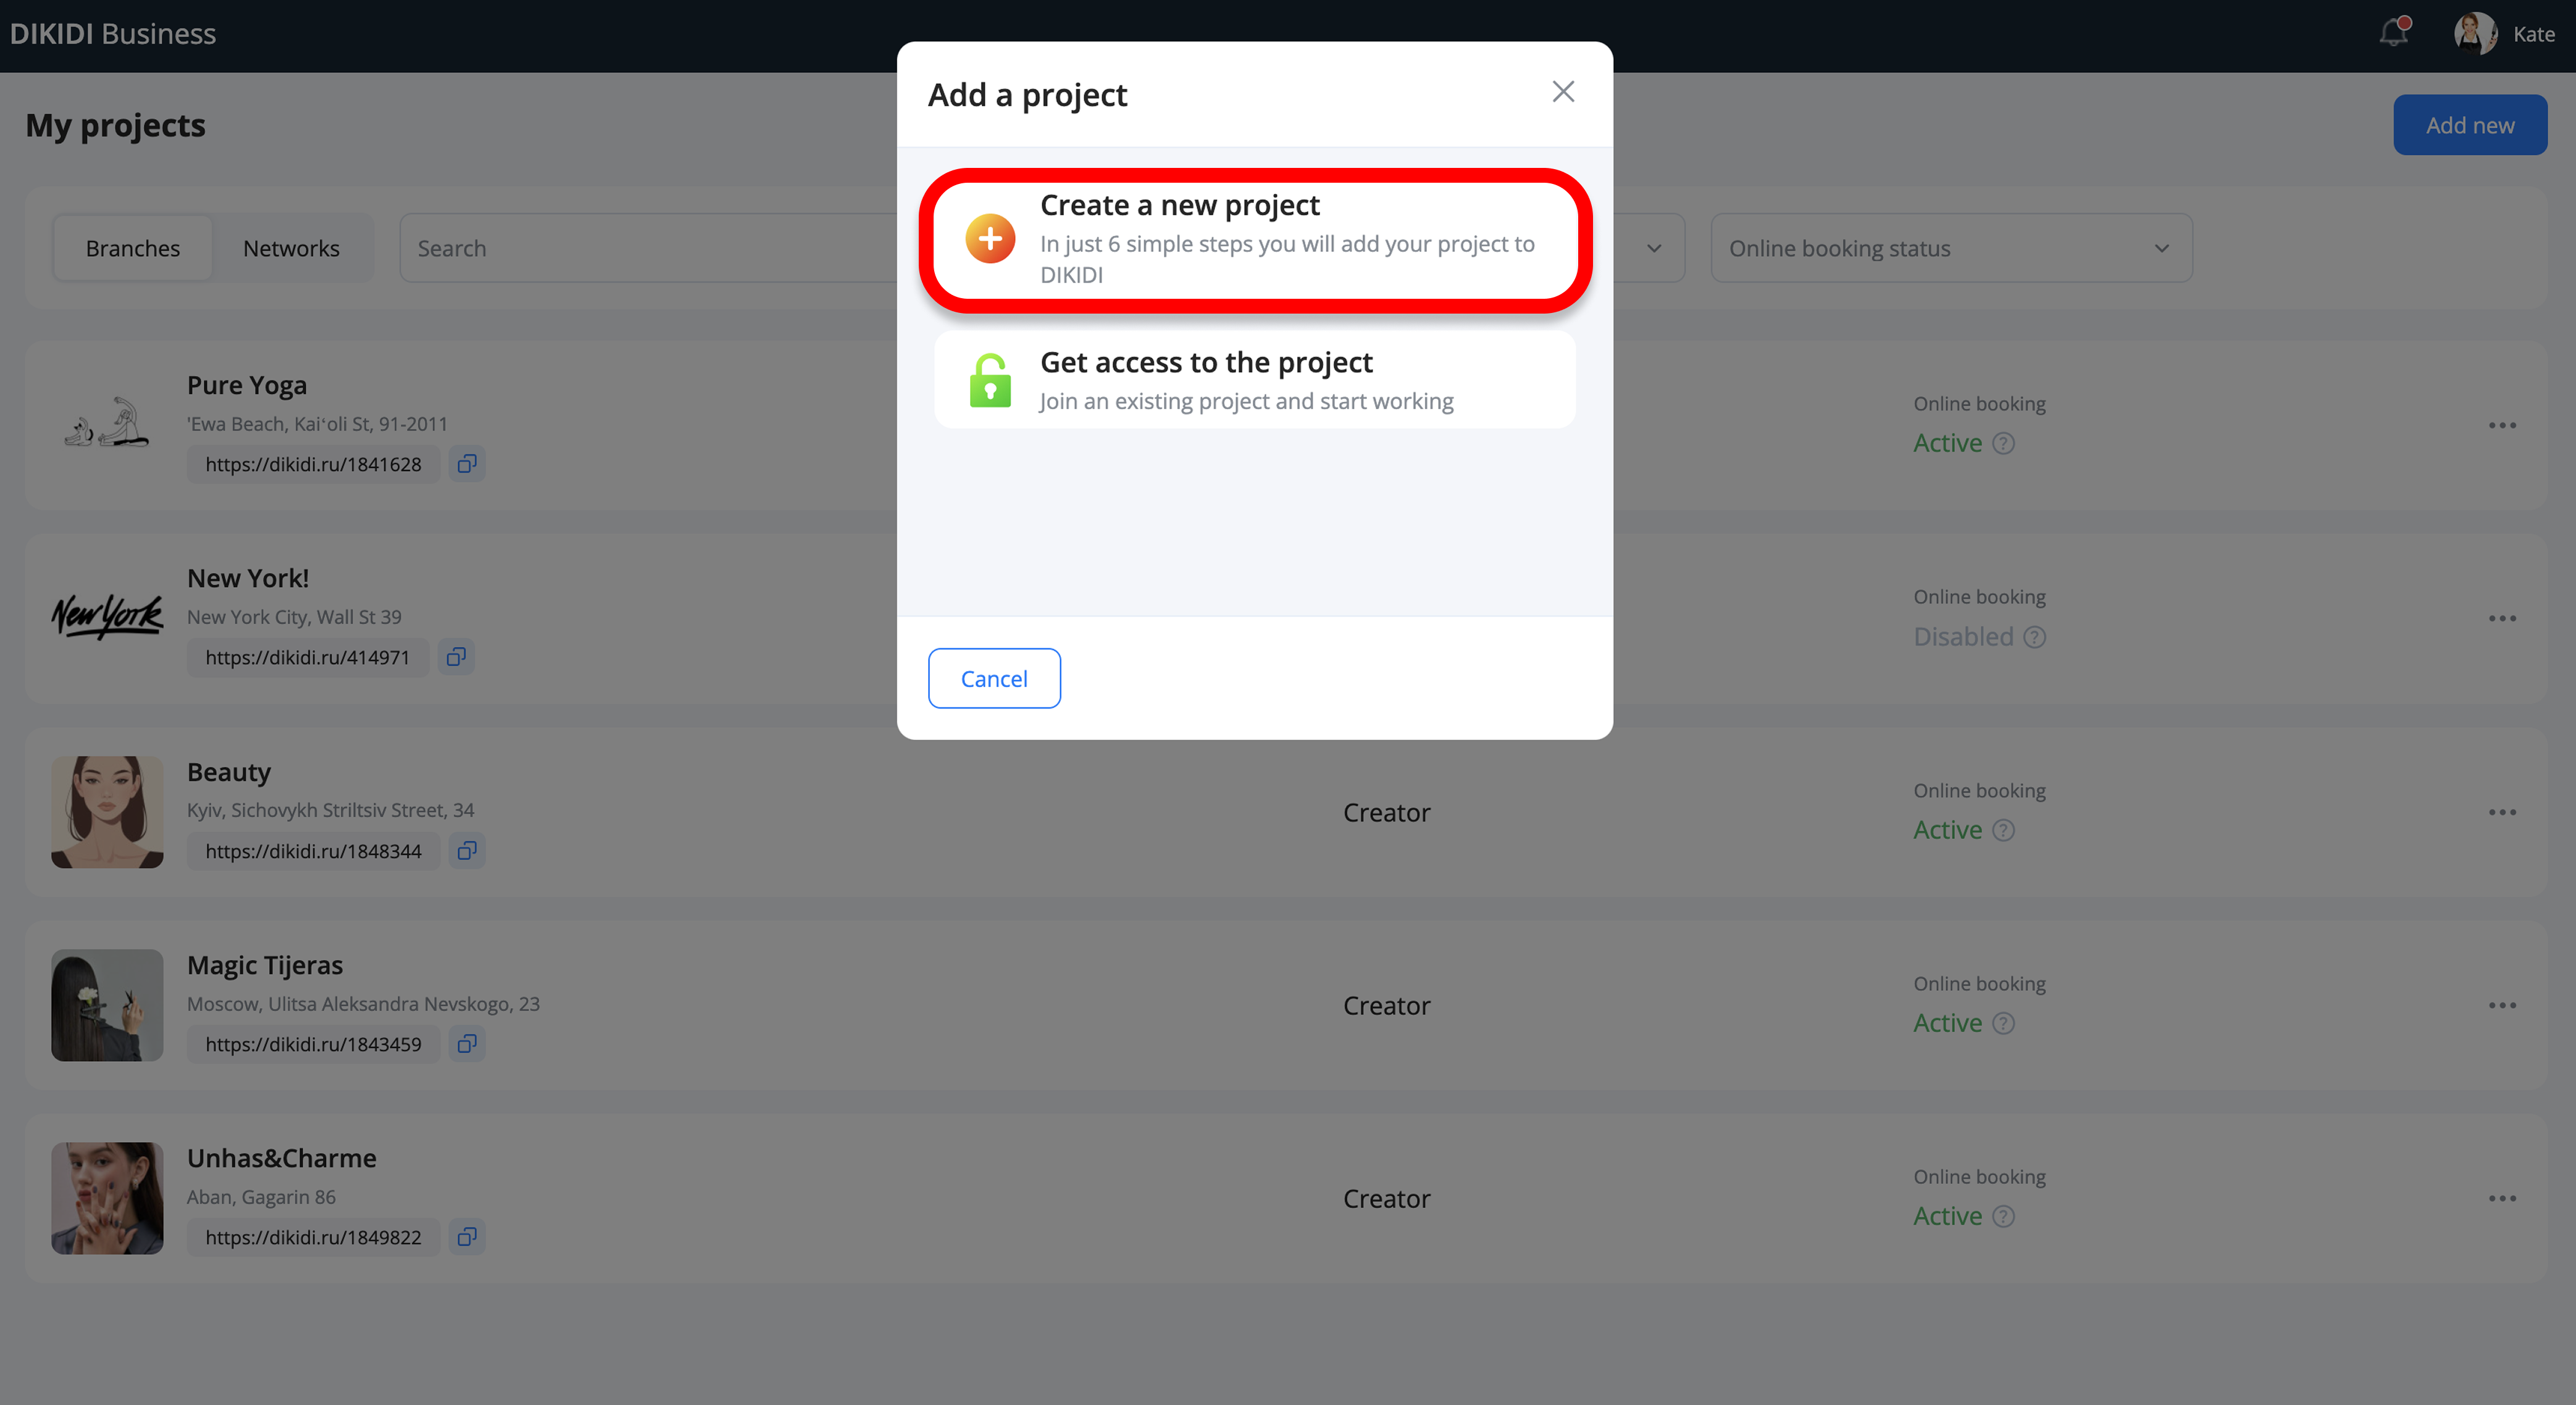
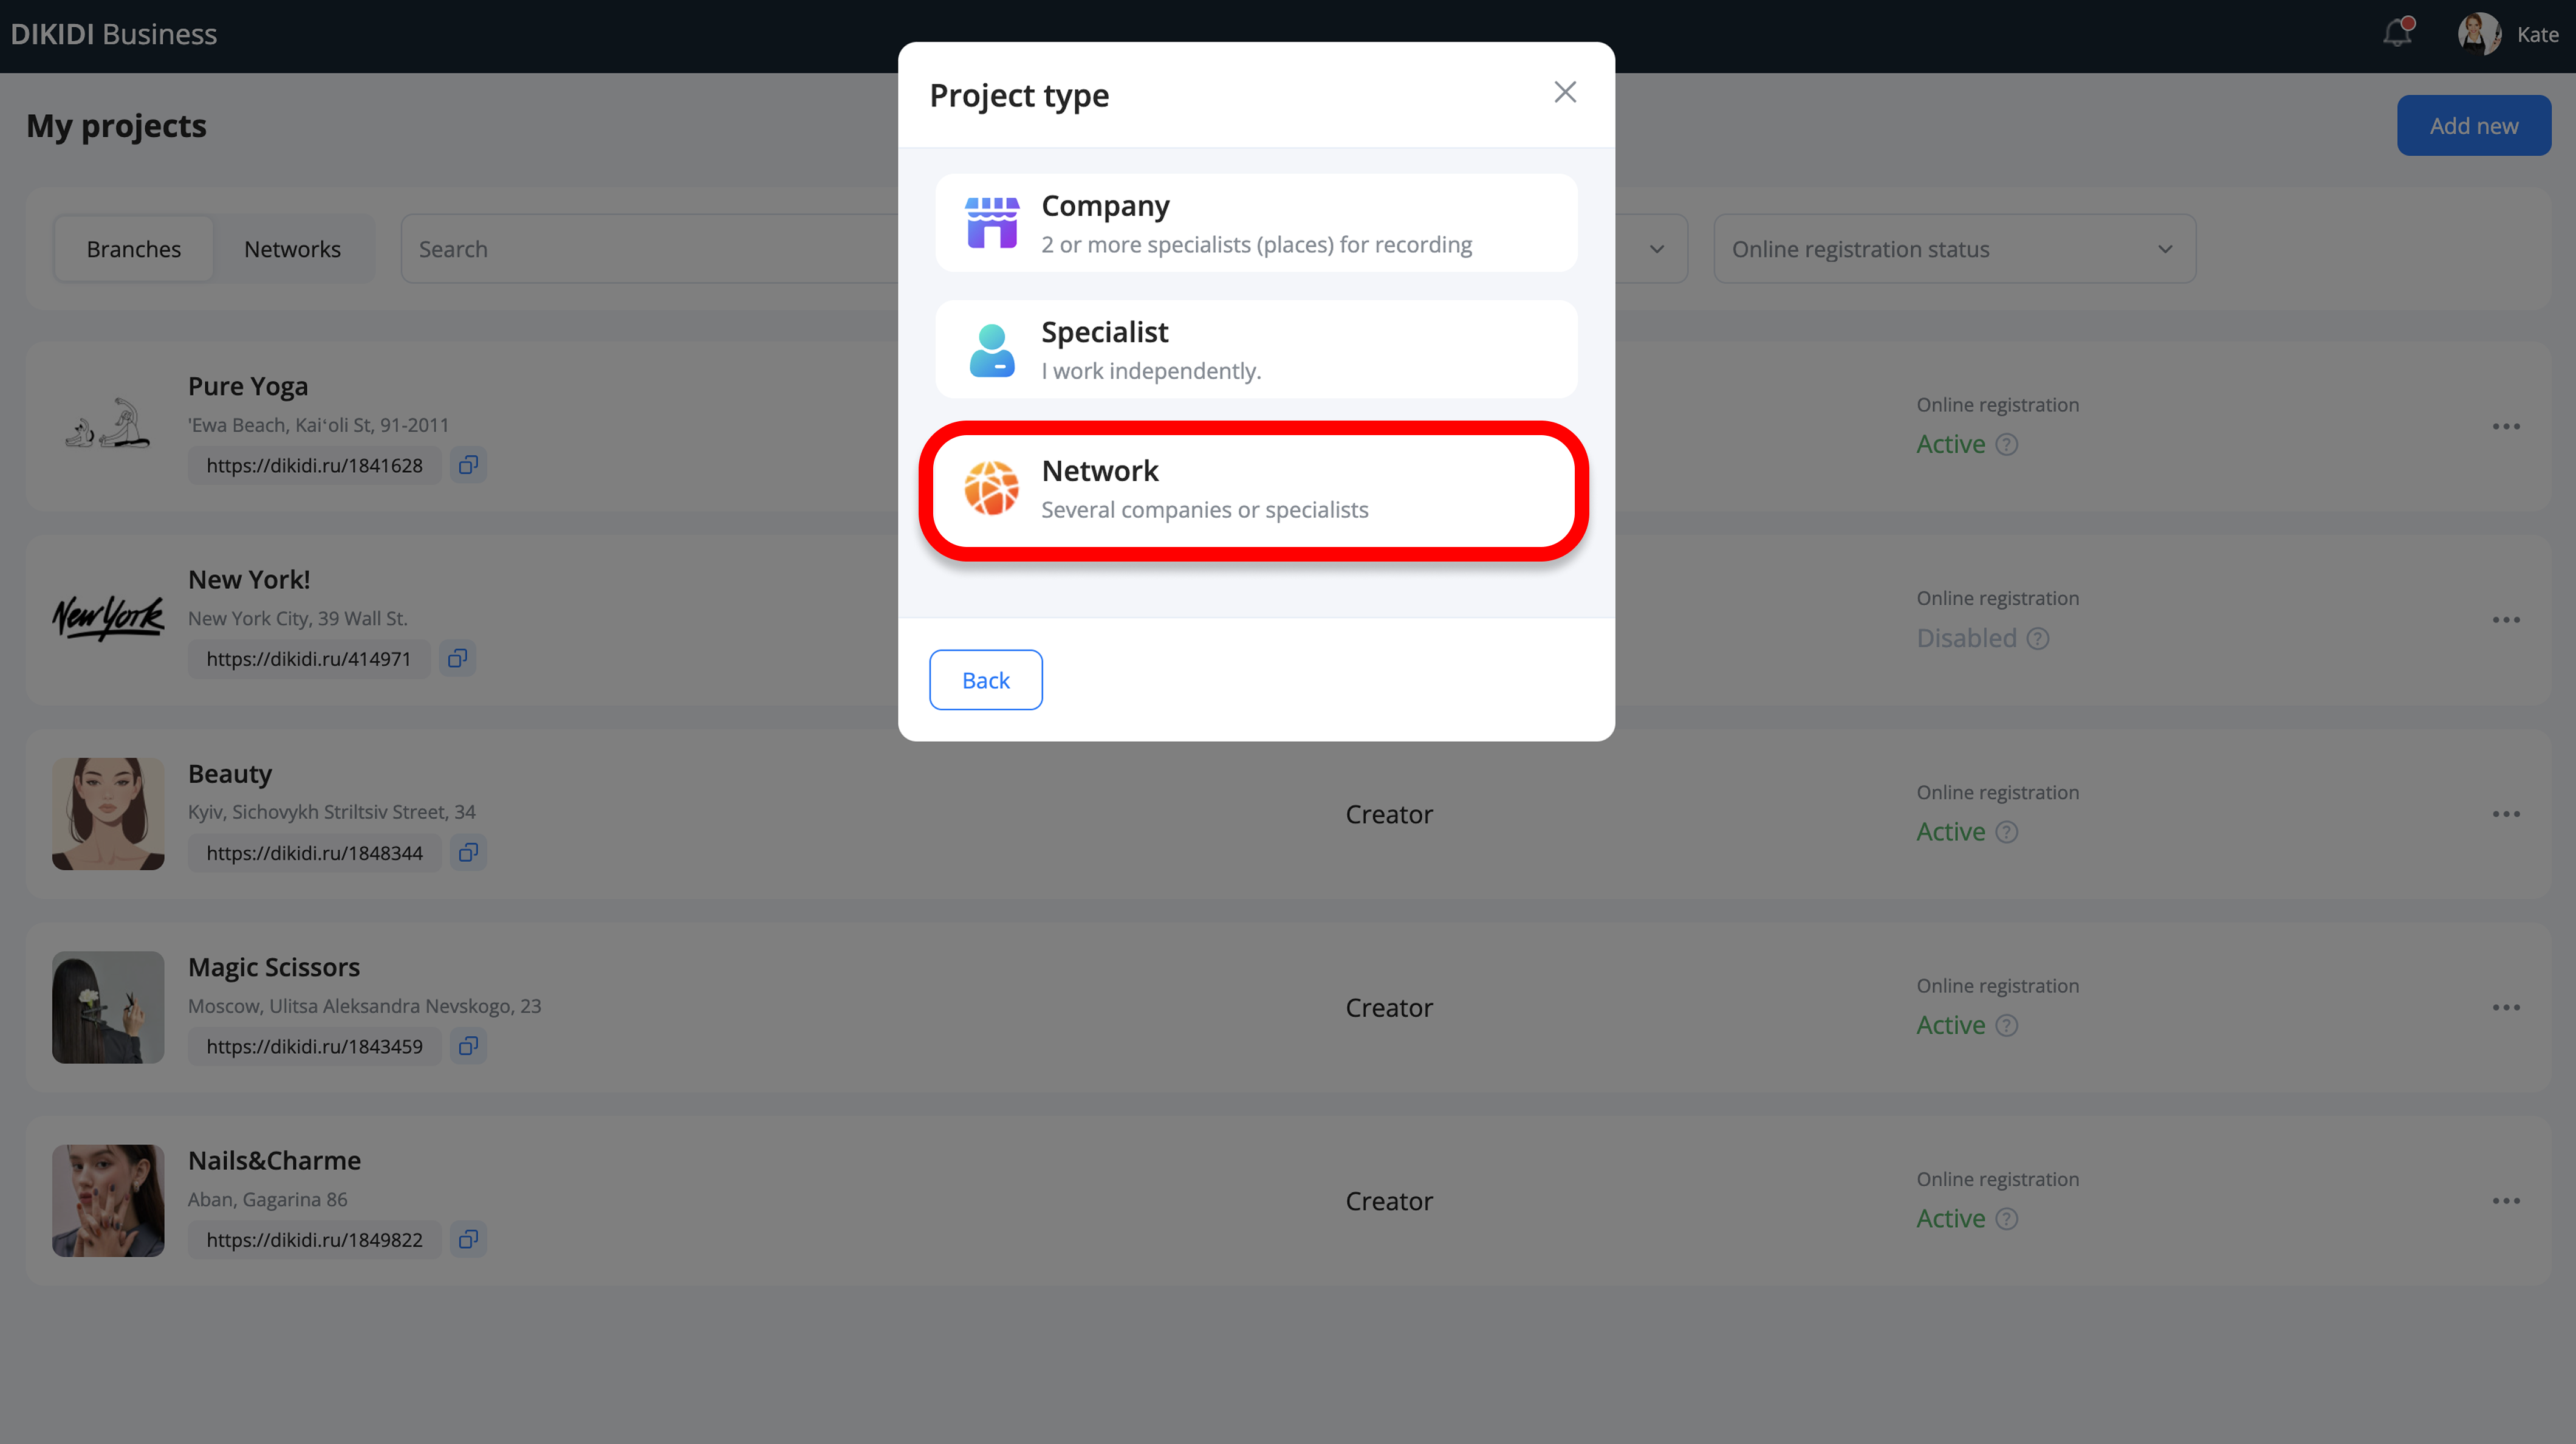
You also can go to the "Branches" tab → click "Add New" in the upper right corner → select "Create New Project" → "Network"
3️⃣ Fill in Network Information
In the window that opens, specify:
-
Network Name
-
Country (this determines the currency for reports)
4️⃣ Add Branches
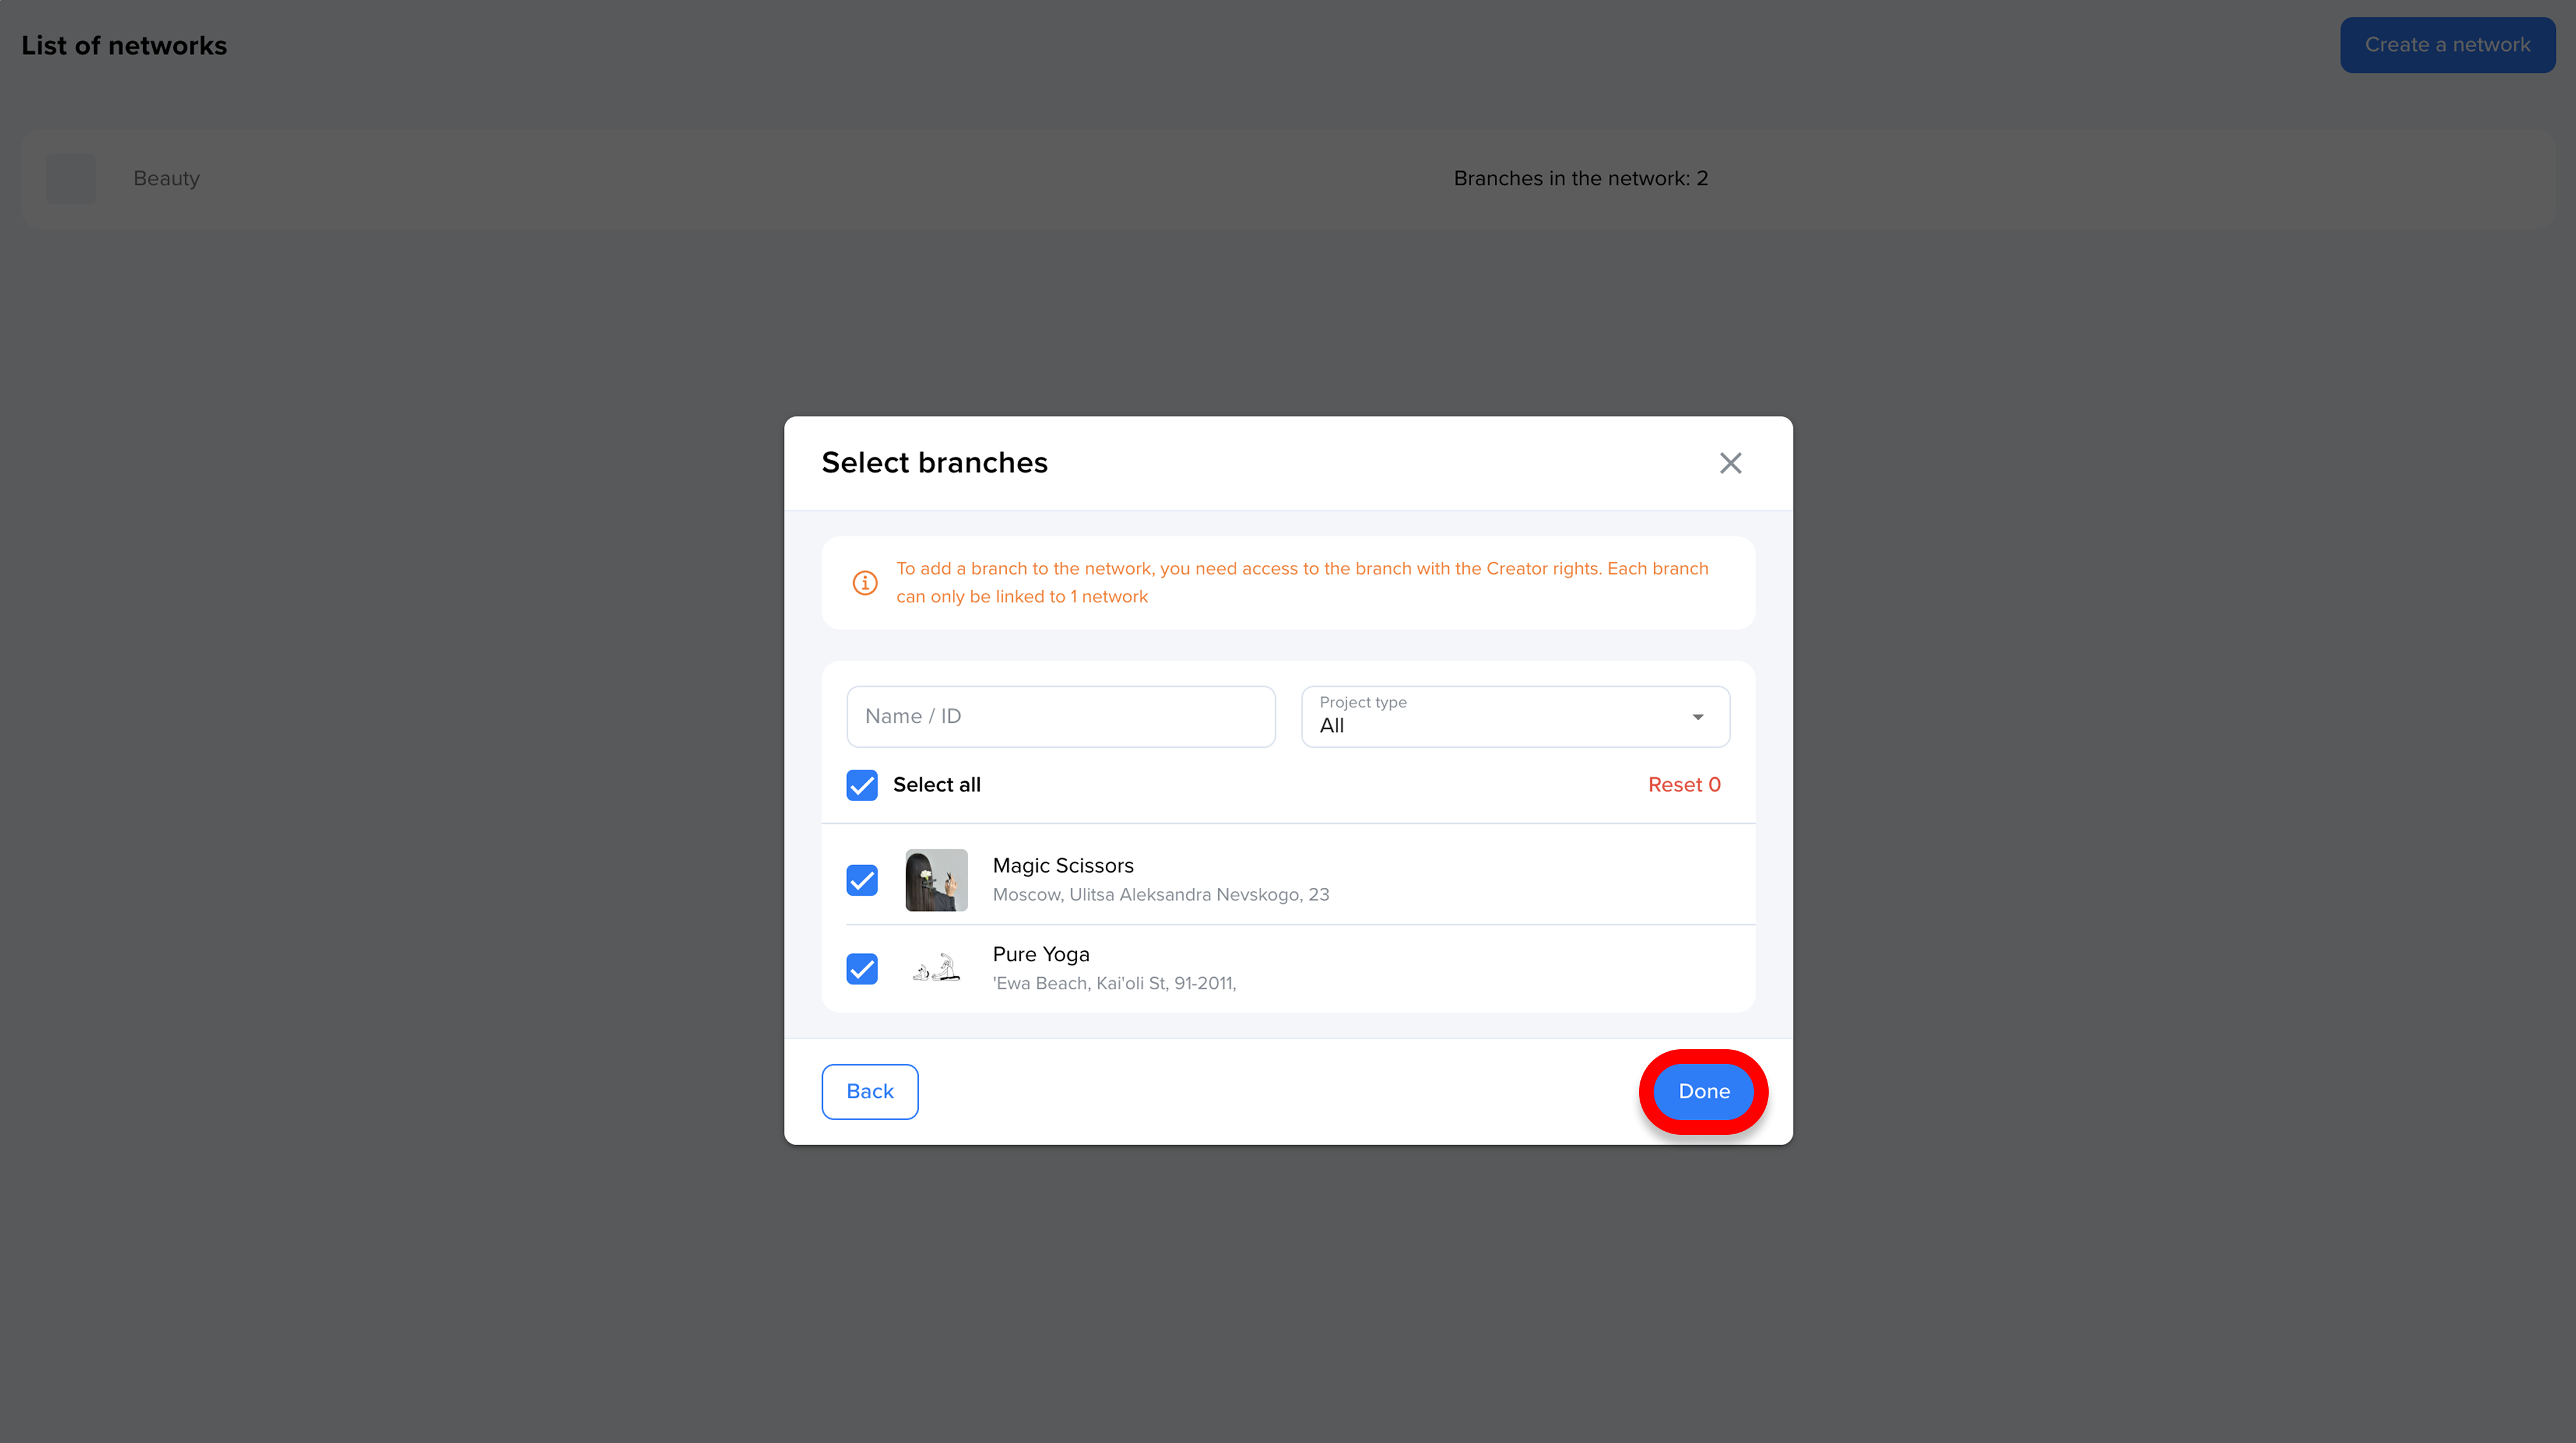
Click "Branch" and select the projects you want to include in the network. You can only add projects where you have Creator access.
⚠️ NB! A project can only be included as a branch in one network. If the project is already a branch in another network, you won't be able to add it to a new one.
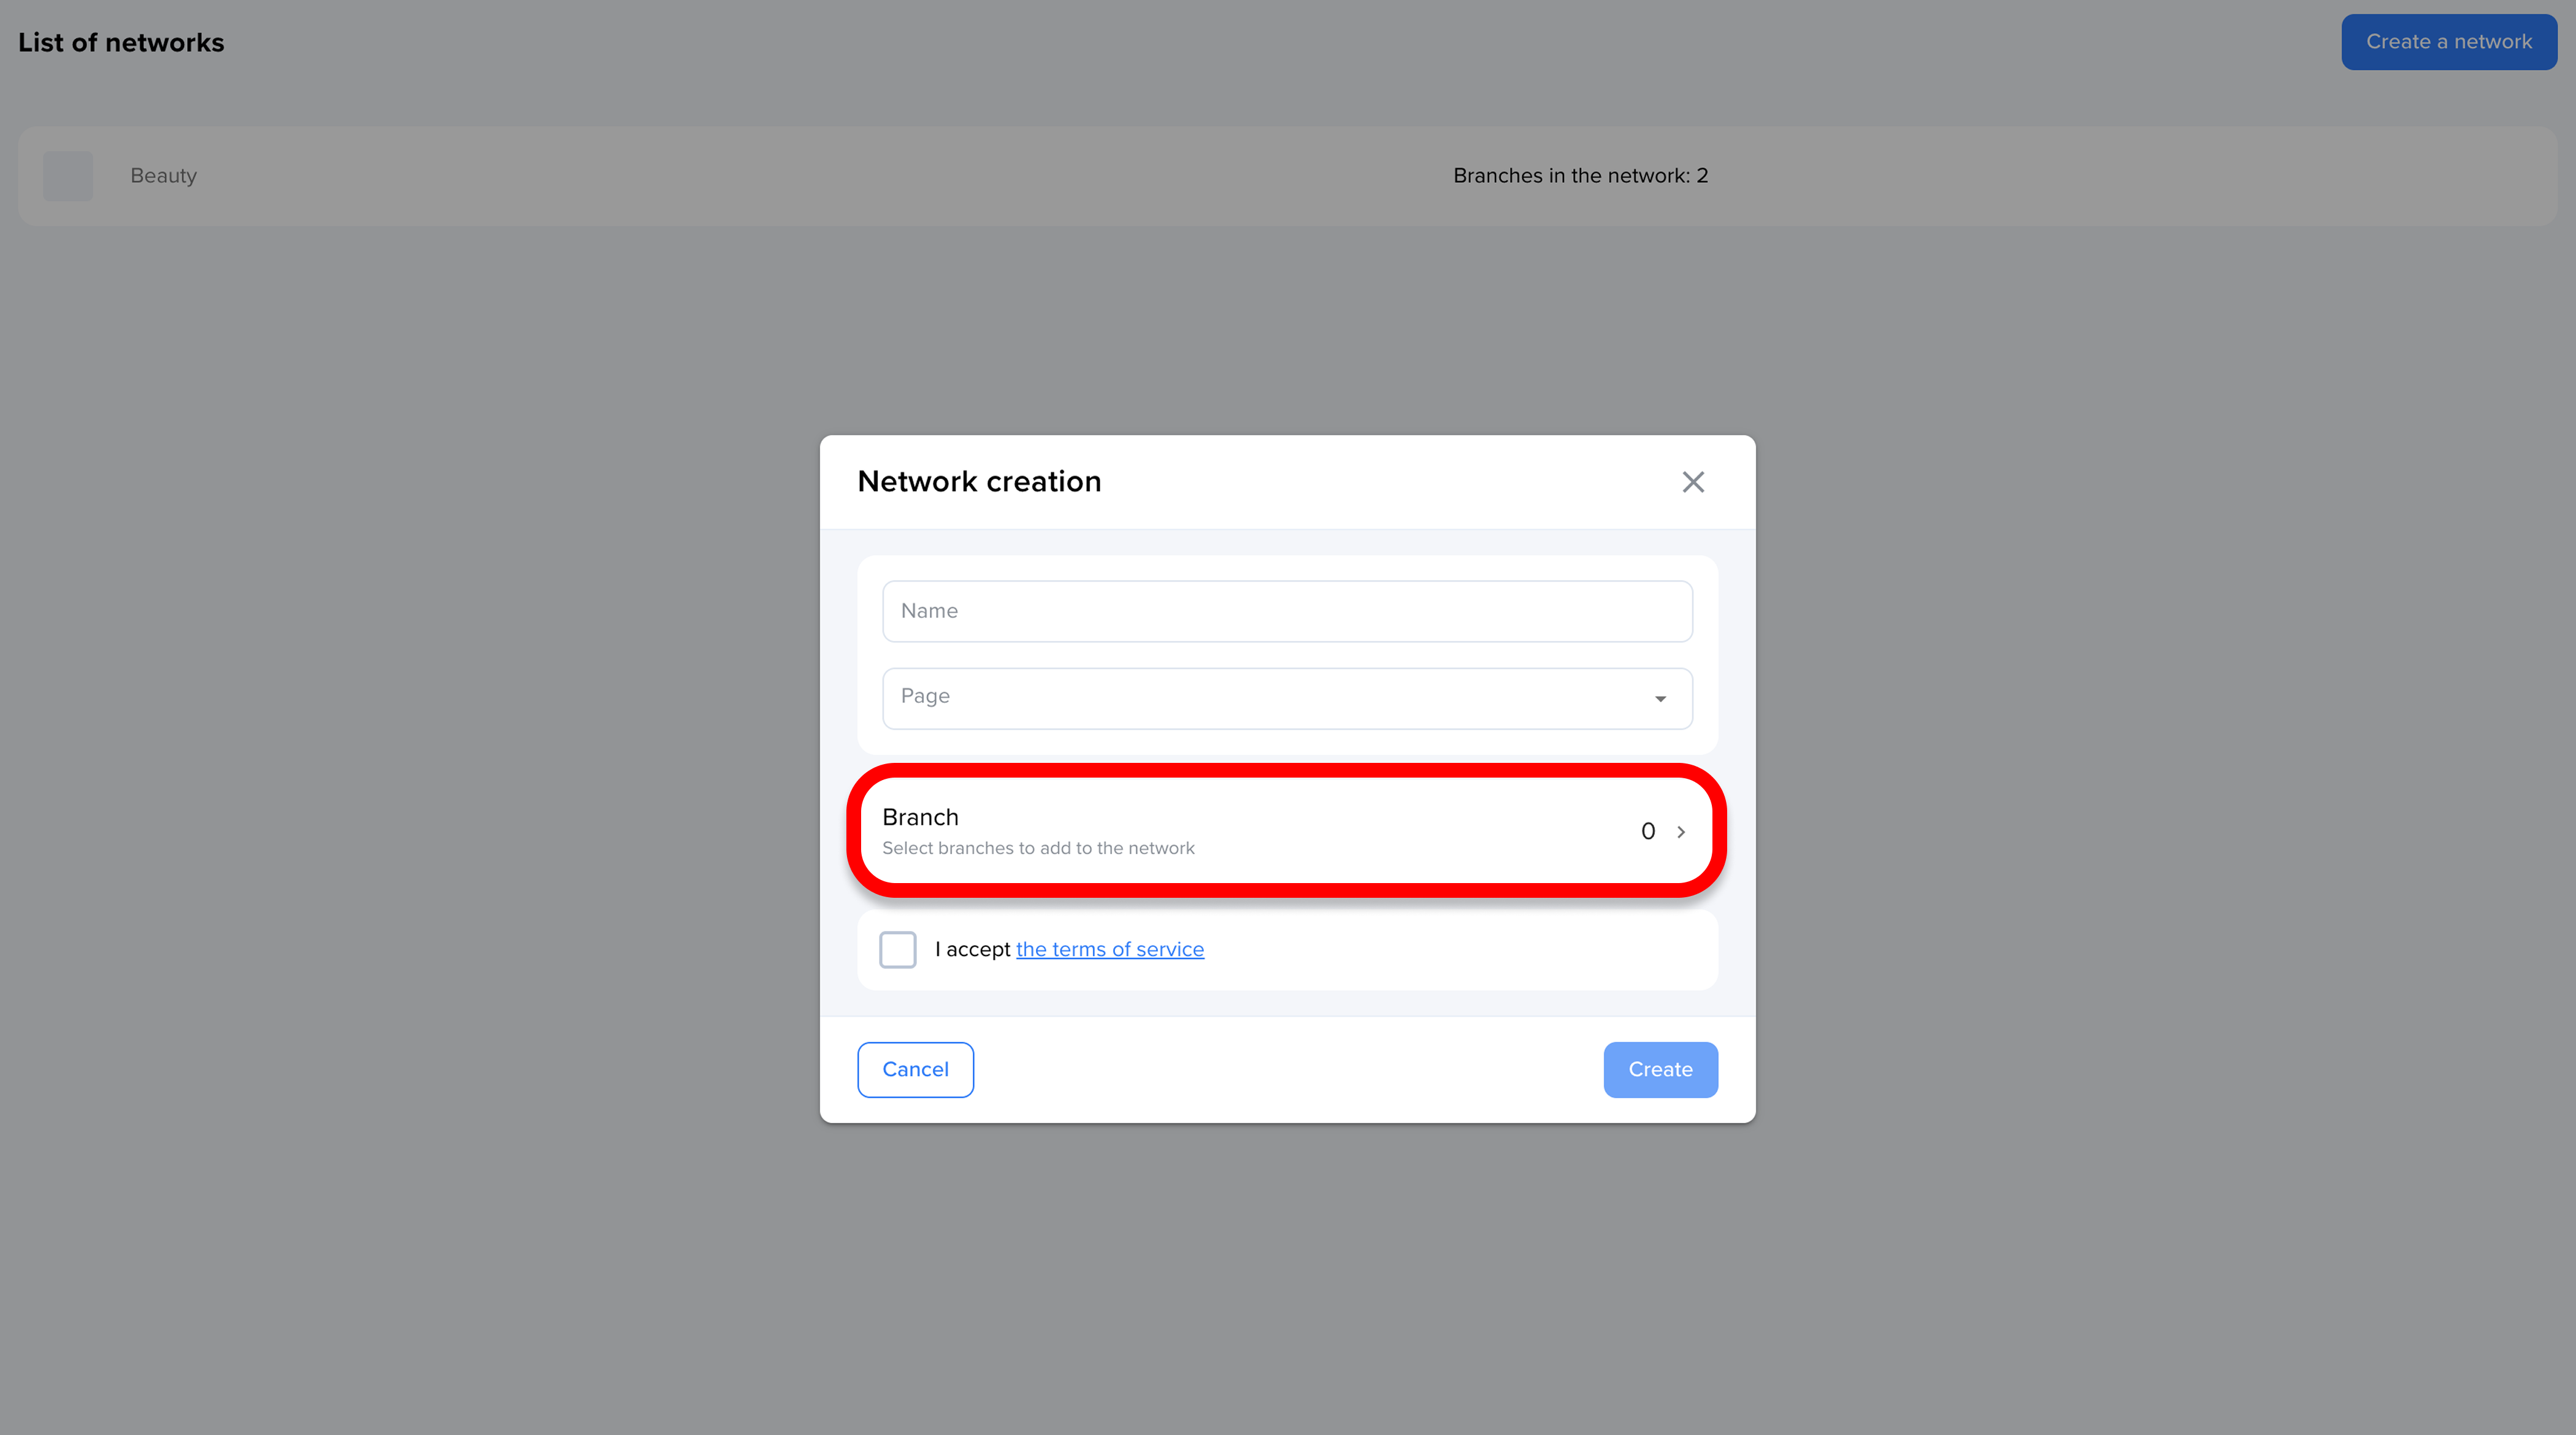
If you have a lot of projects, use the search function by name or project type. Once you've made your selections, click "Done"
5️⃣ Finalize Creation
Review the service's terms of use and agree to them. Click "Create"
✅ Done! Your network of branches is now created, and you can start working with it.