Adding and Removing a Branch in the Network in DIKIDI
Last modified:
Adding a Branch to the Network
To add a branch to an existing network, follow these steps:
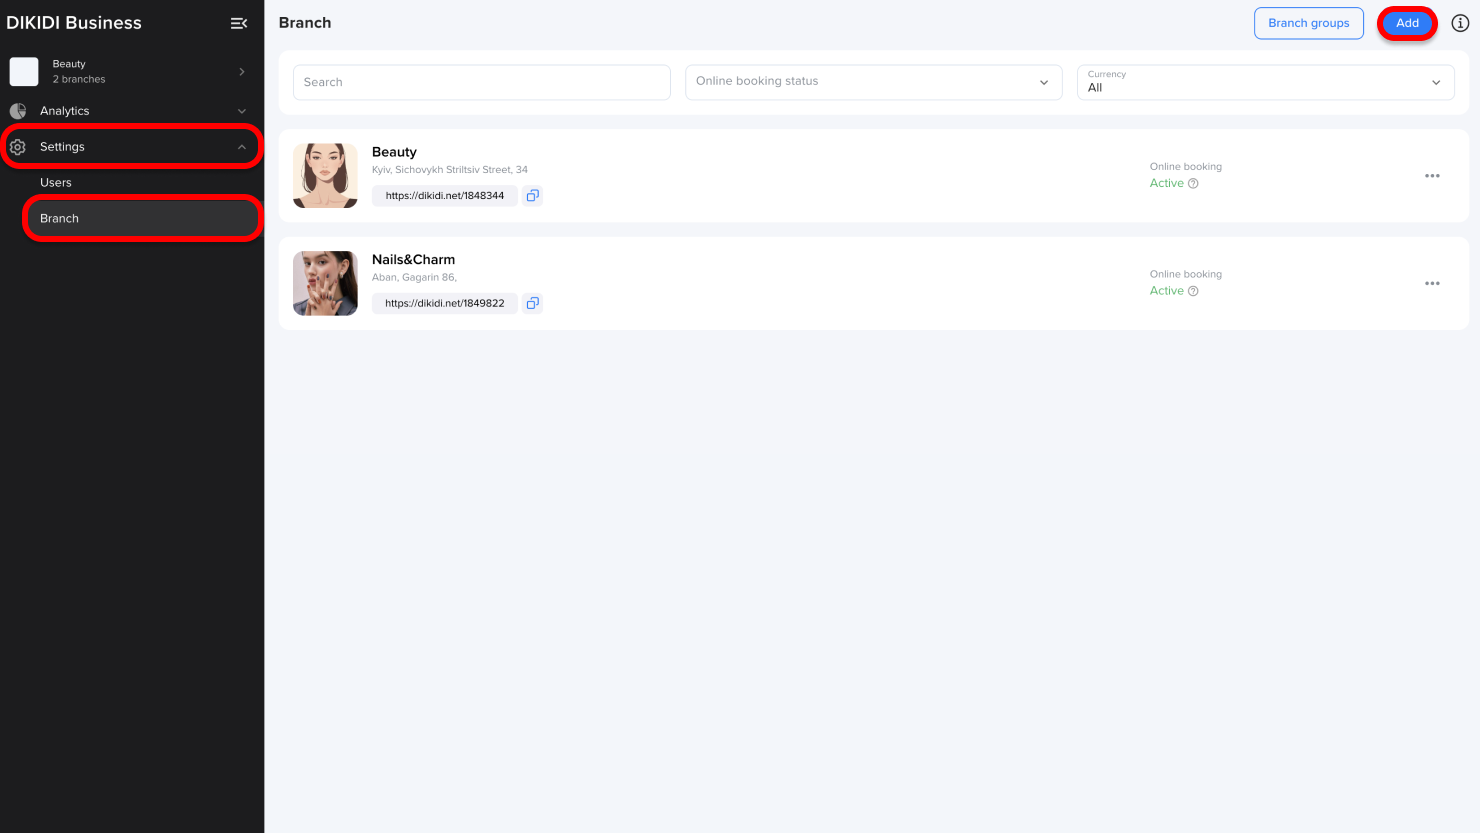
1️⃣ Navigate to the "Branch" section
Open your network and go to “Settings” → “Branch”. Click “Add” in the top right corner.
2️⃣ Select Projects
In the pop-up window, select one or more projects you wish to add to the network. Remember, you can only add projects where you have “Creator” access.
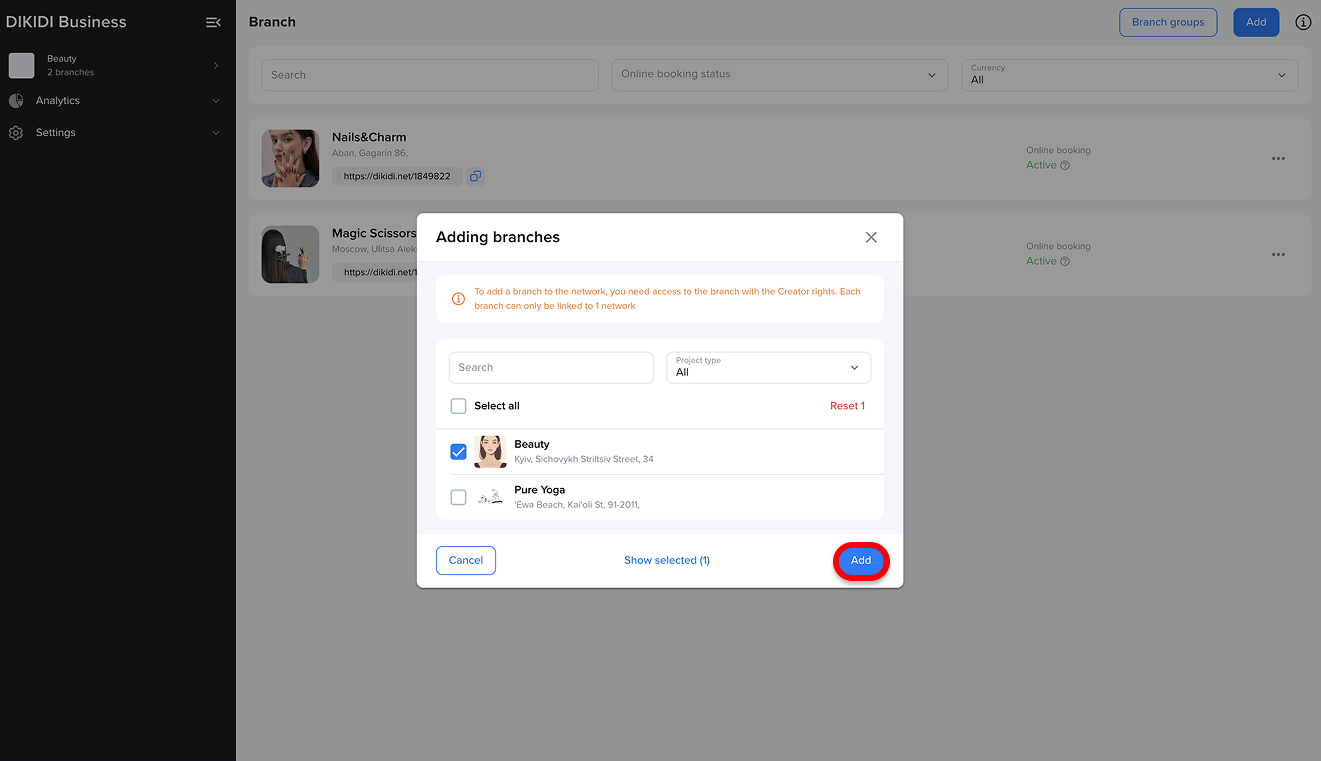
3️⃣ Confirm Addition
Click “Add”.
✅ Done! The project has become a branch of your network.
Removing a Branch from the Network
To remove a branch from the network, follow these steps:
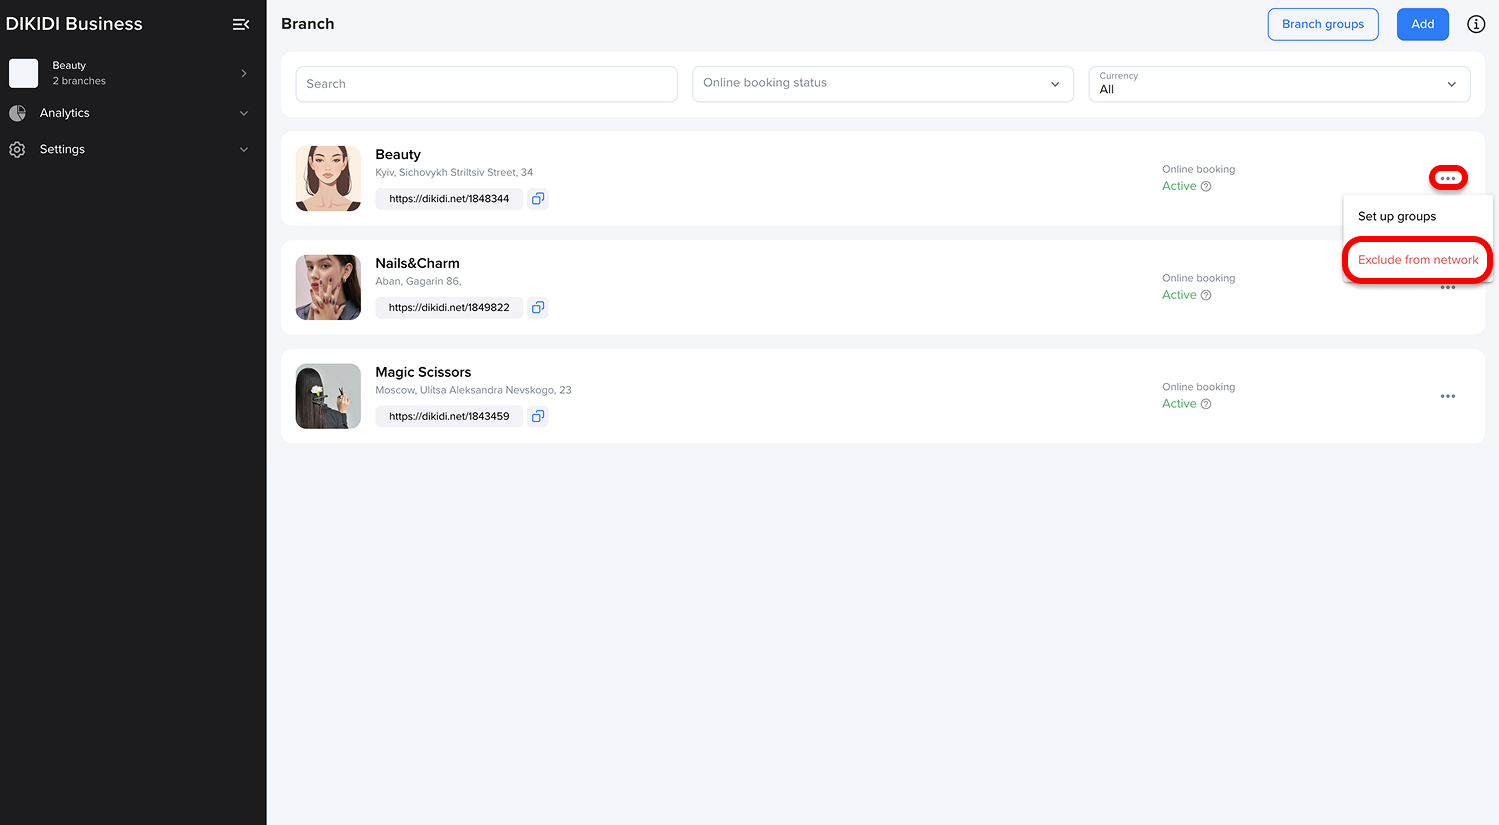
1️⃣ Navigate to the "Branch" section
Open your network and go to “Settings” → “Branch”. Find the desired branch, click on the three dots next to it, and select “Exclude from Network”.
2️⃣ Confirm Removal
In the pop-up window, enter the name of the branch to confirm its removal. Click “Exclude”.
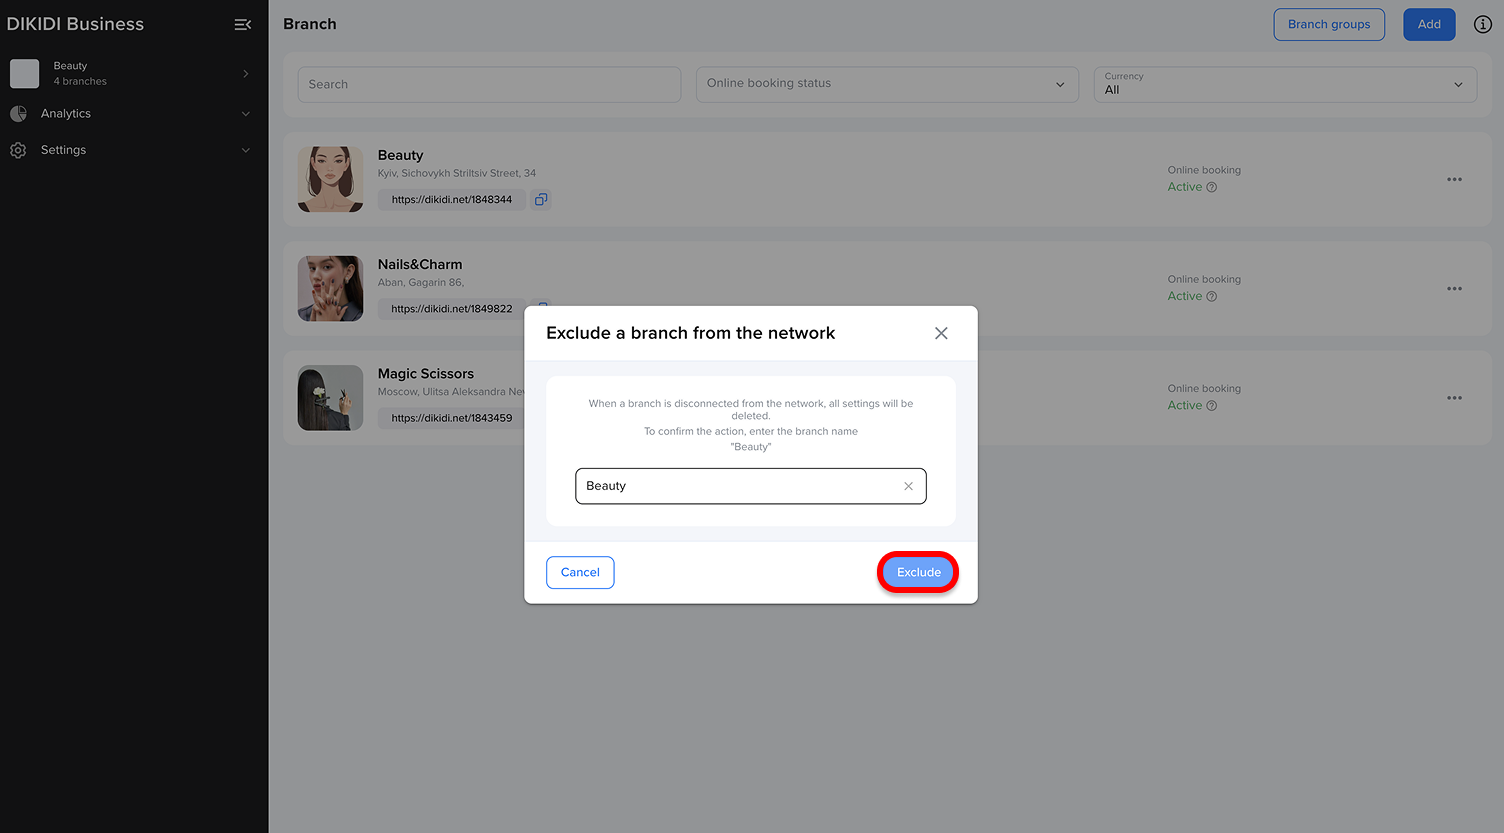
✅ Done! The branch has been removed from the network.