Branch Groups in the Network in DIKIDI
Last modified:
Creating a Branch Group
If your network includes branches you'd like to group based on certain criteria (e.g., city, country), follow these steps:
1️⃣ Navigate to the "Branches" section
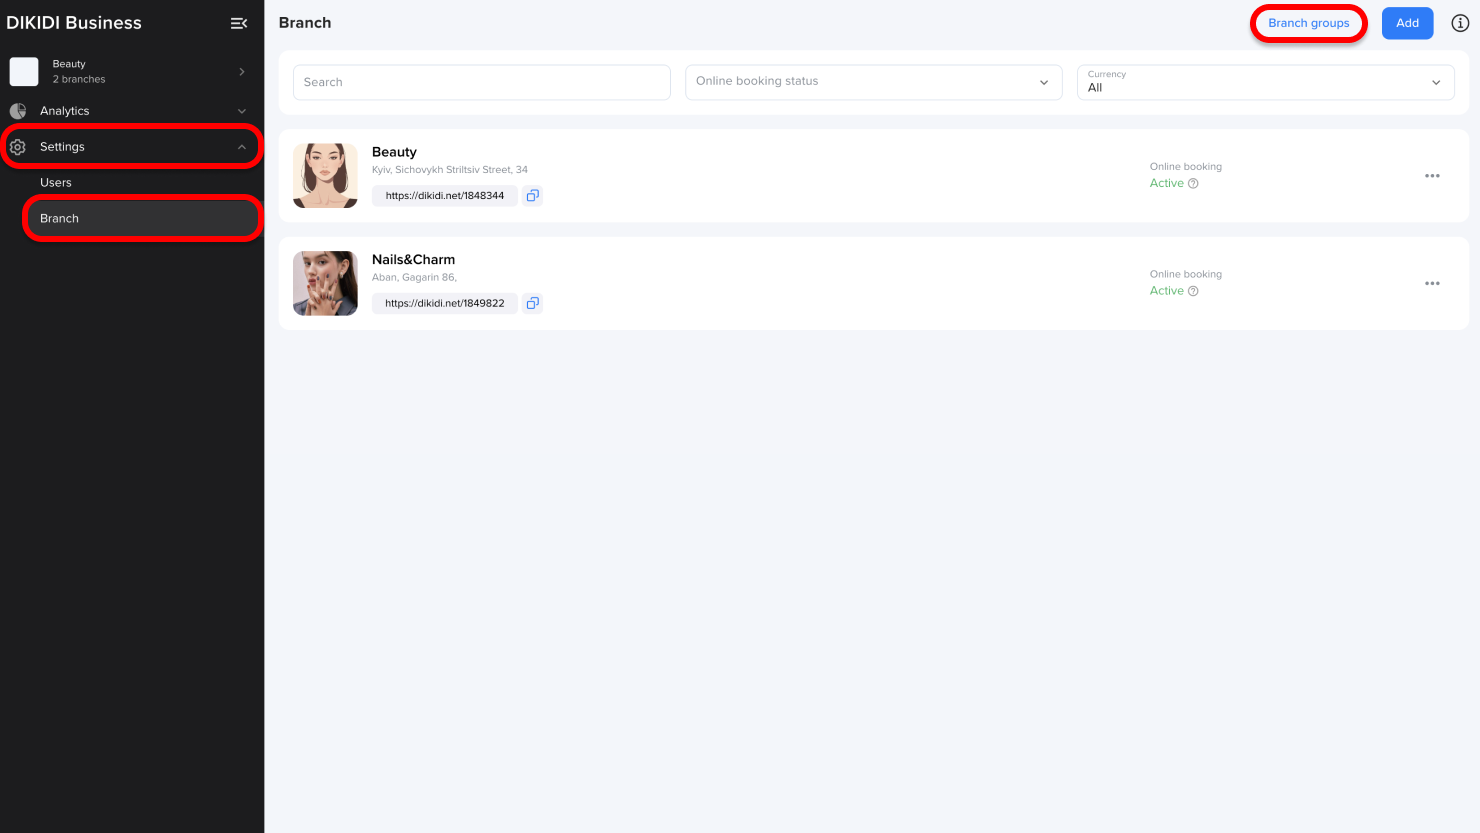
Open your network and go to “Settings” → “Branches”. Click “Branch Groups” in the top right corner.
2️⃣ Add a Branch Group
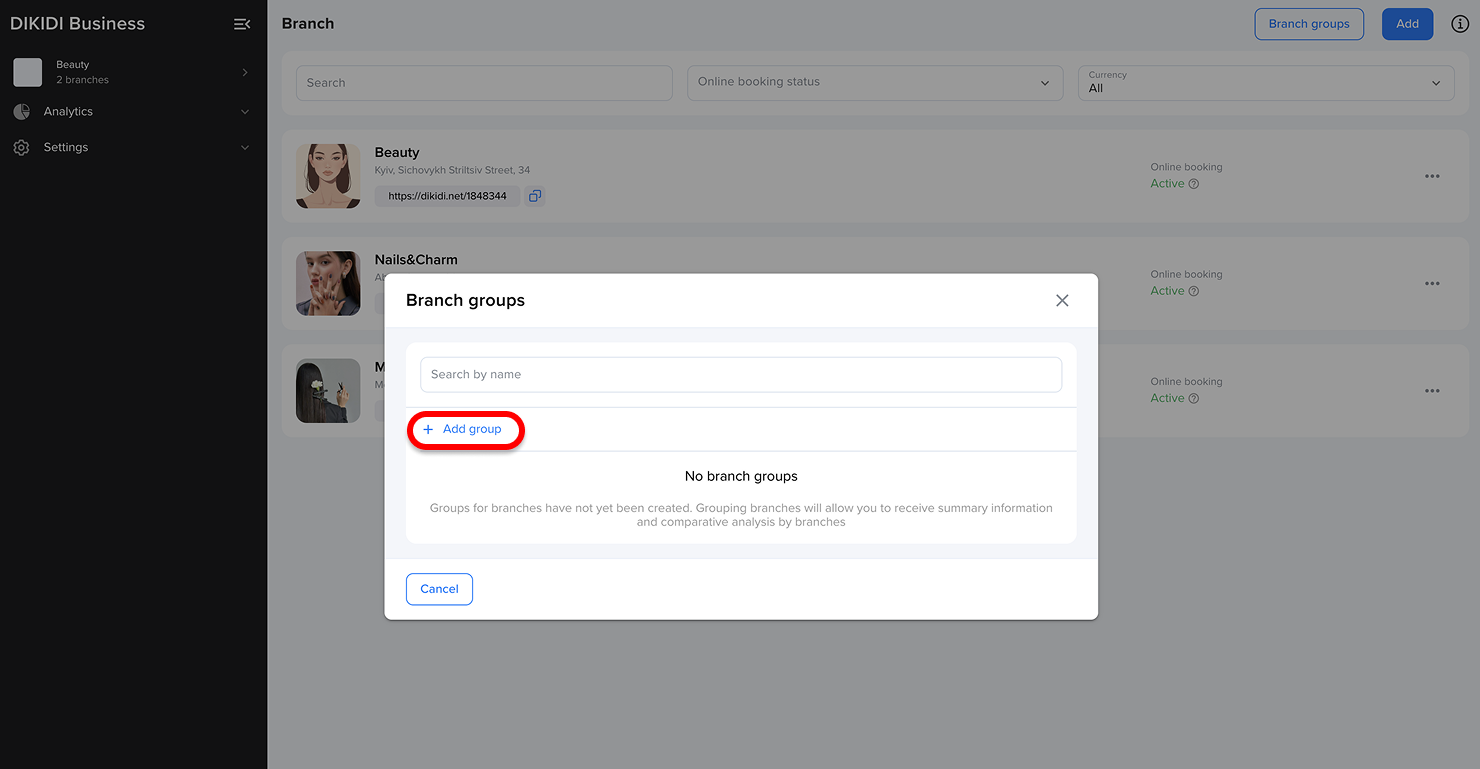
In the pop-up window, select “Add Group”. Enter the group name, choose a color, and add branches to this group. Click “Save” to confirm.
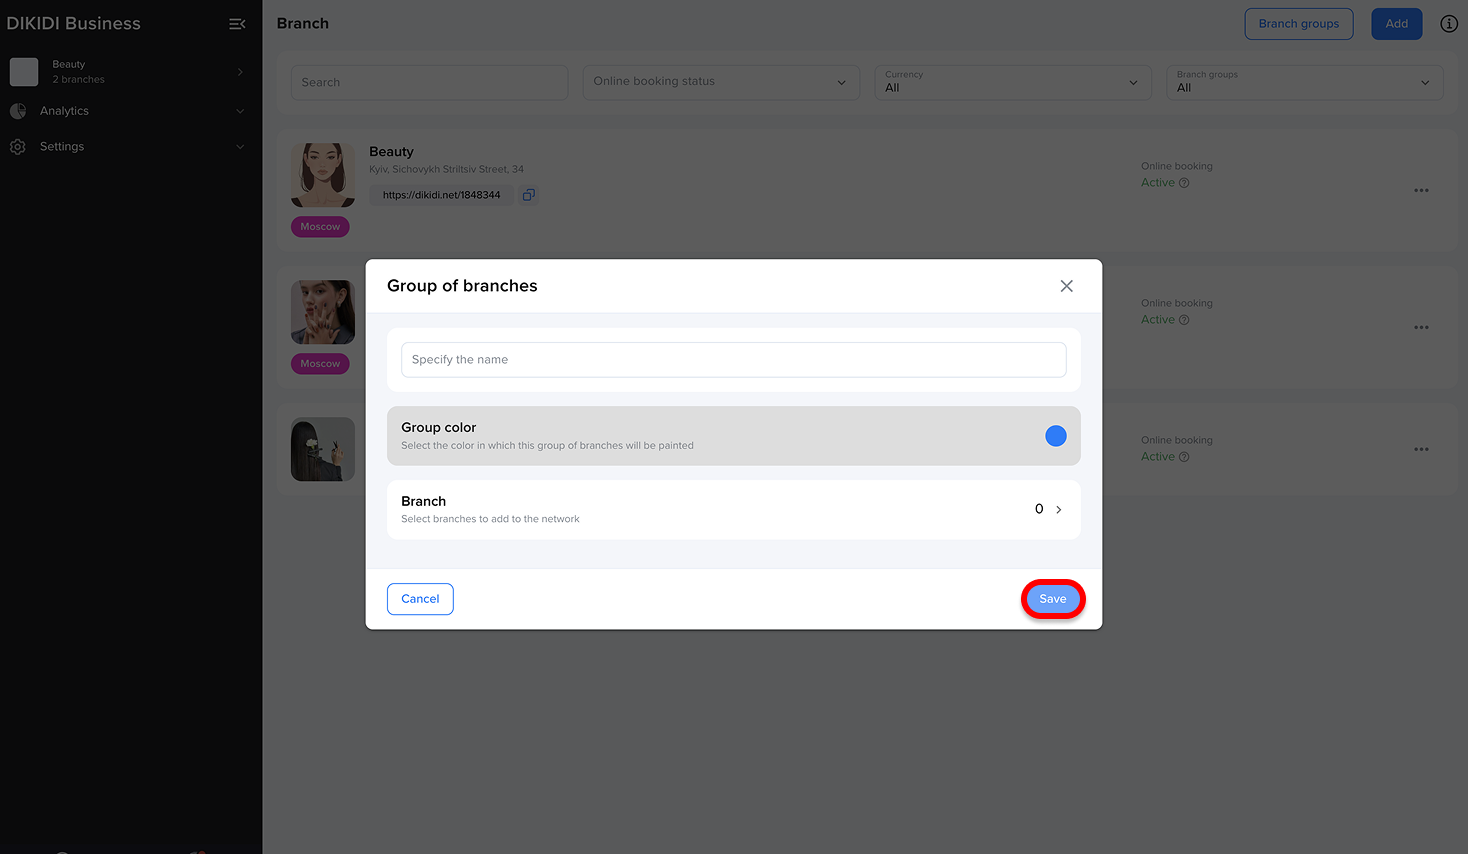
✅ Done! The branches are now grouped, and a colored label with the group name will appear next to their names.
⚠️NB! A branch can belong to multiple groups. There is no limit to the number of groups.
Editing a Branch Group
To modify a group's settings, follow these steps:
1️⃣ Navigate to the "Branches" section
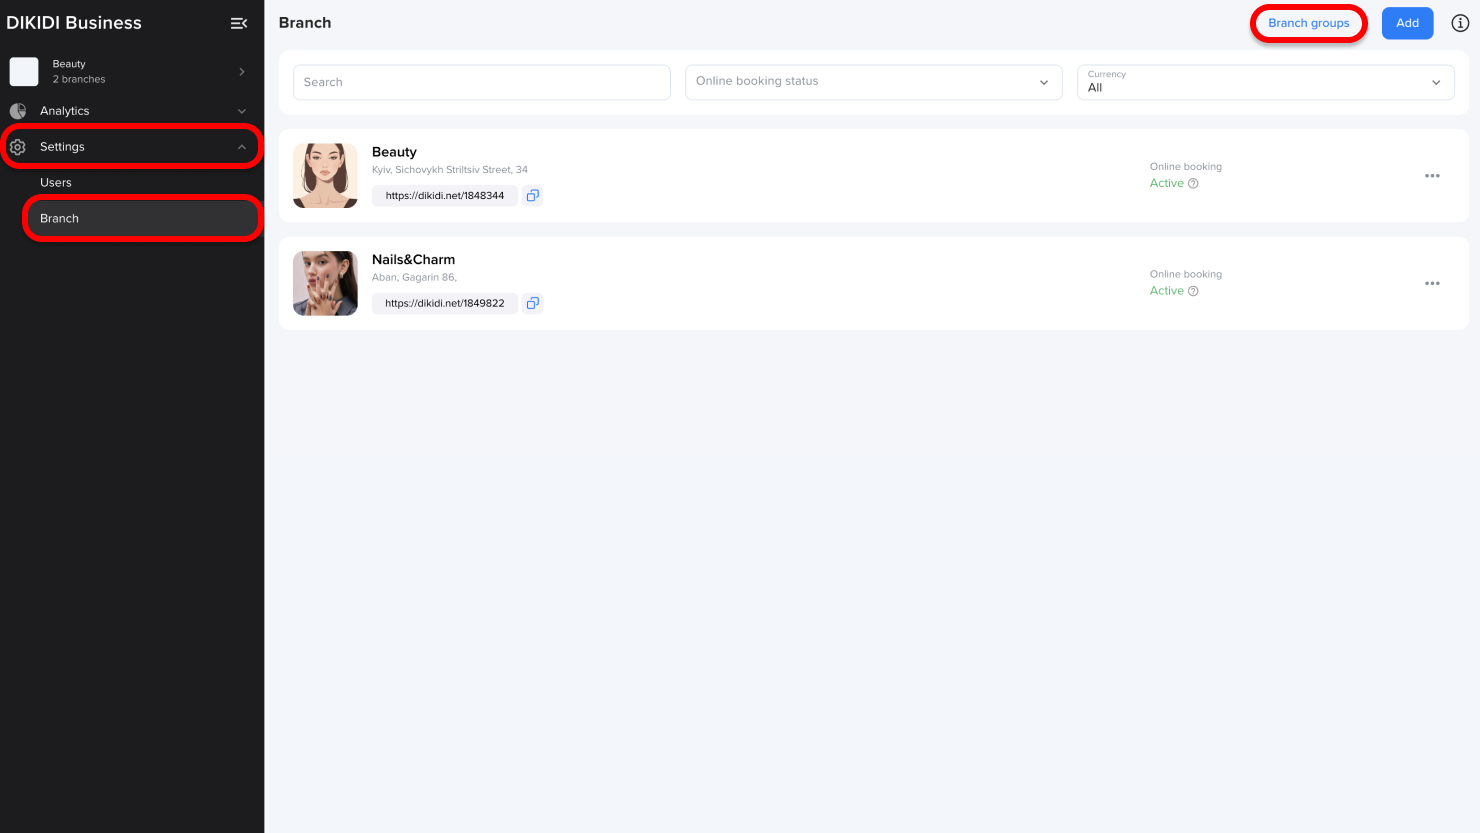
Open your network and go to “Settings” → “Branches”. Click “Branch Groups” in the top right corner.
2️⃣ Edit the Group
Select the branch group you wish to edit. Make changes to the name, color, or branch composition. Click “Save” to confirm.
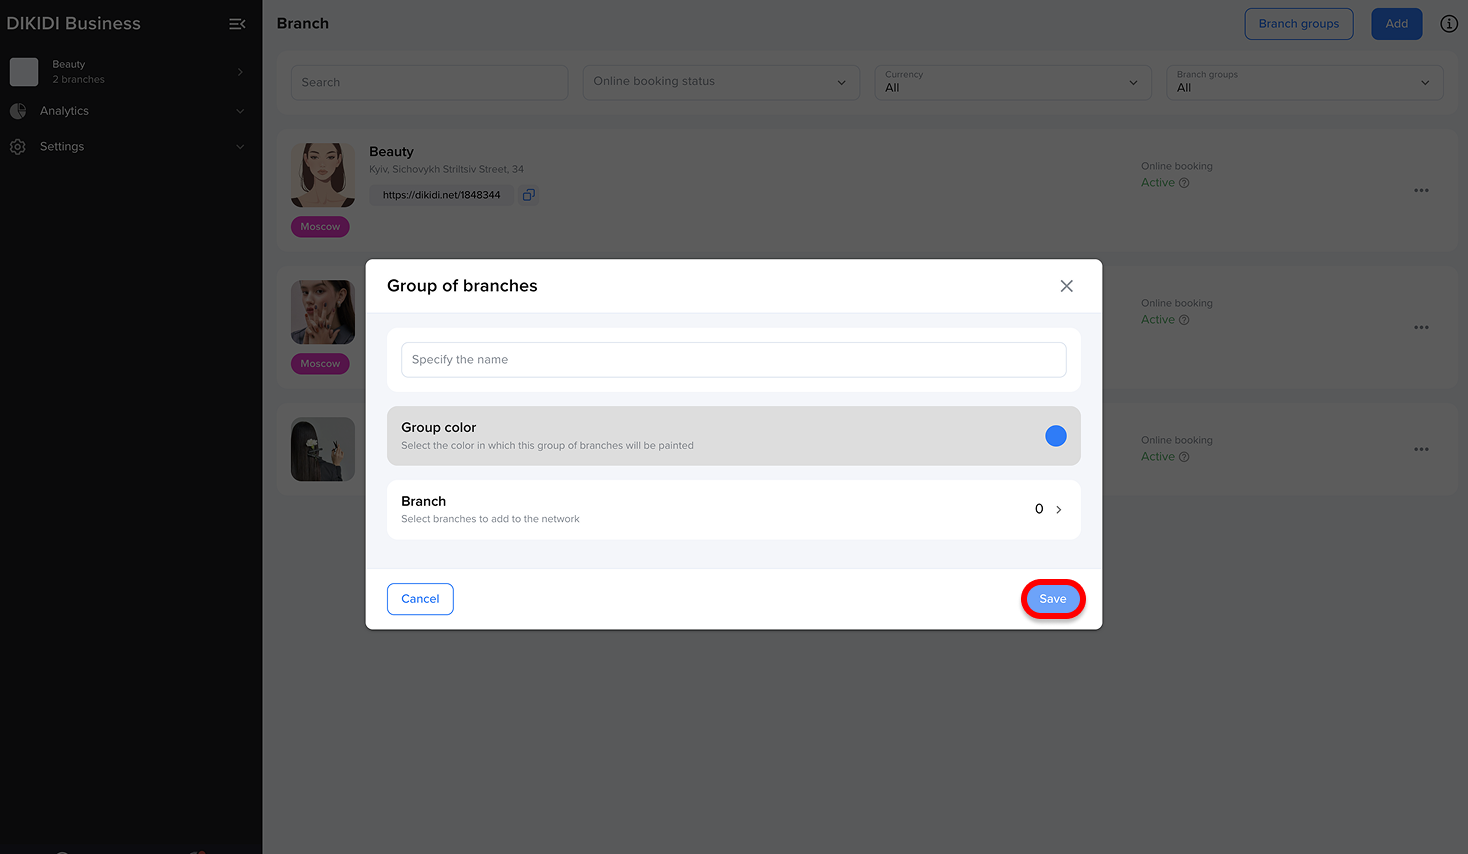
✅ Done! The branch group has been updated.
Deleting a Branch Group
To remove a branch group, follow these steps:
1️⃣ Navigate to the "Branches" section
Open your network and go to “Settings” → “Branches”. Click “Branch Groups” in the top right corner.
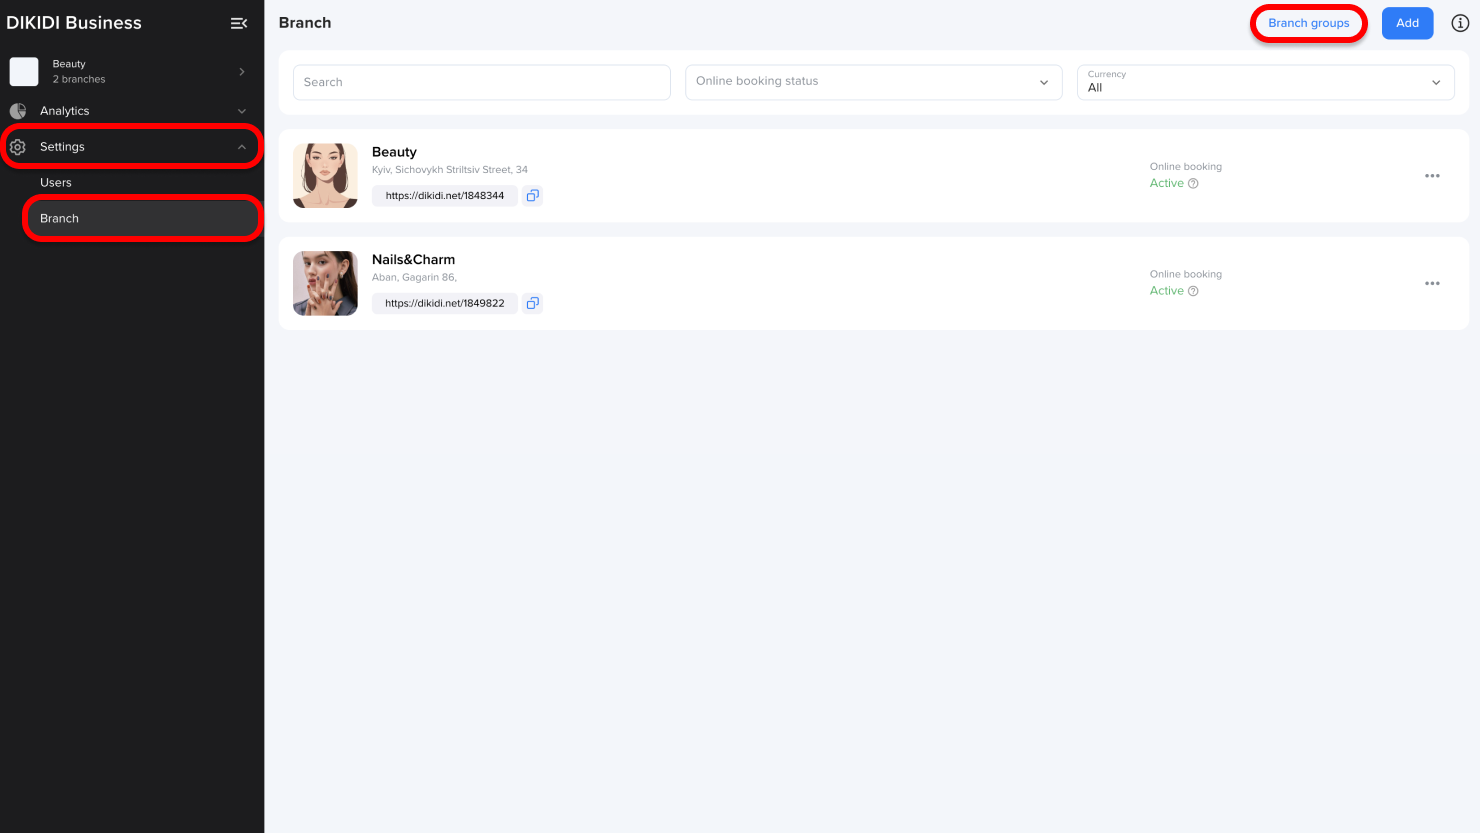
2️⃣ Delete the Group
Select the branch group you wish to remove. Click “Delete Group”. Confirm the action by clicking “Save”.
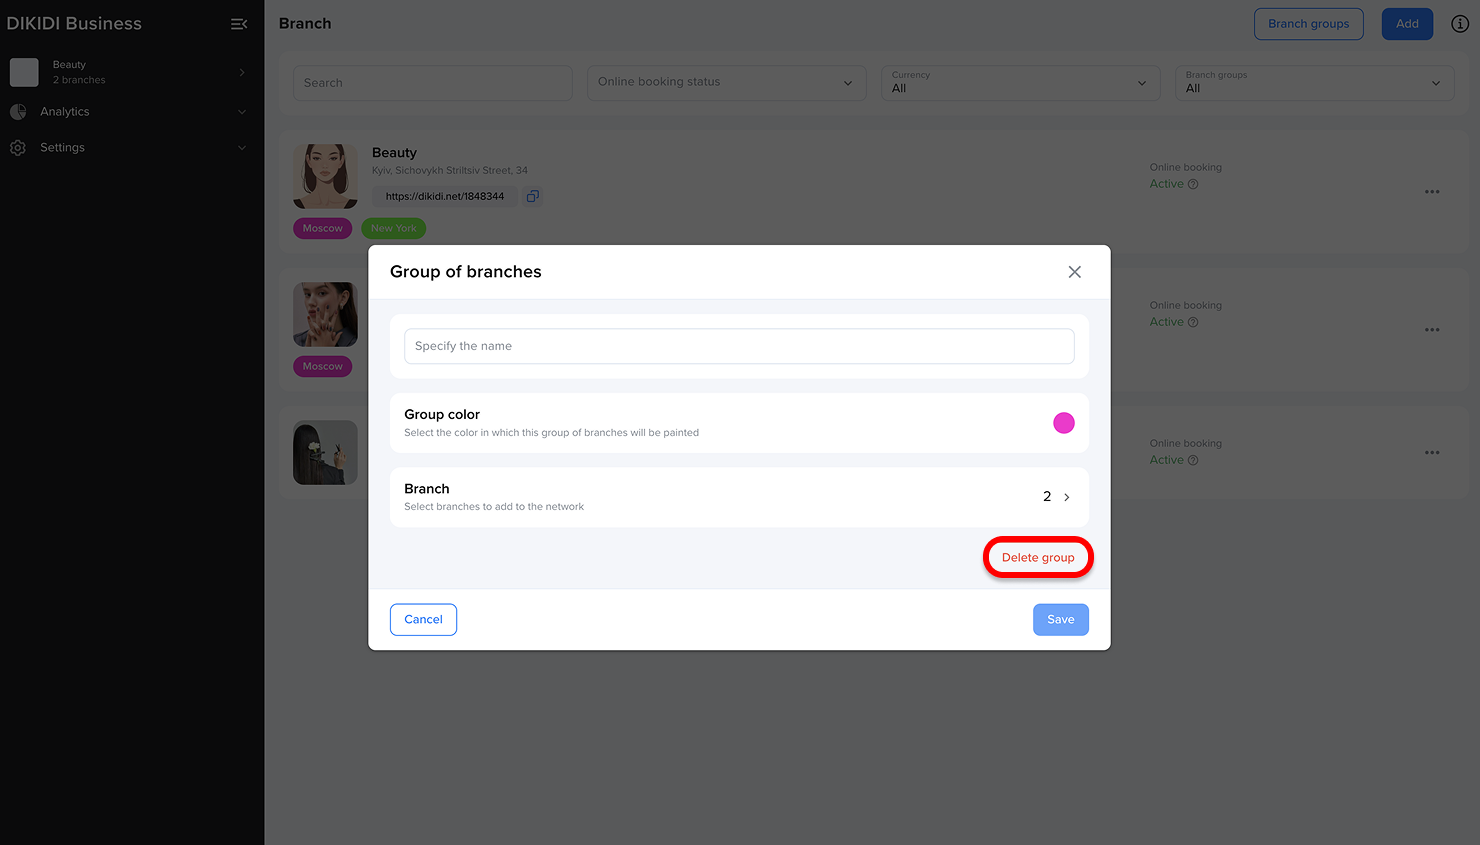
✅ Done! The branch group has been removed from the network.
Removing a Branch from a Group
To exclude a branch from a group, follow these steps:
1️⃣ Navigate to the "Branches" section
Open your network and go to “Settings” → “Branches”. Find the desired branch, click on the three dots next to it, and select “Set up Groups”.
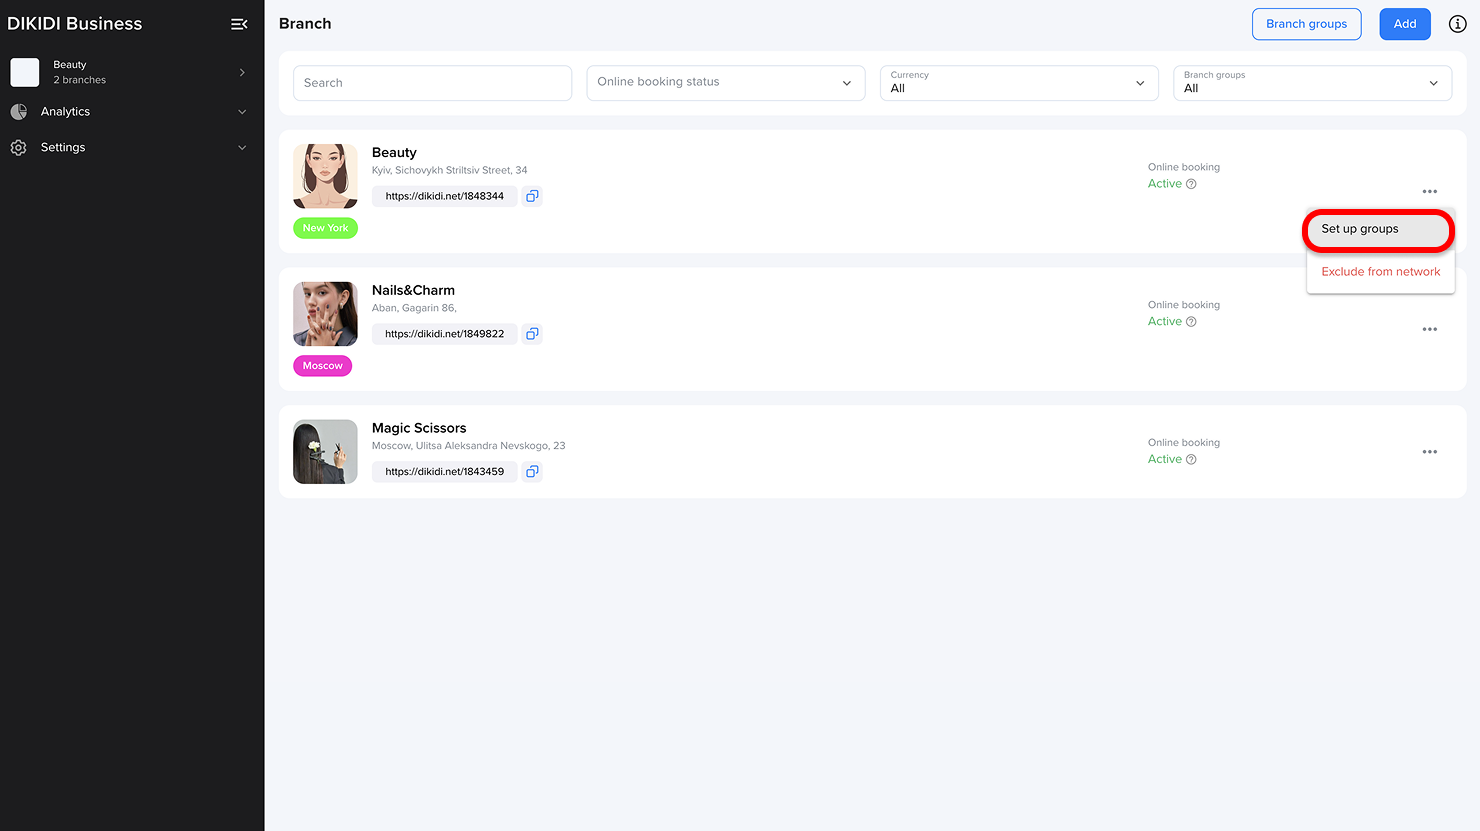
2️⃣ Remove the Branch
In the pop-up list, uncheck the box next to the group from which you want to remove the branch. Click “Save” to confirm.
✅ Done! The branch has been removed from the group, but the group will remain active even if it no longer contains any branches.